Start your business journey online
Appstwentyfourseventeen : How to Publish Your Android App on Google Play Store?
To upload an app on Google Play, follow these steps:
Step 1: Go to Google Play Console
Step 2: If you have a Google Developer account, login, else Signup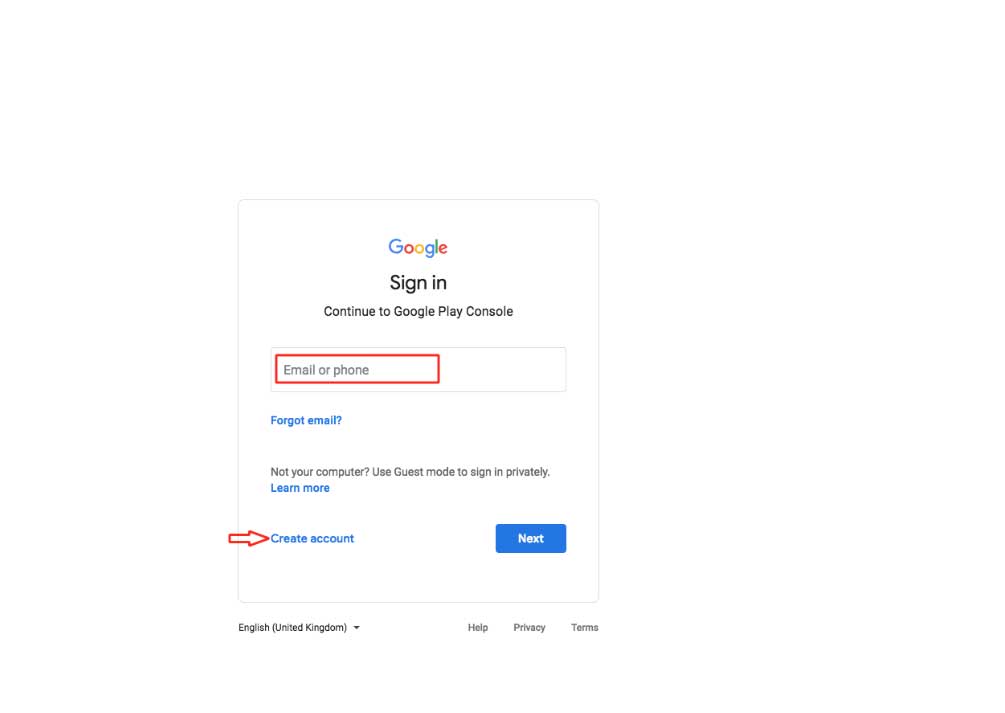
Step 3: Click on the create App button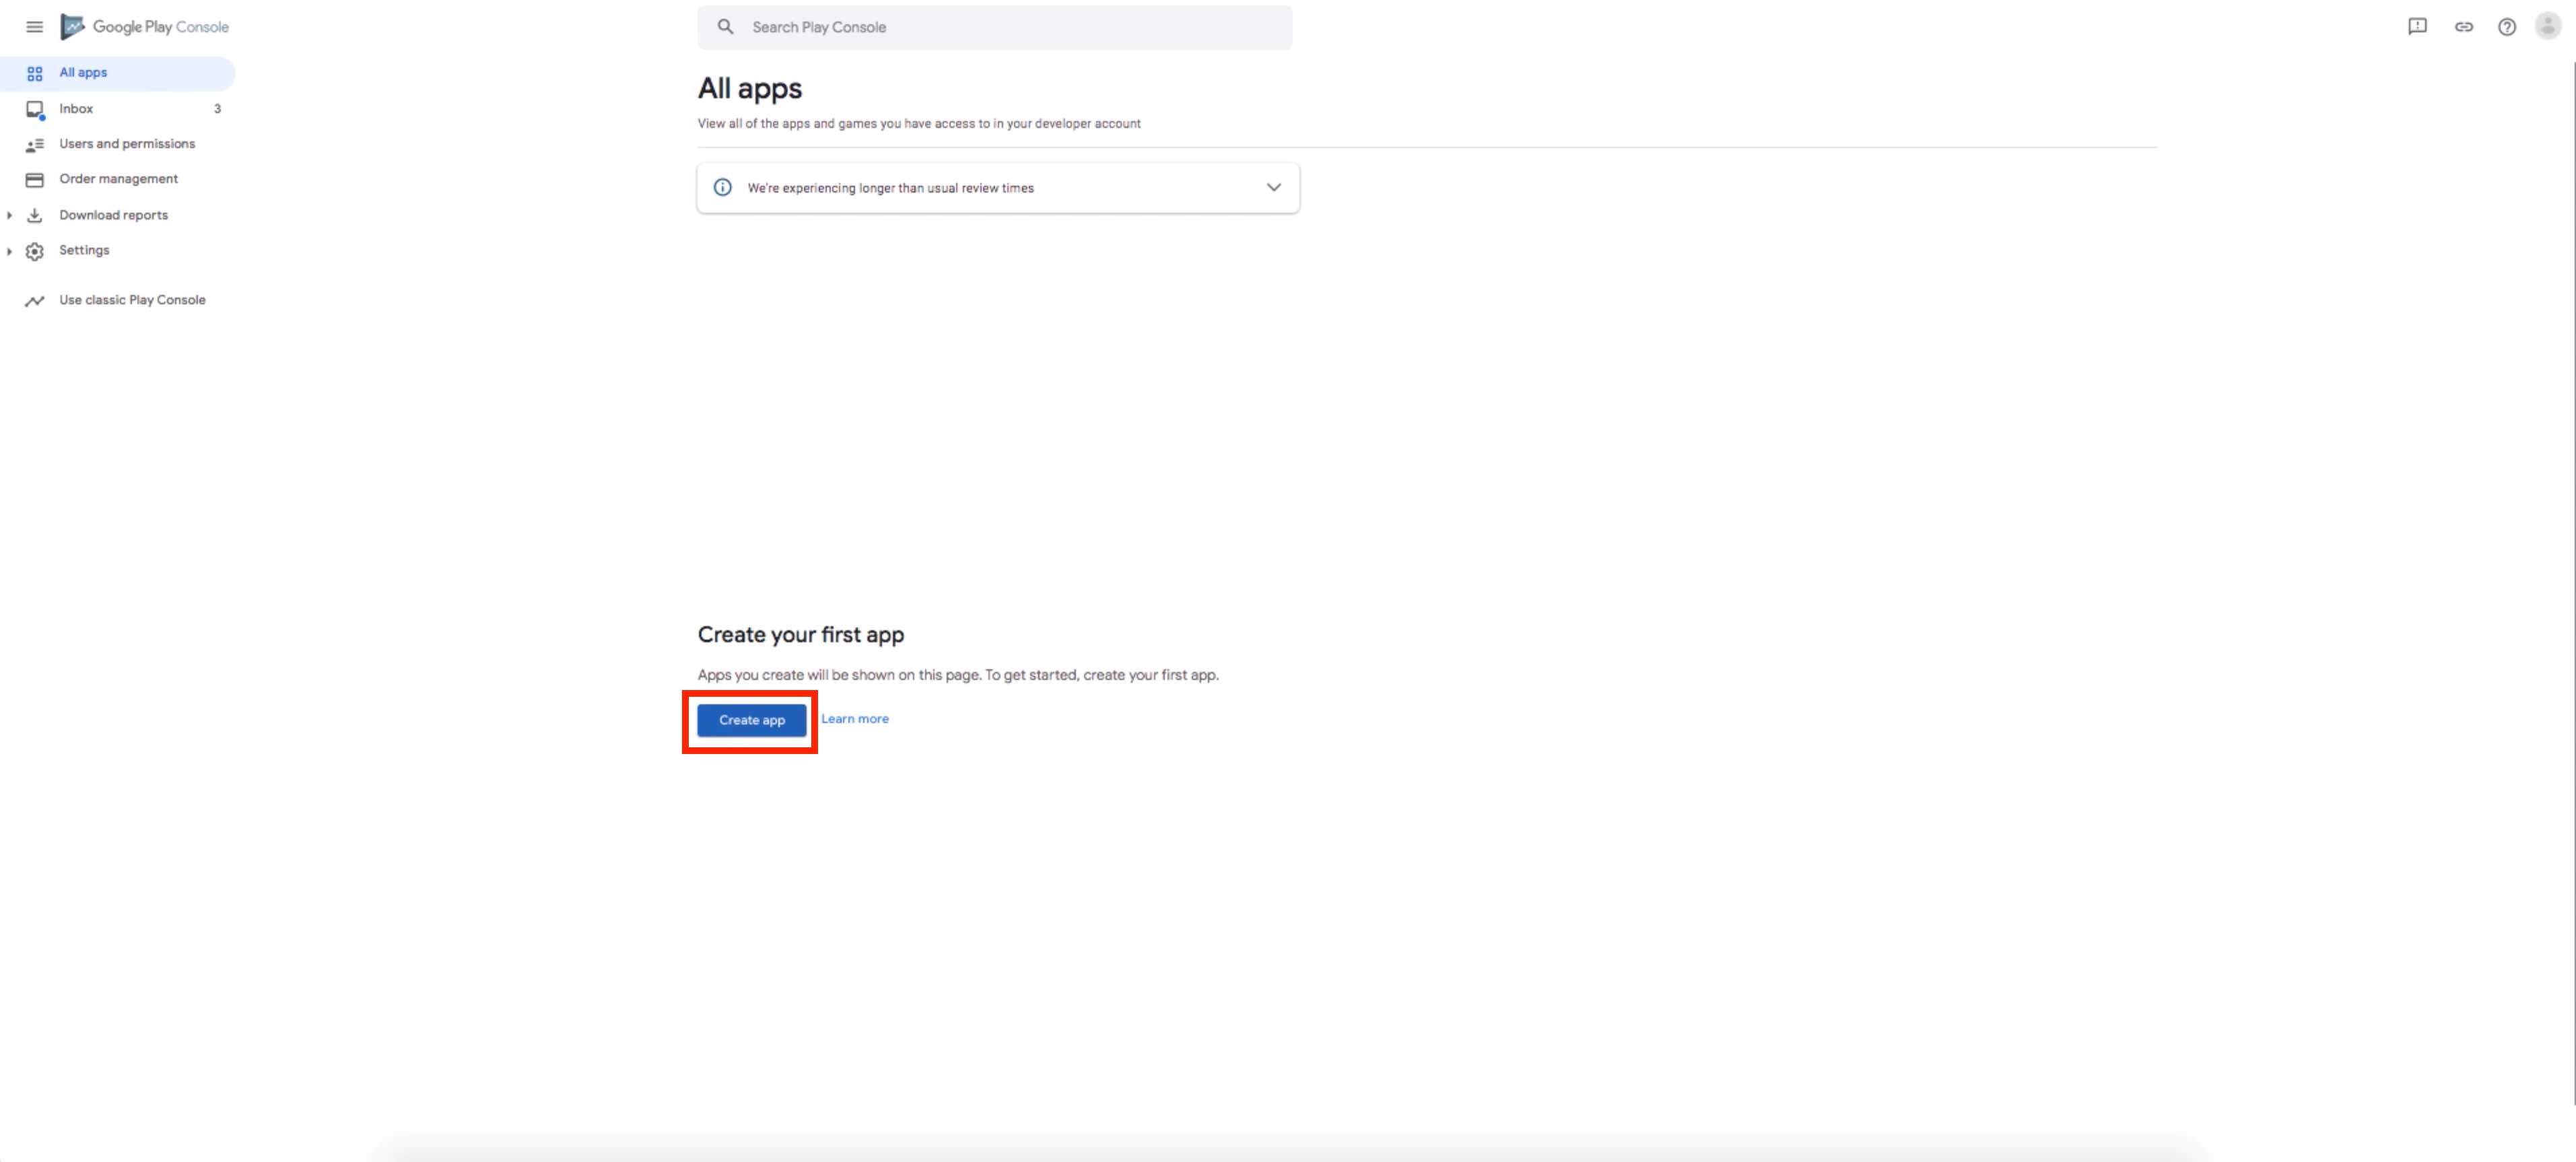
Step 4: Enter the app name and select the Default Language from the dropdown menu , Select the application type (Game or App) and then select the Paid or Free option to list your app as Paid or Free on Google Play , and Tick mark the Developer Program Policies and US Export Laws checkboxes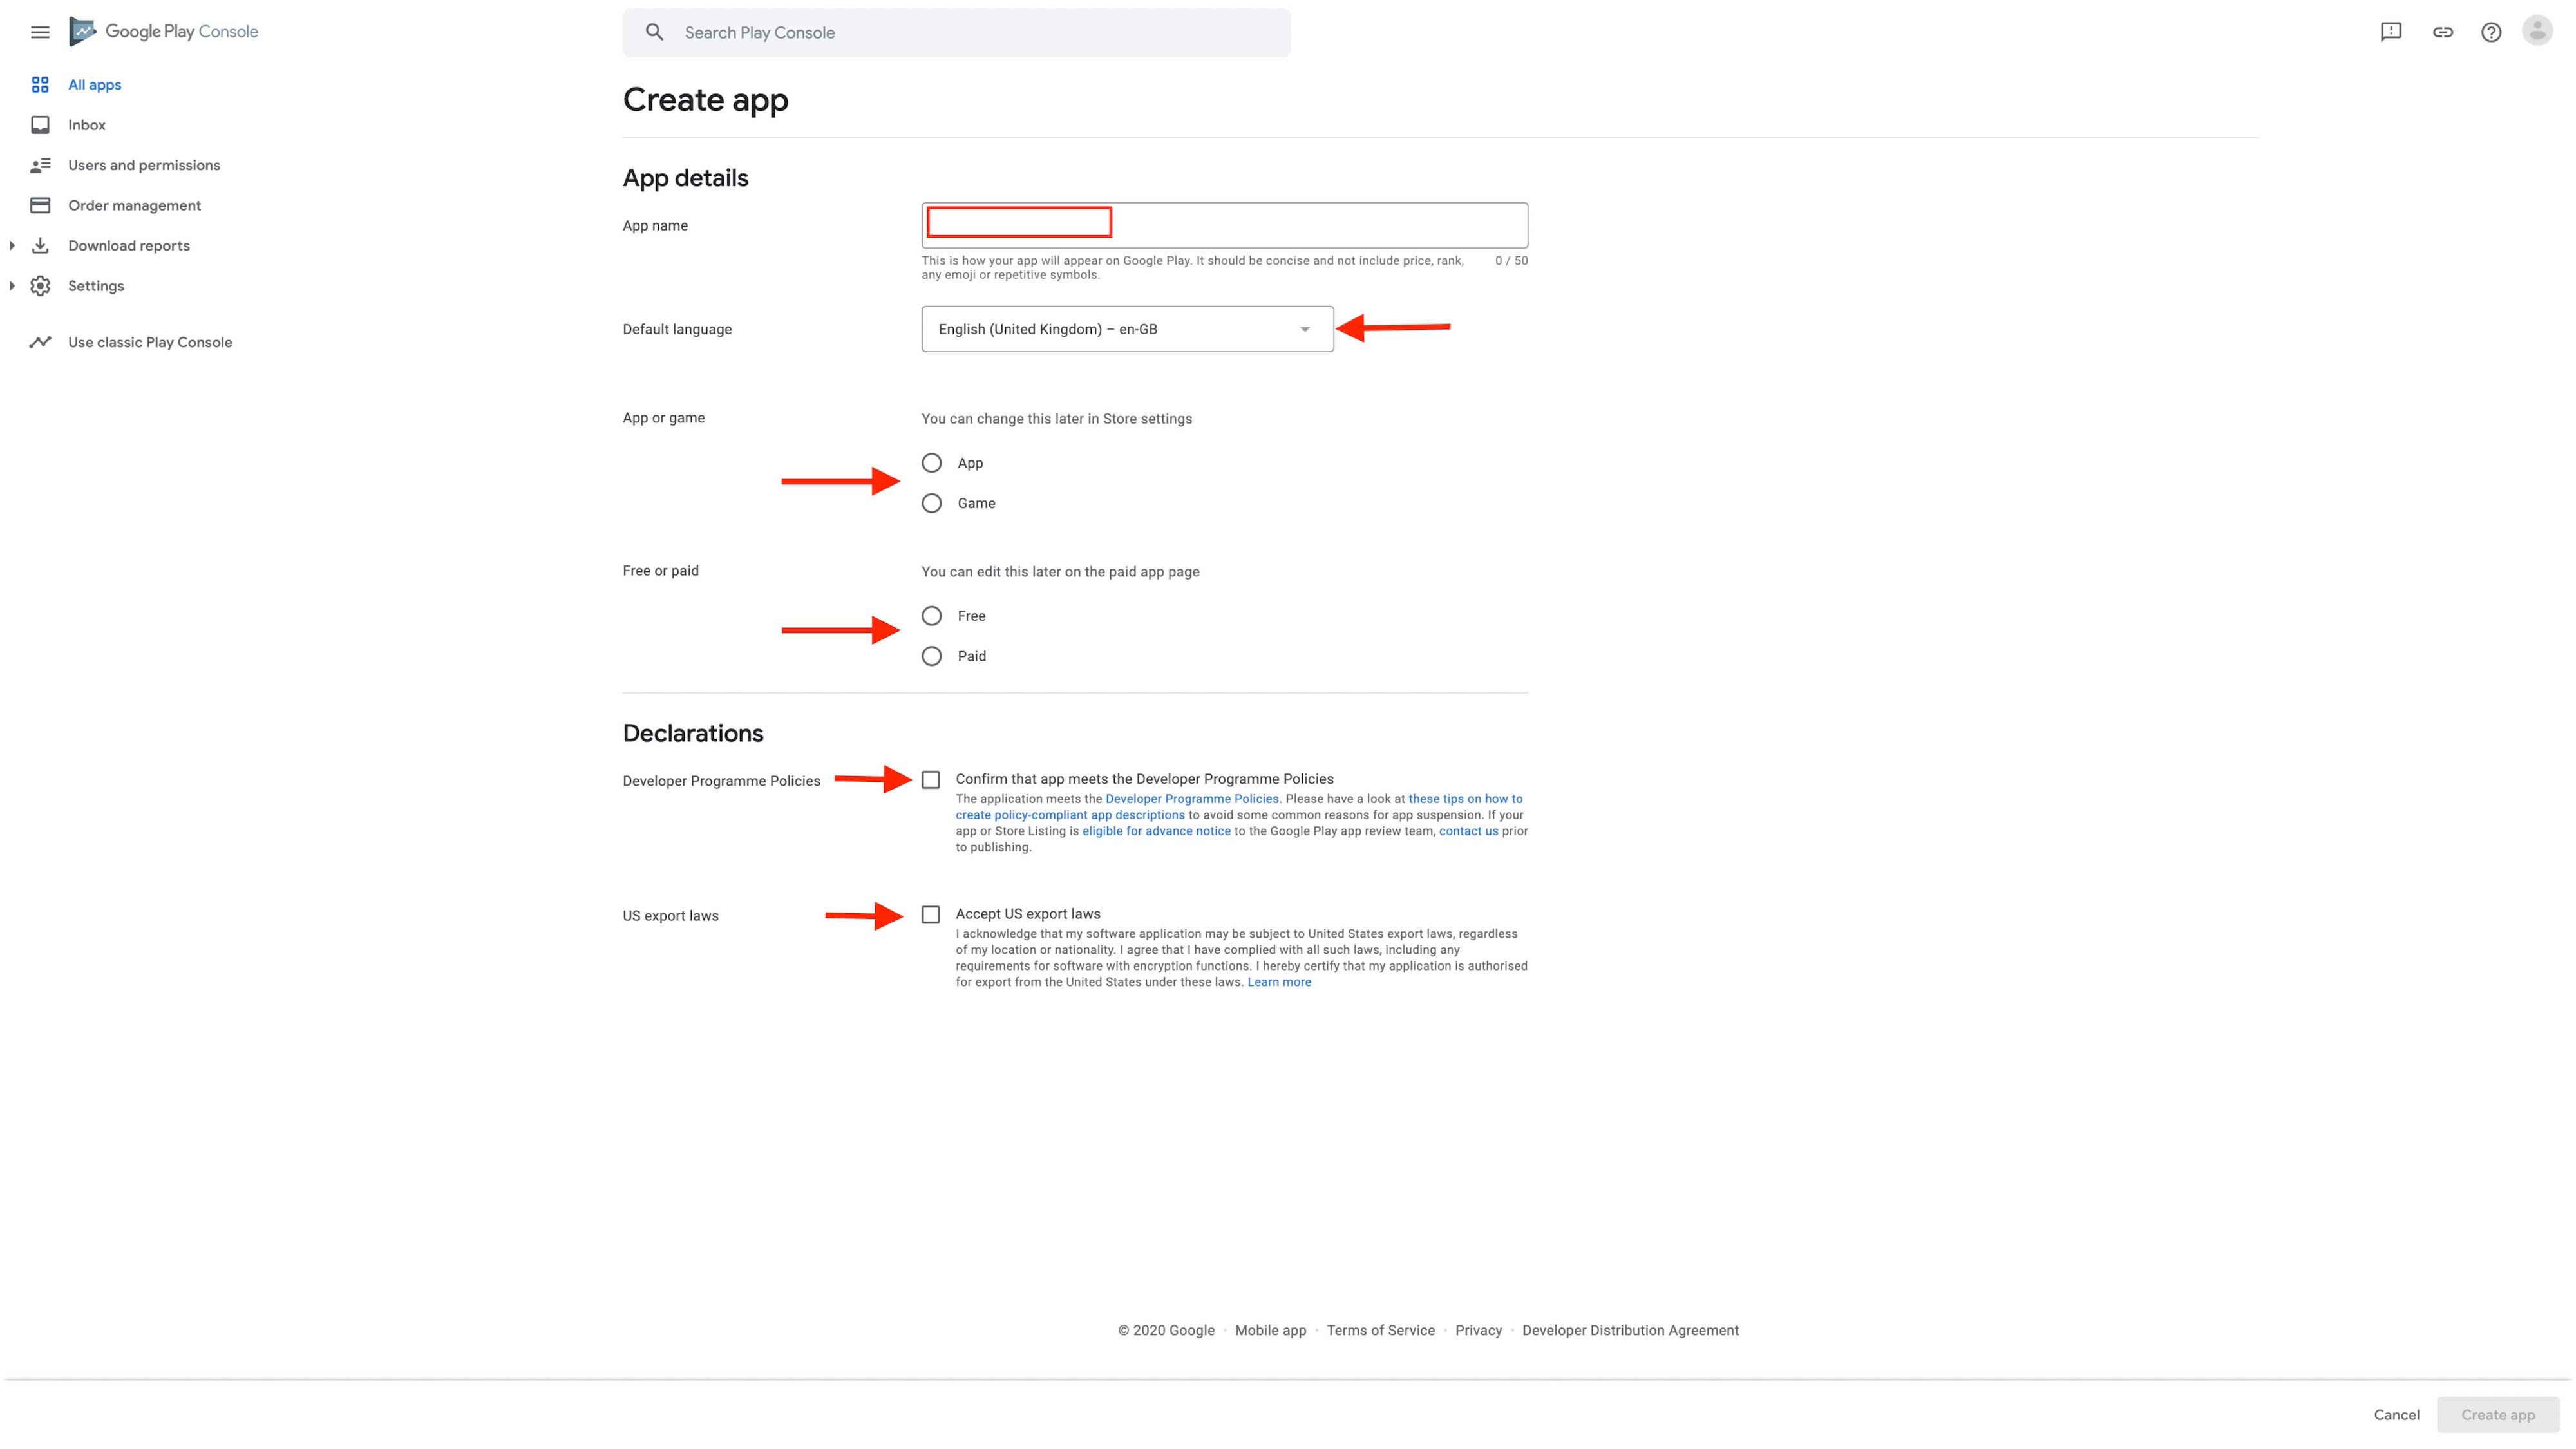
Step 5: Click on Create App
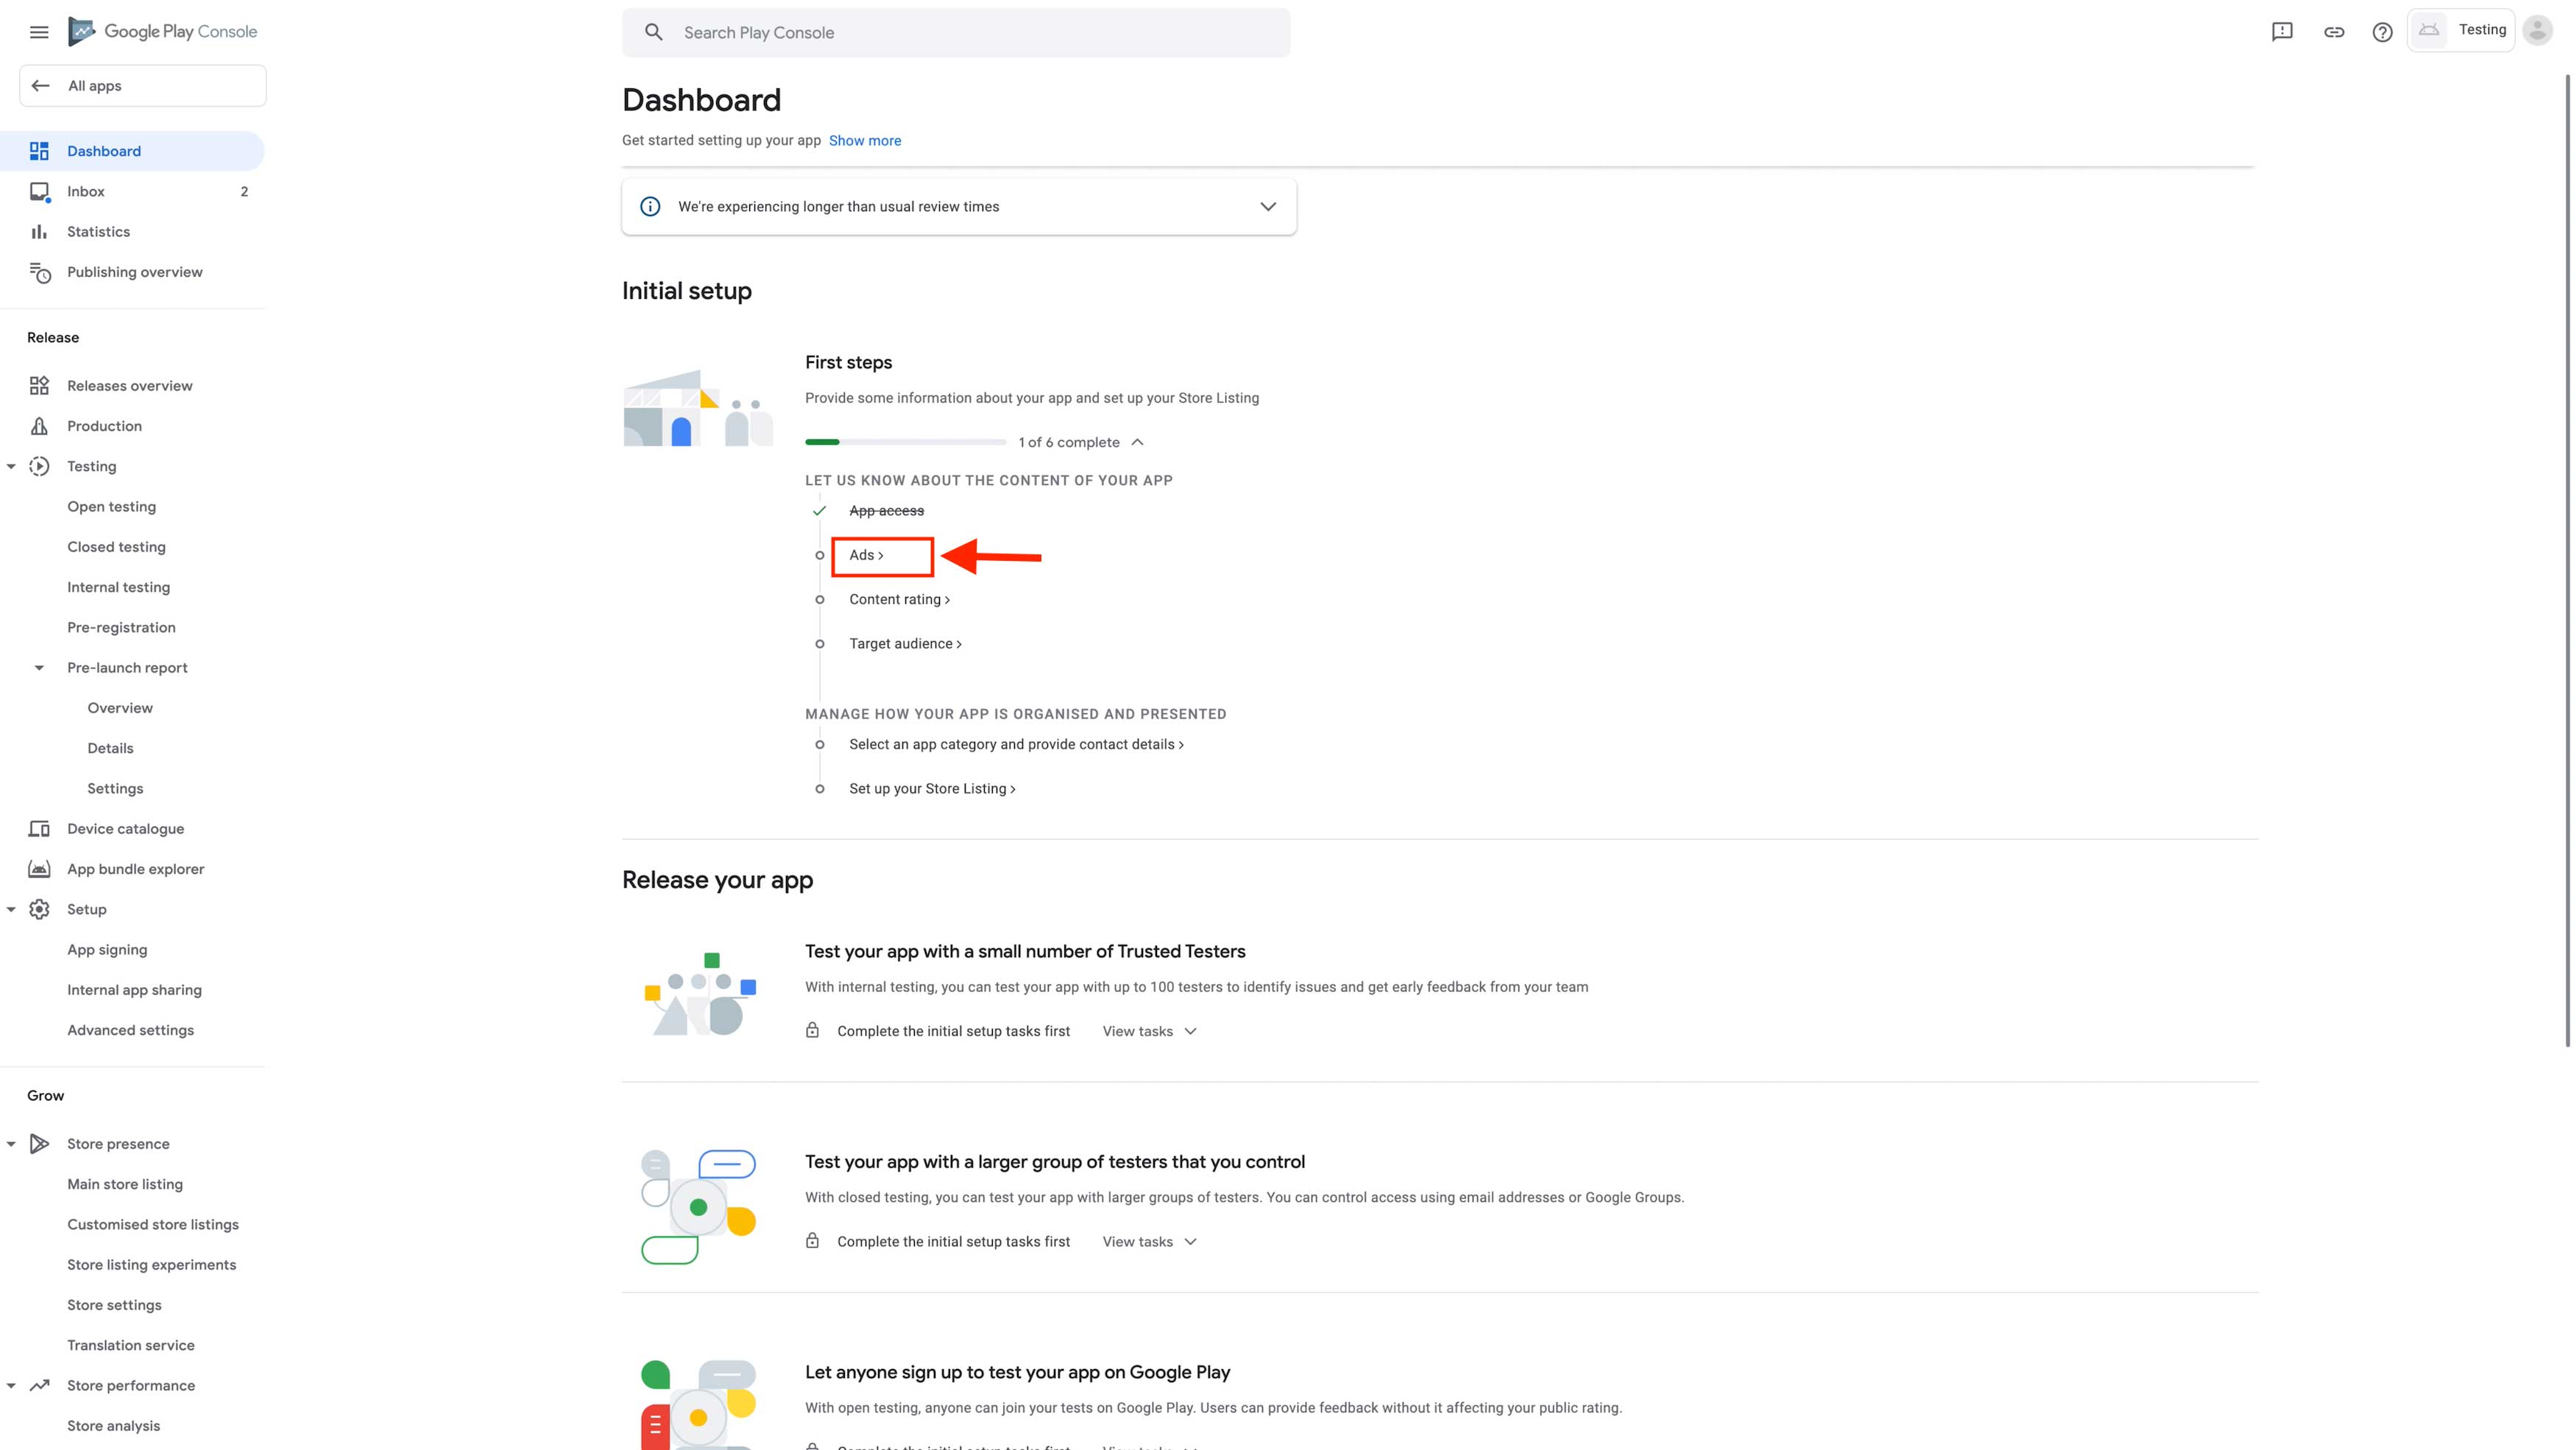
Step 6: Click on view task dropdown in the initial setup section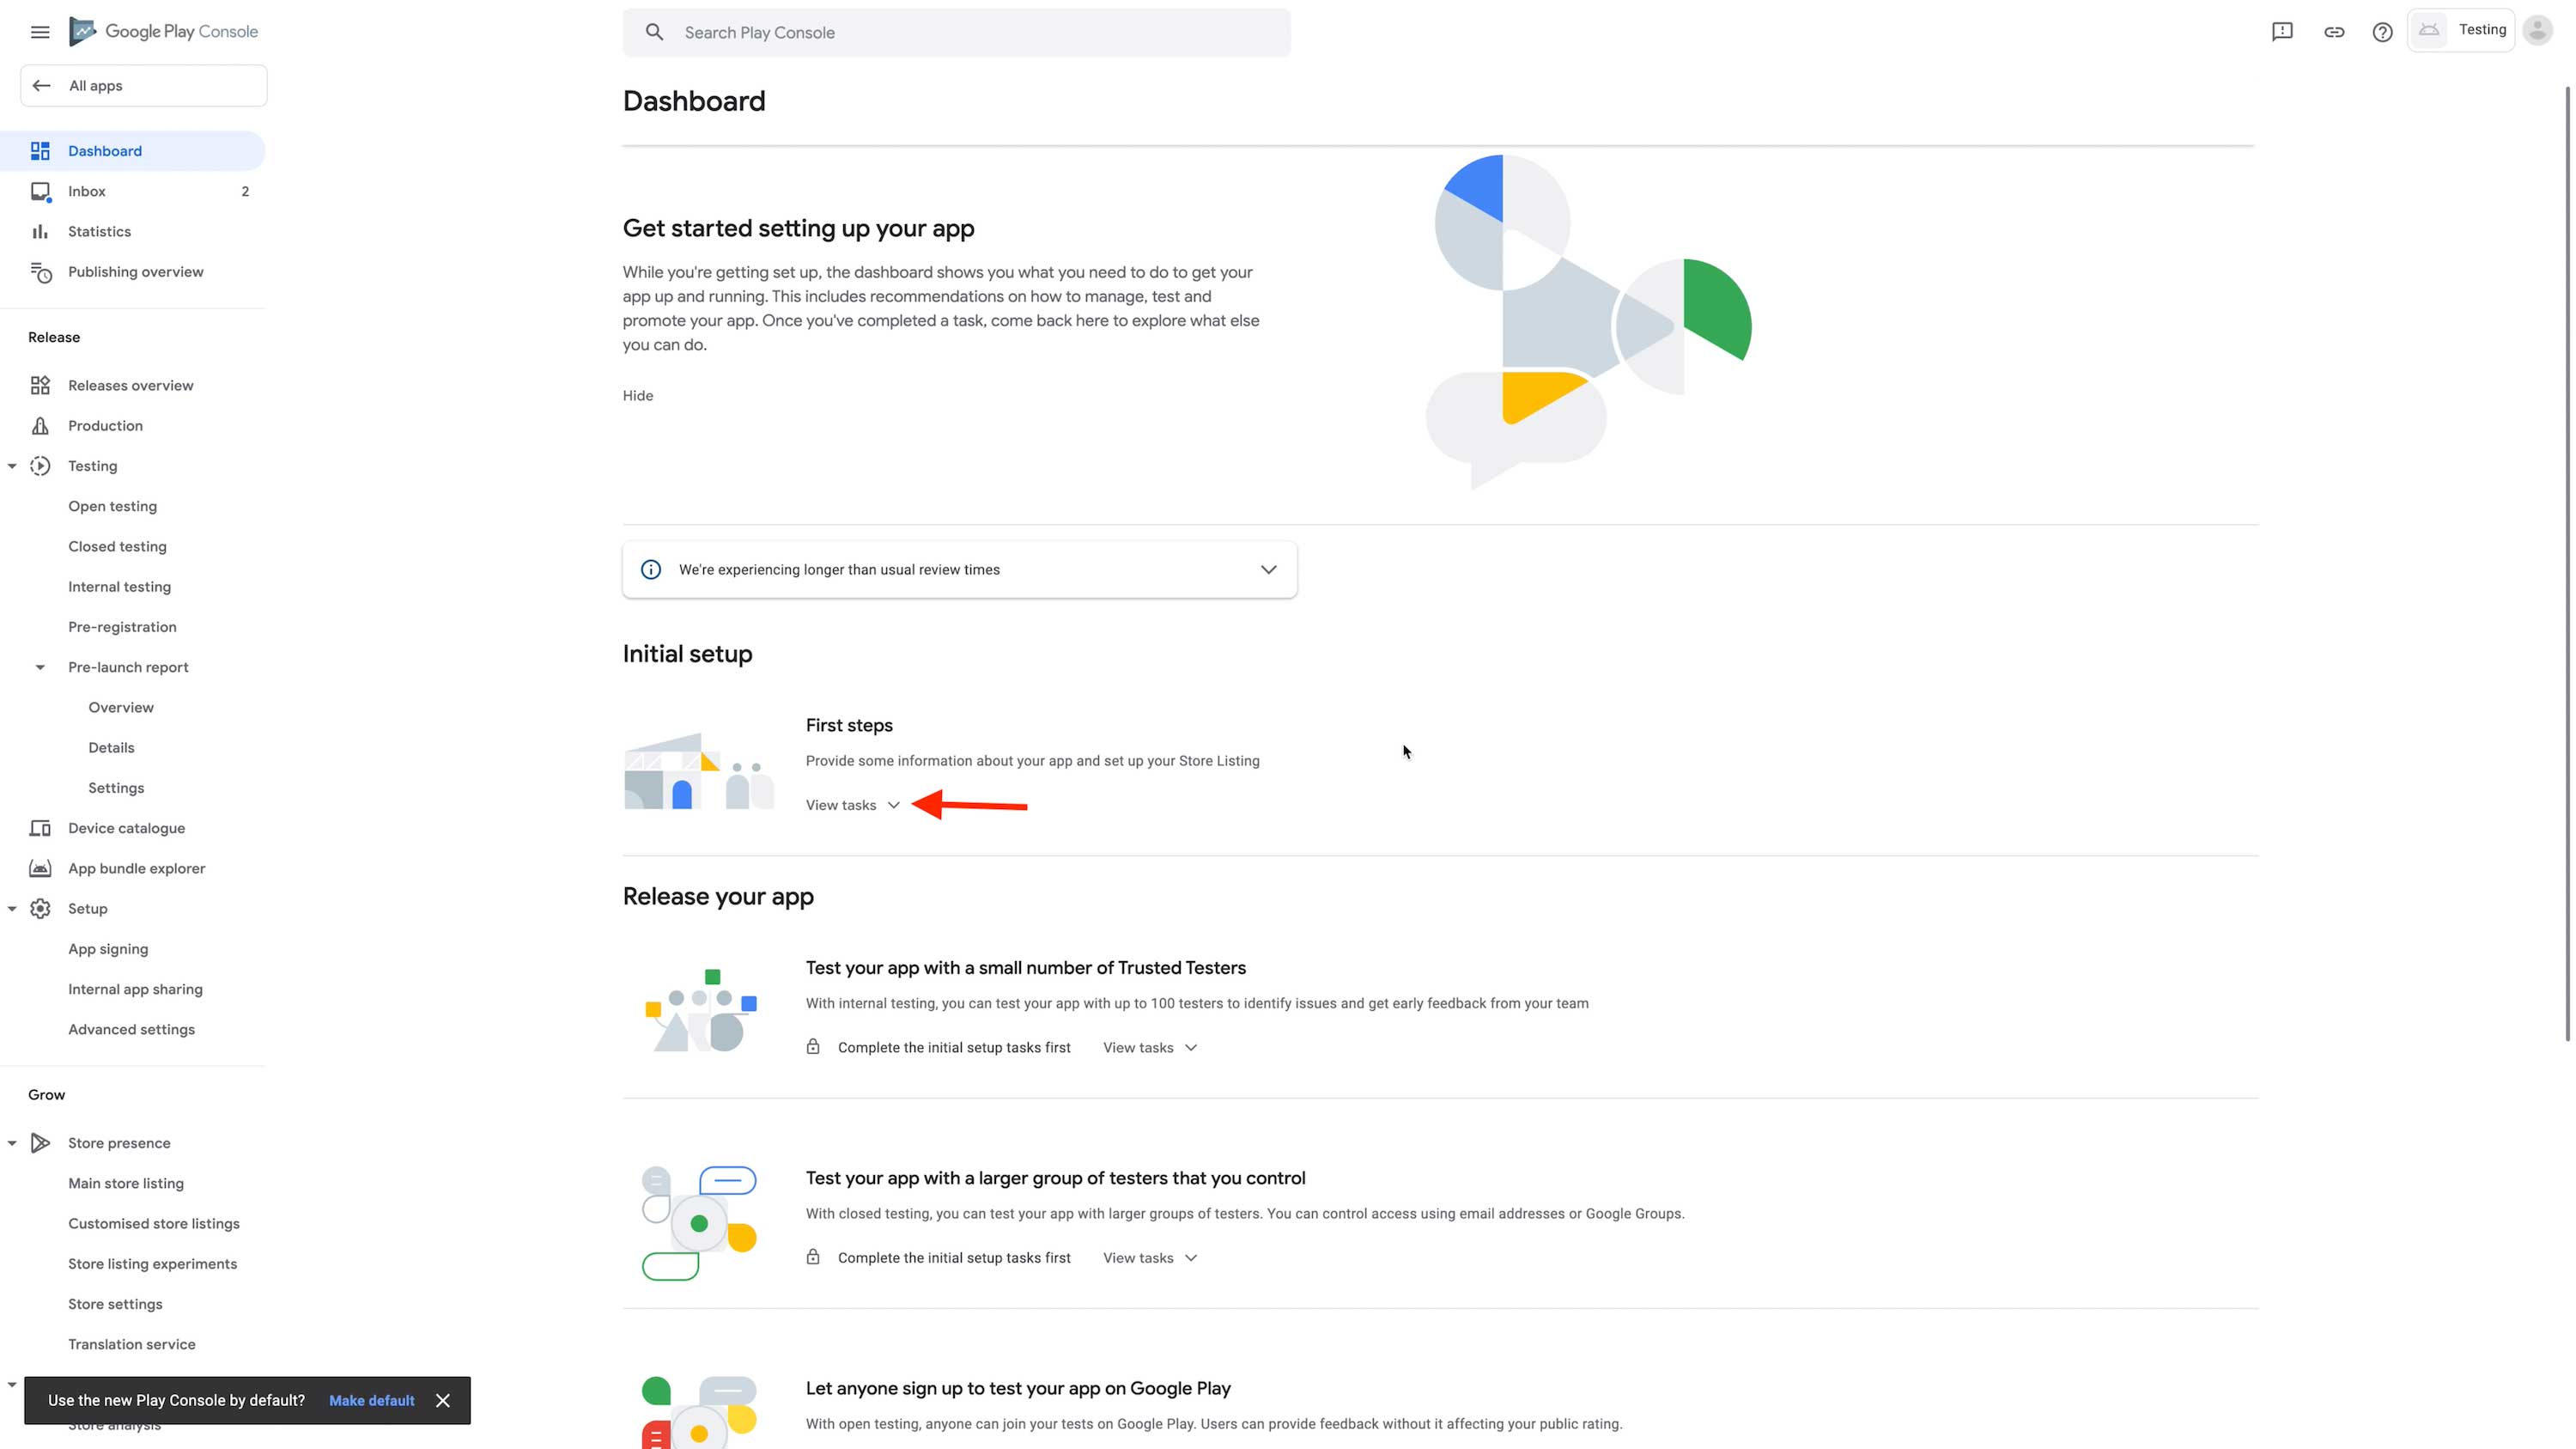 Step 7: Click on App Access
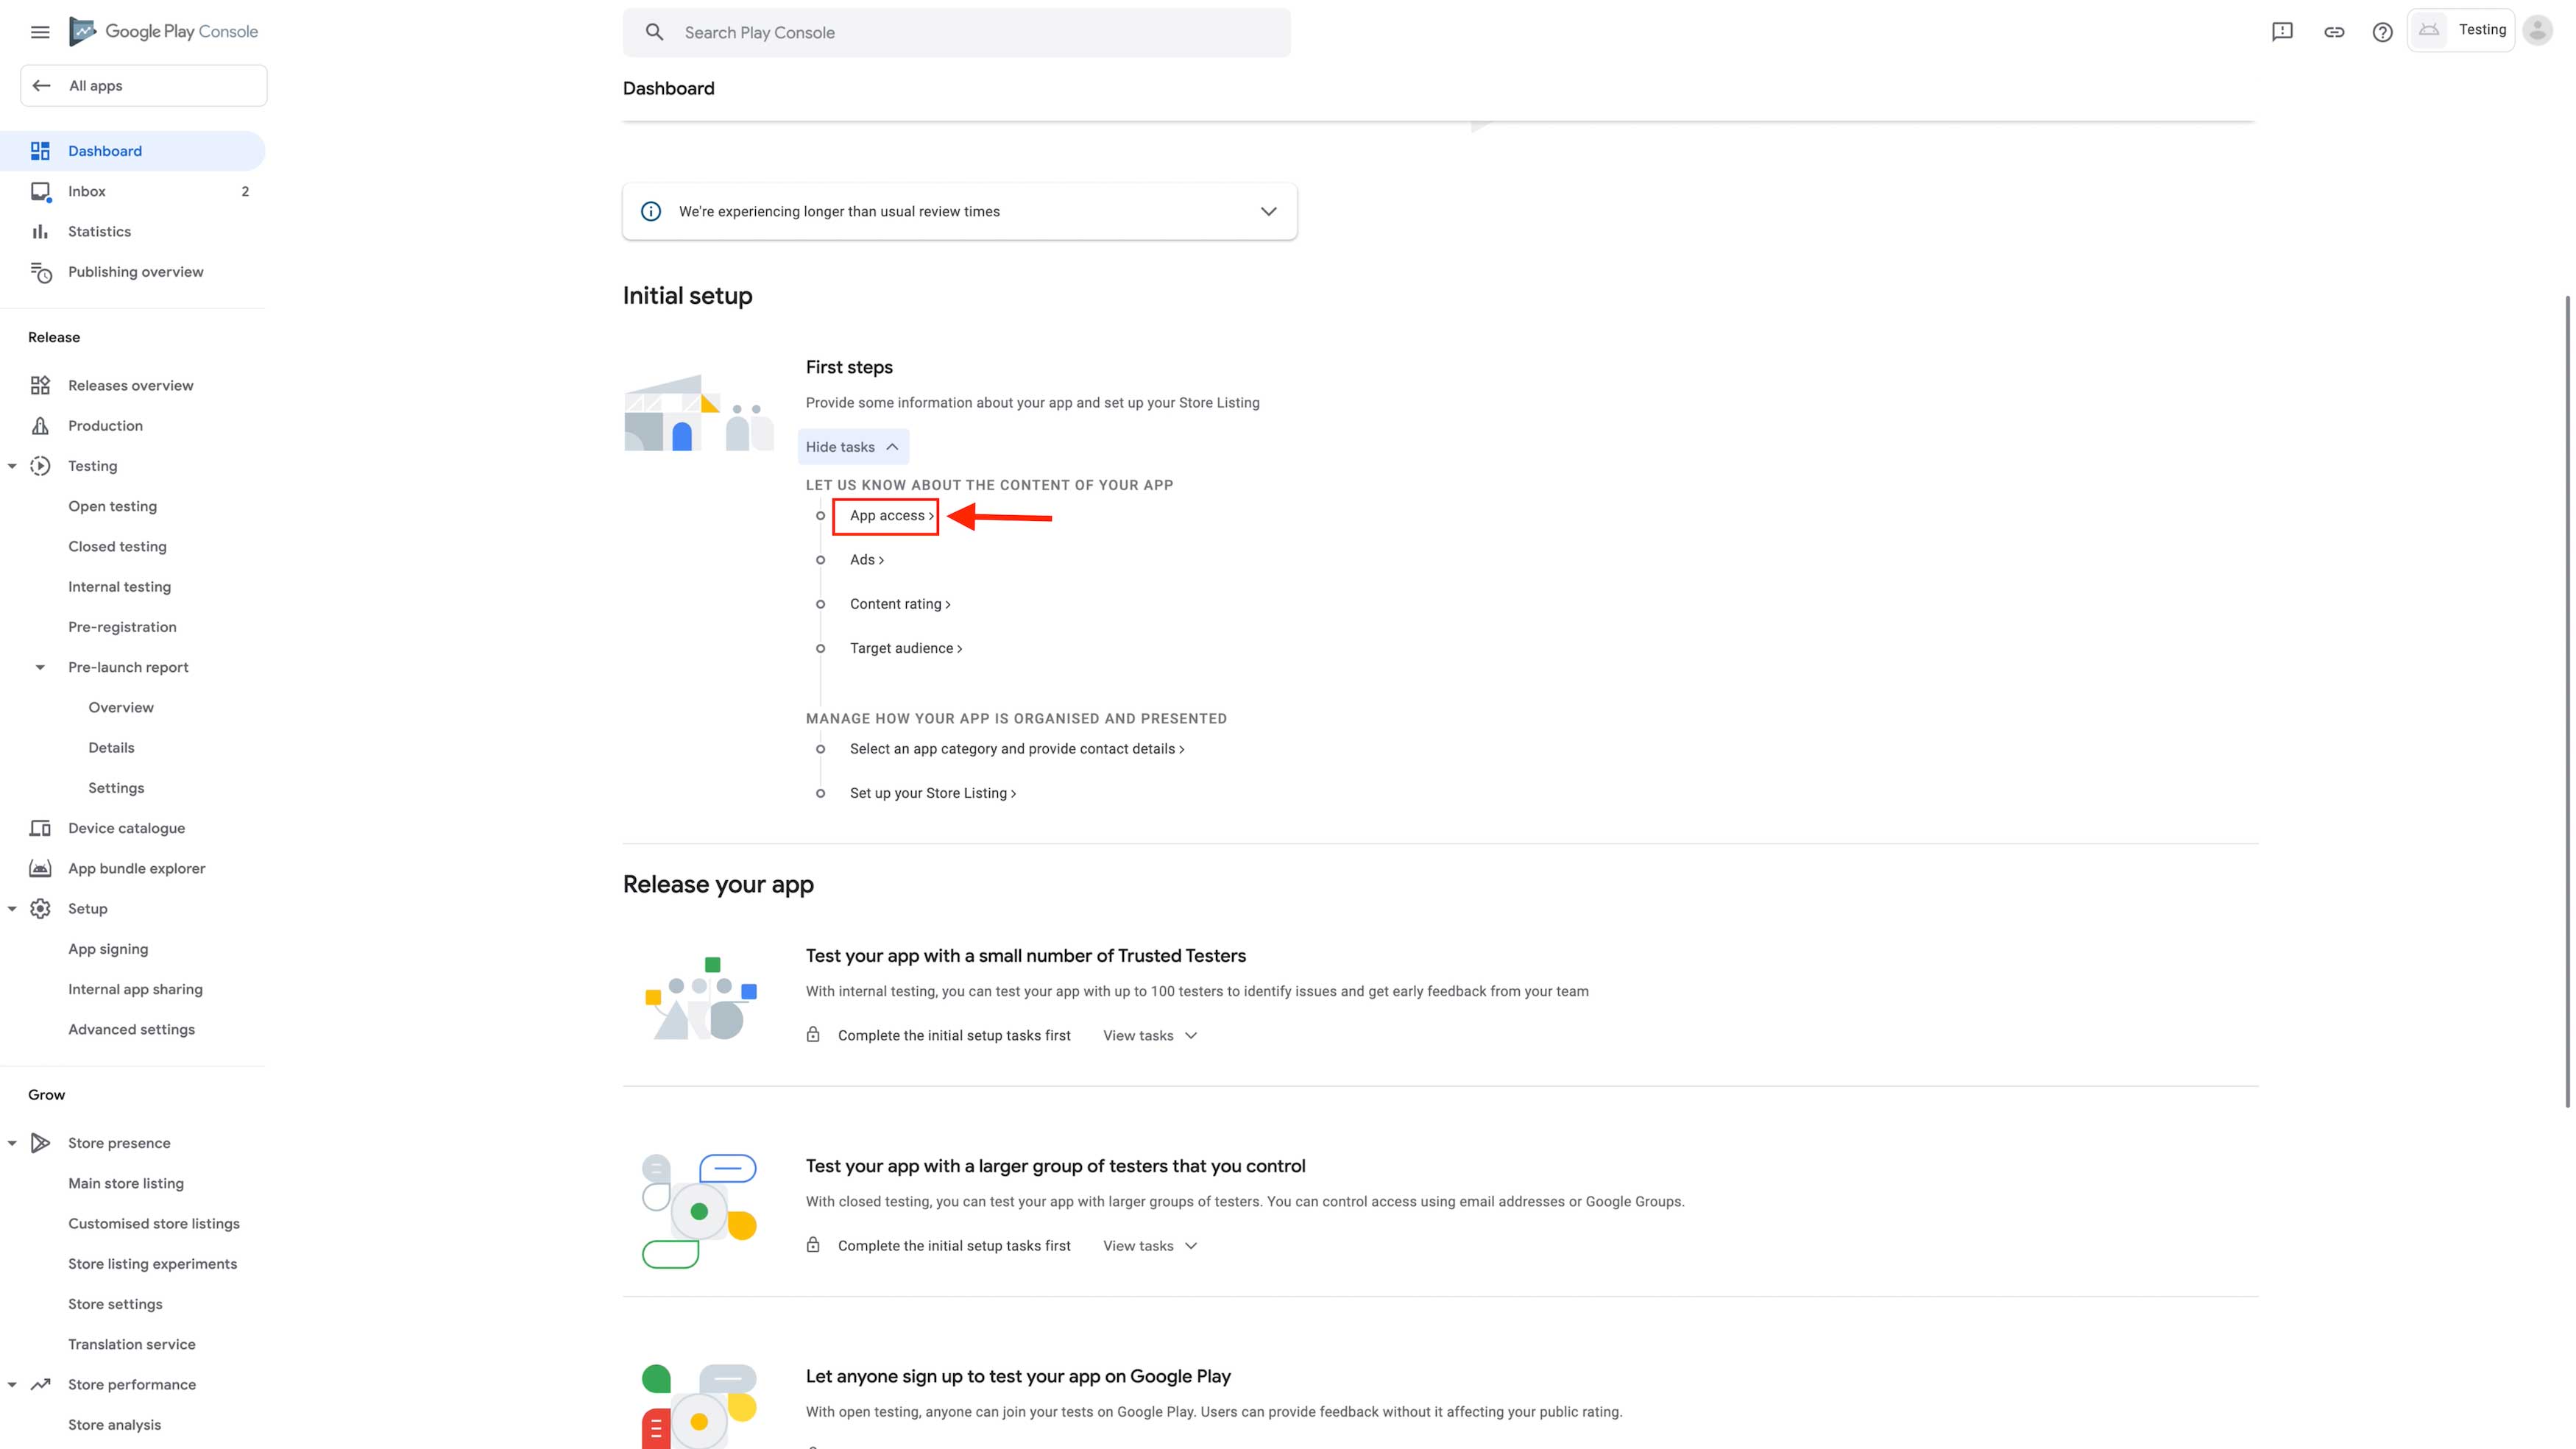
Step 8: Select your desired option 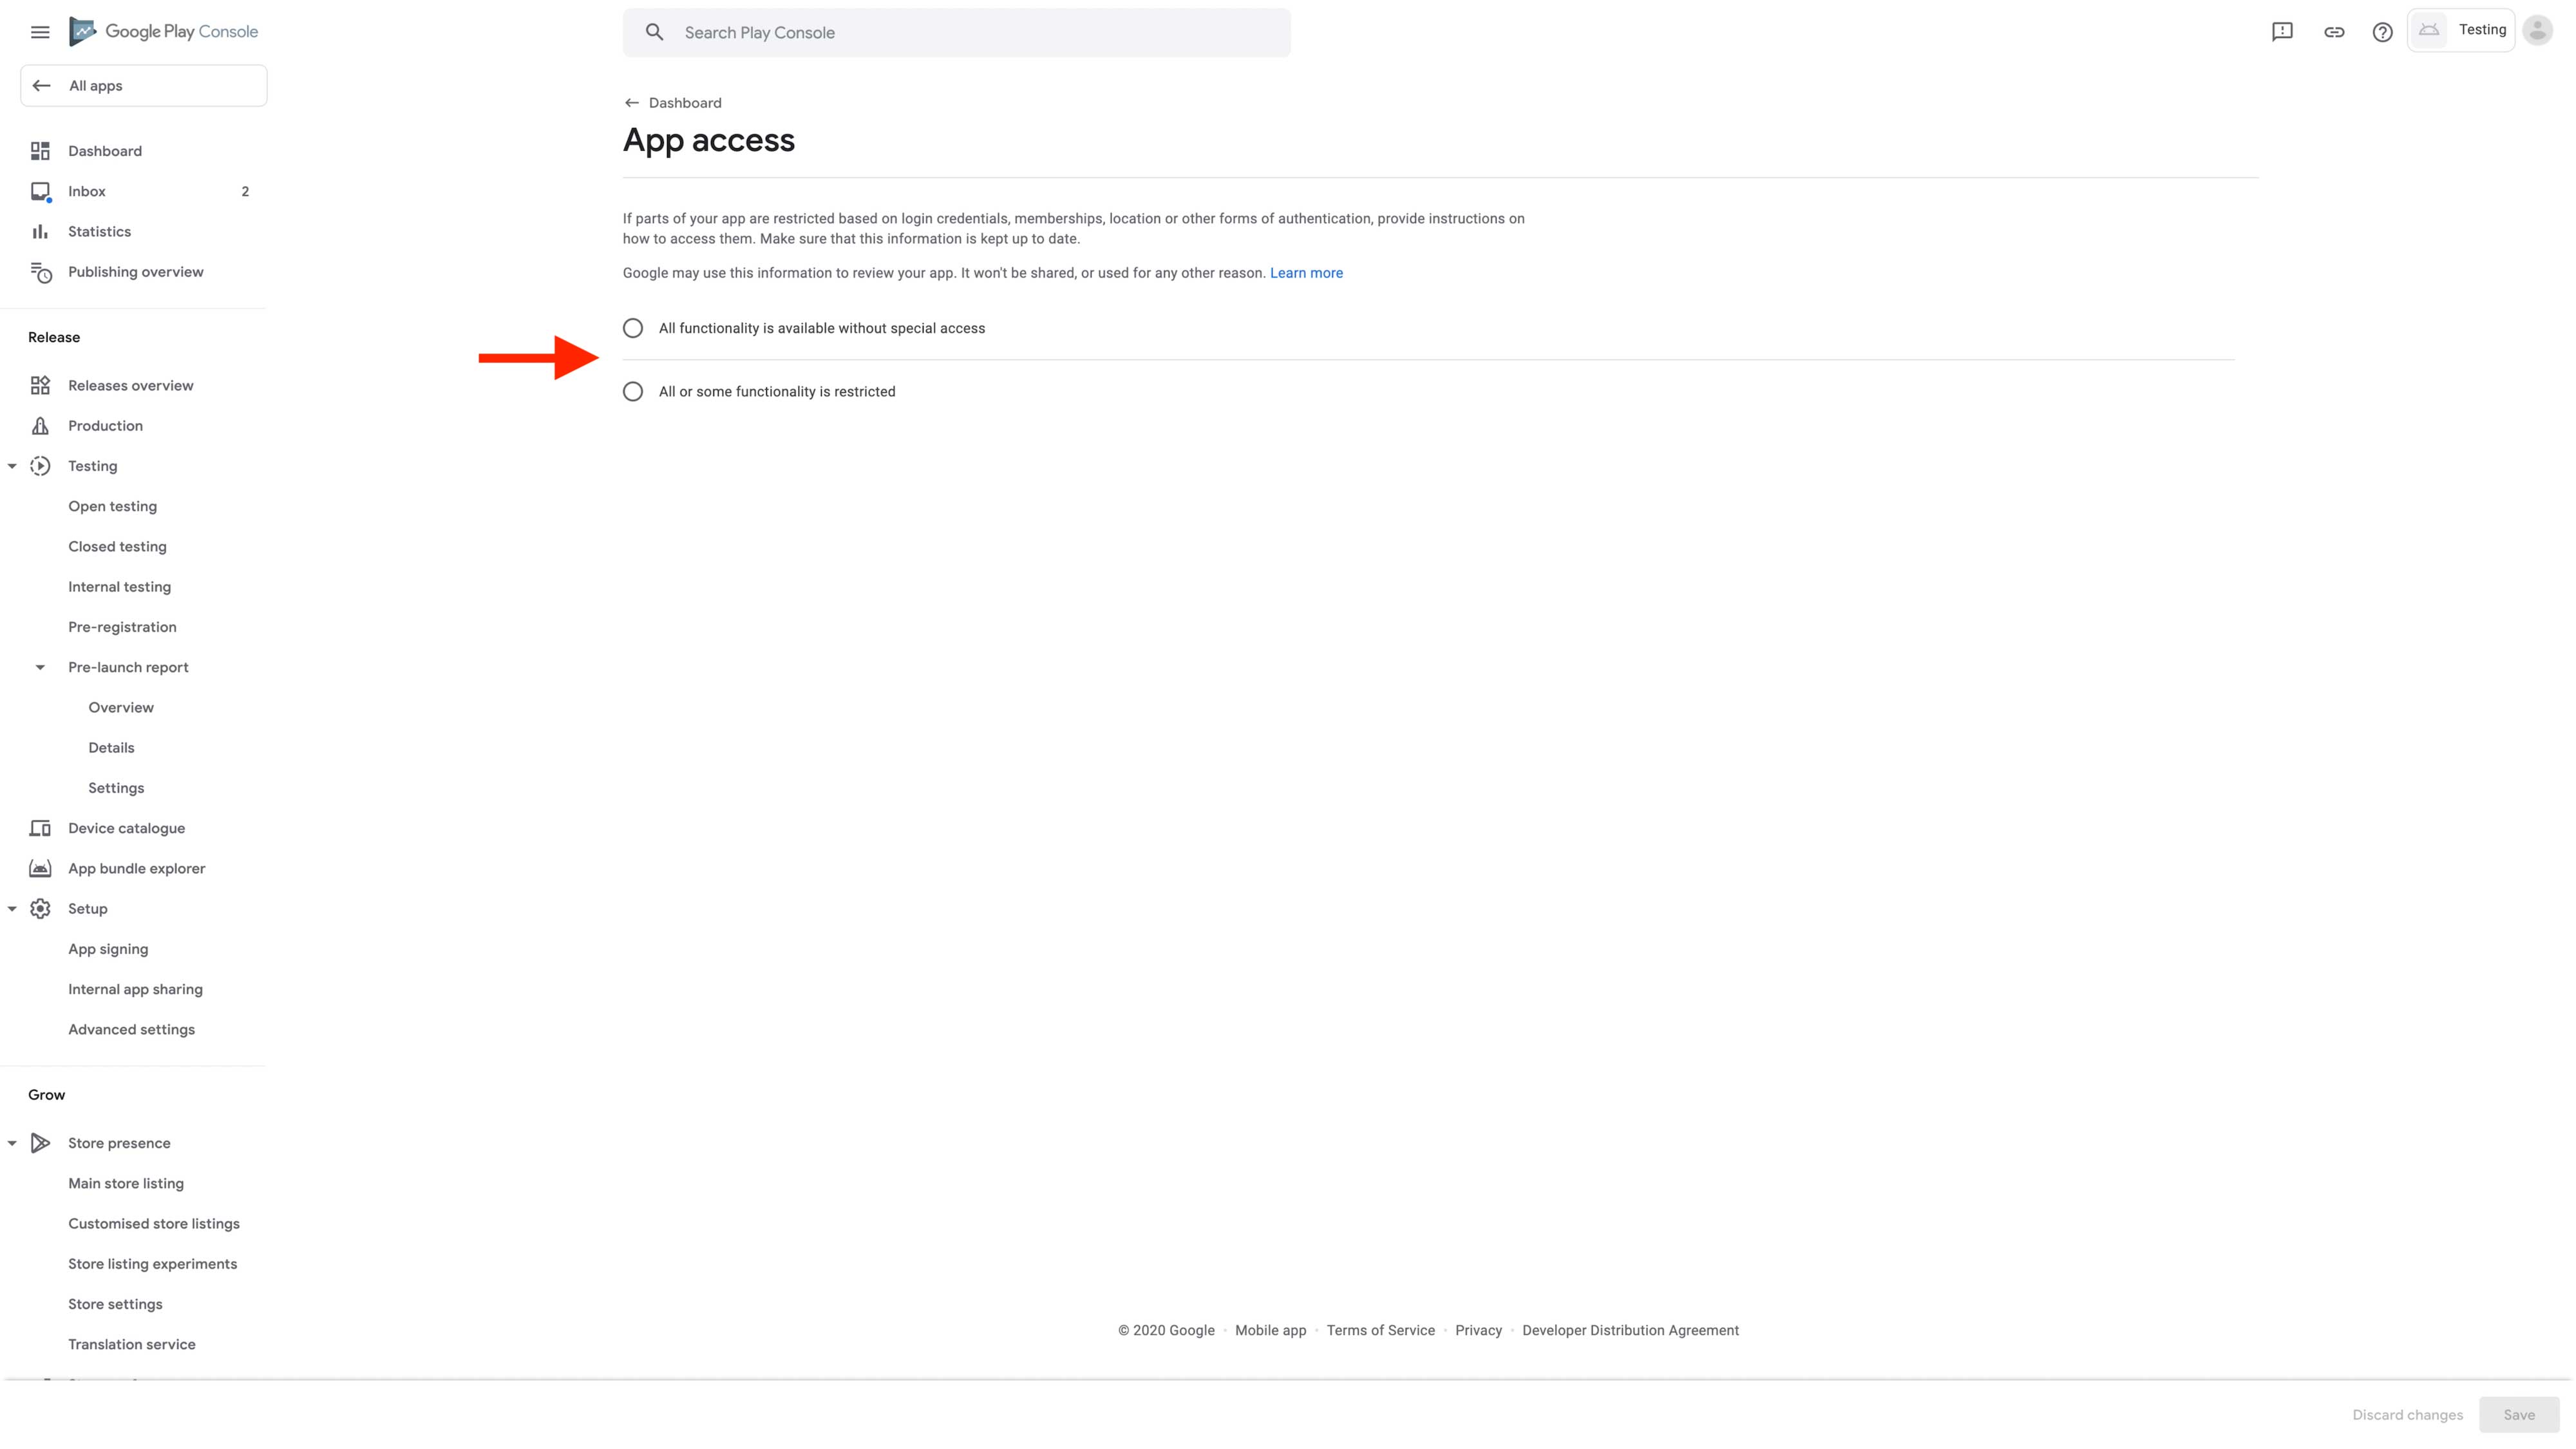
Step 9: Click on Save and click on dashboard for go back to dashboard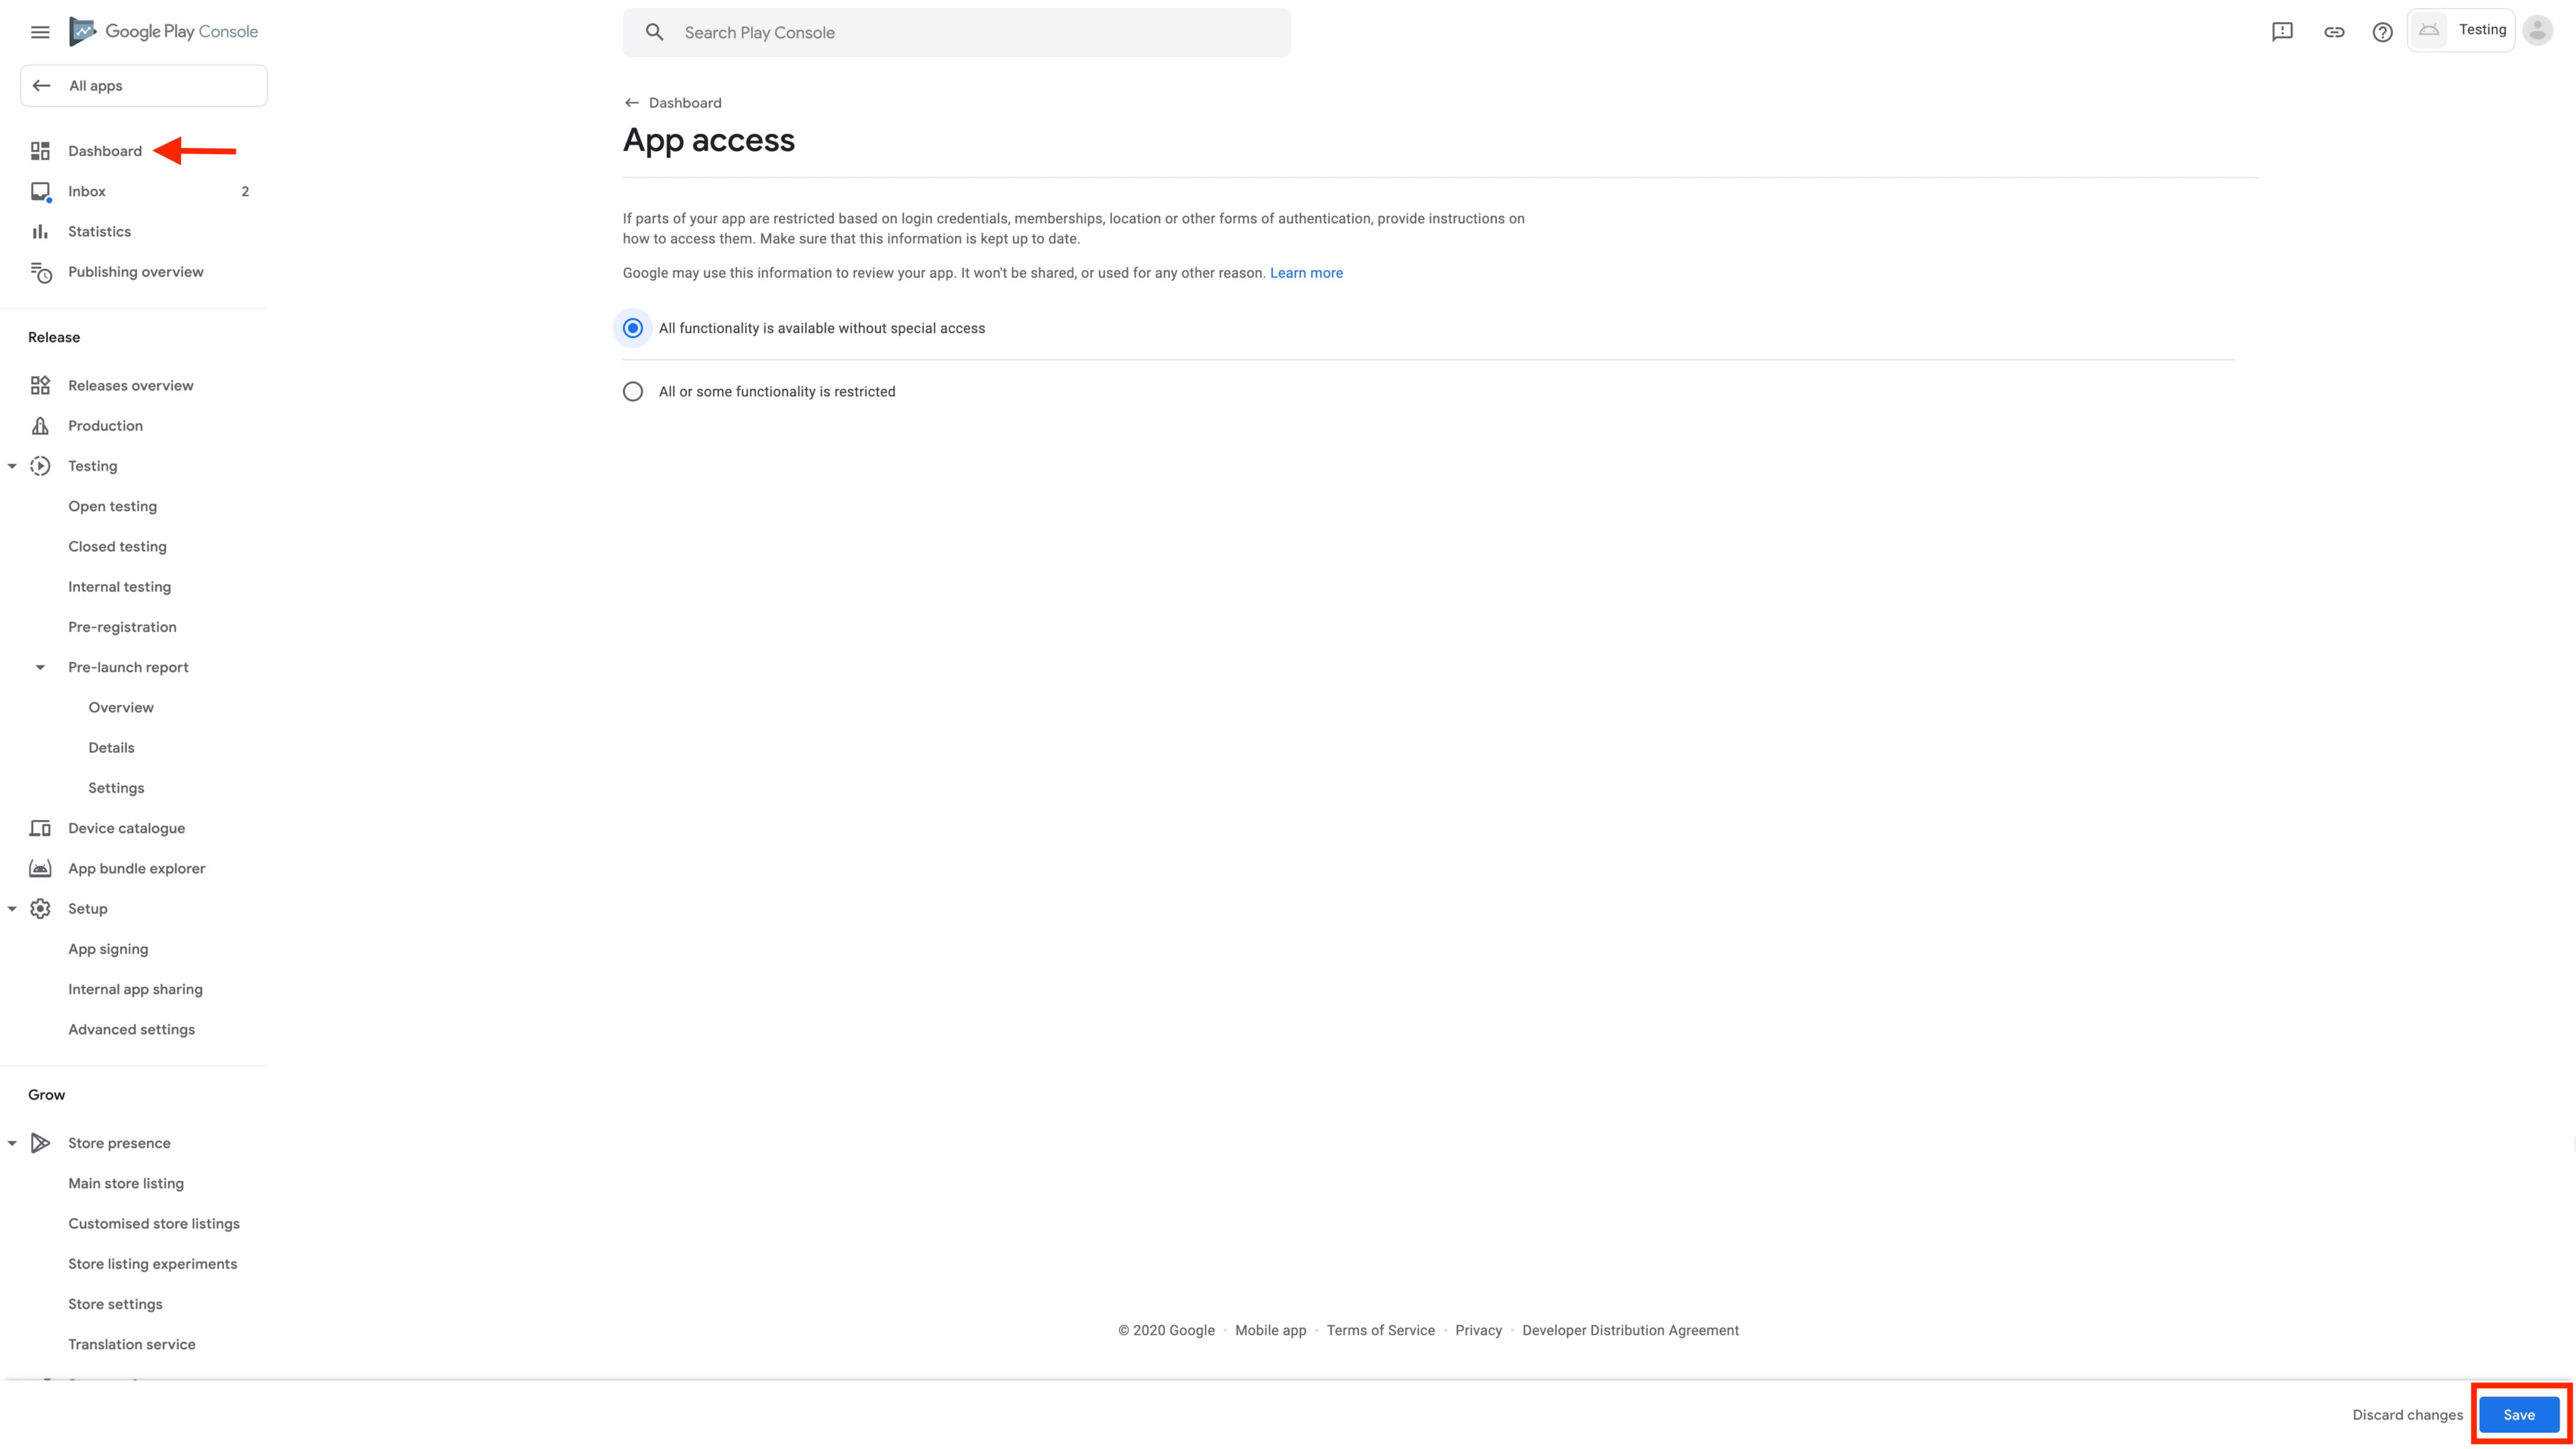
Step 10: Click on Ads
Step 11: If your app contains ads, then click on YES, else click on NO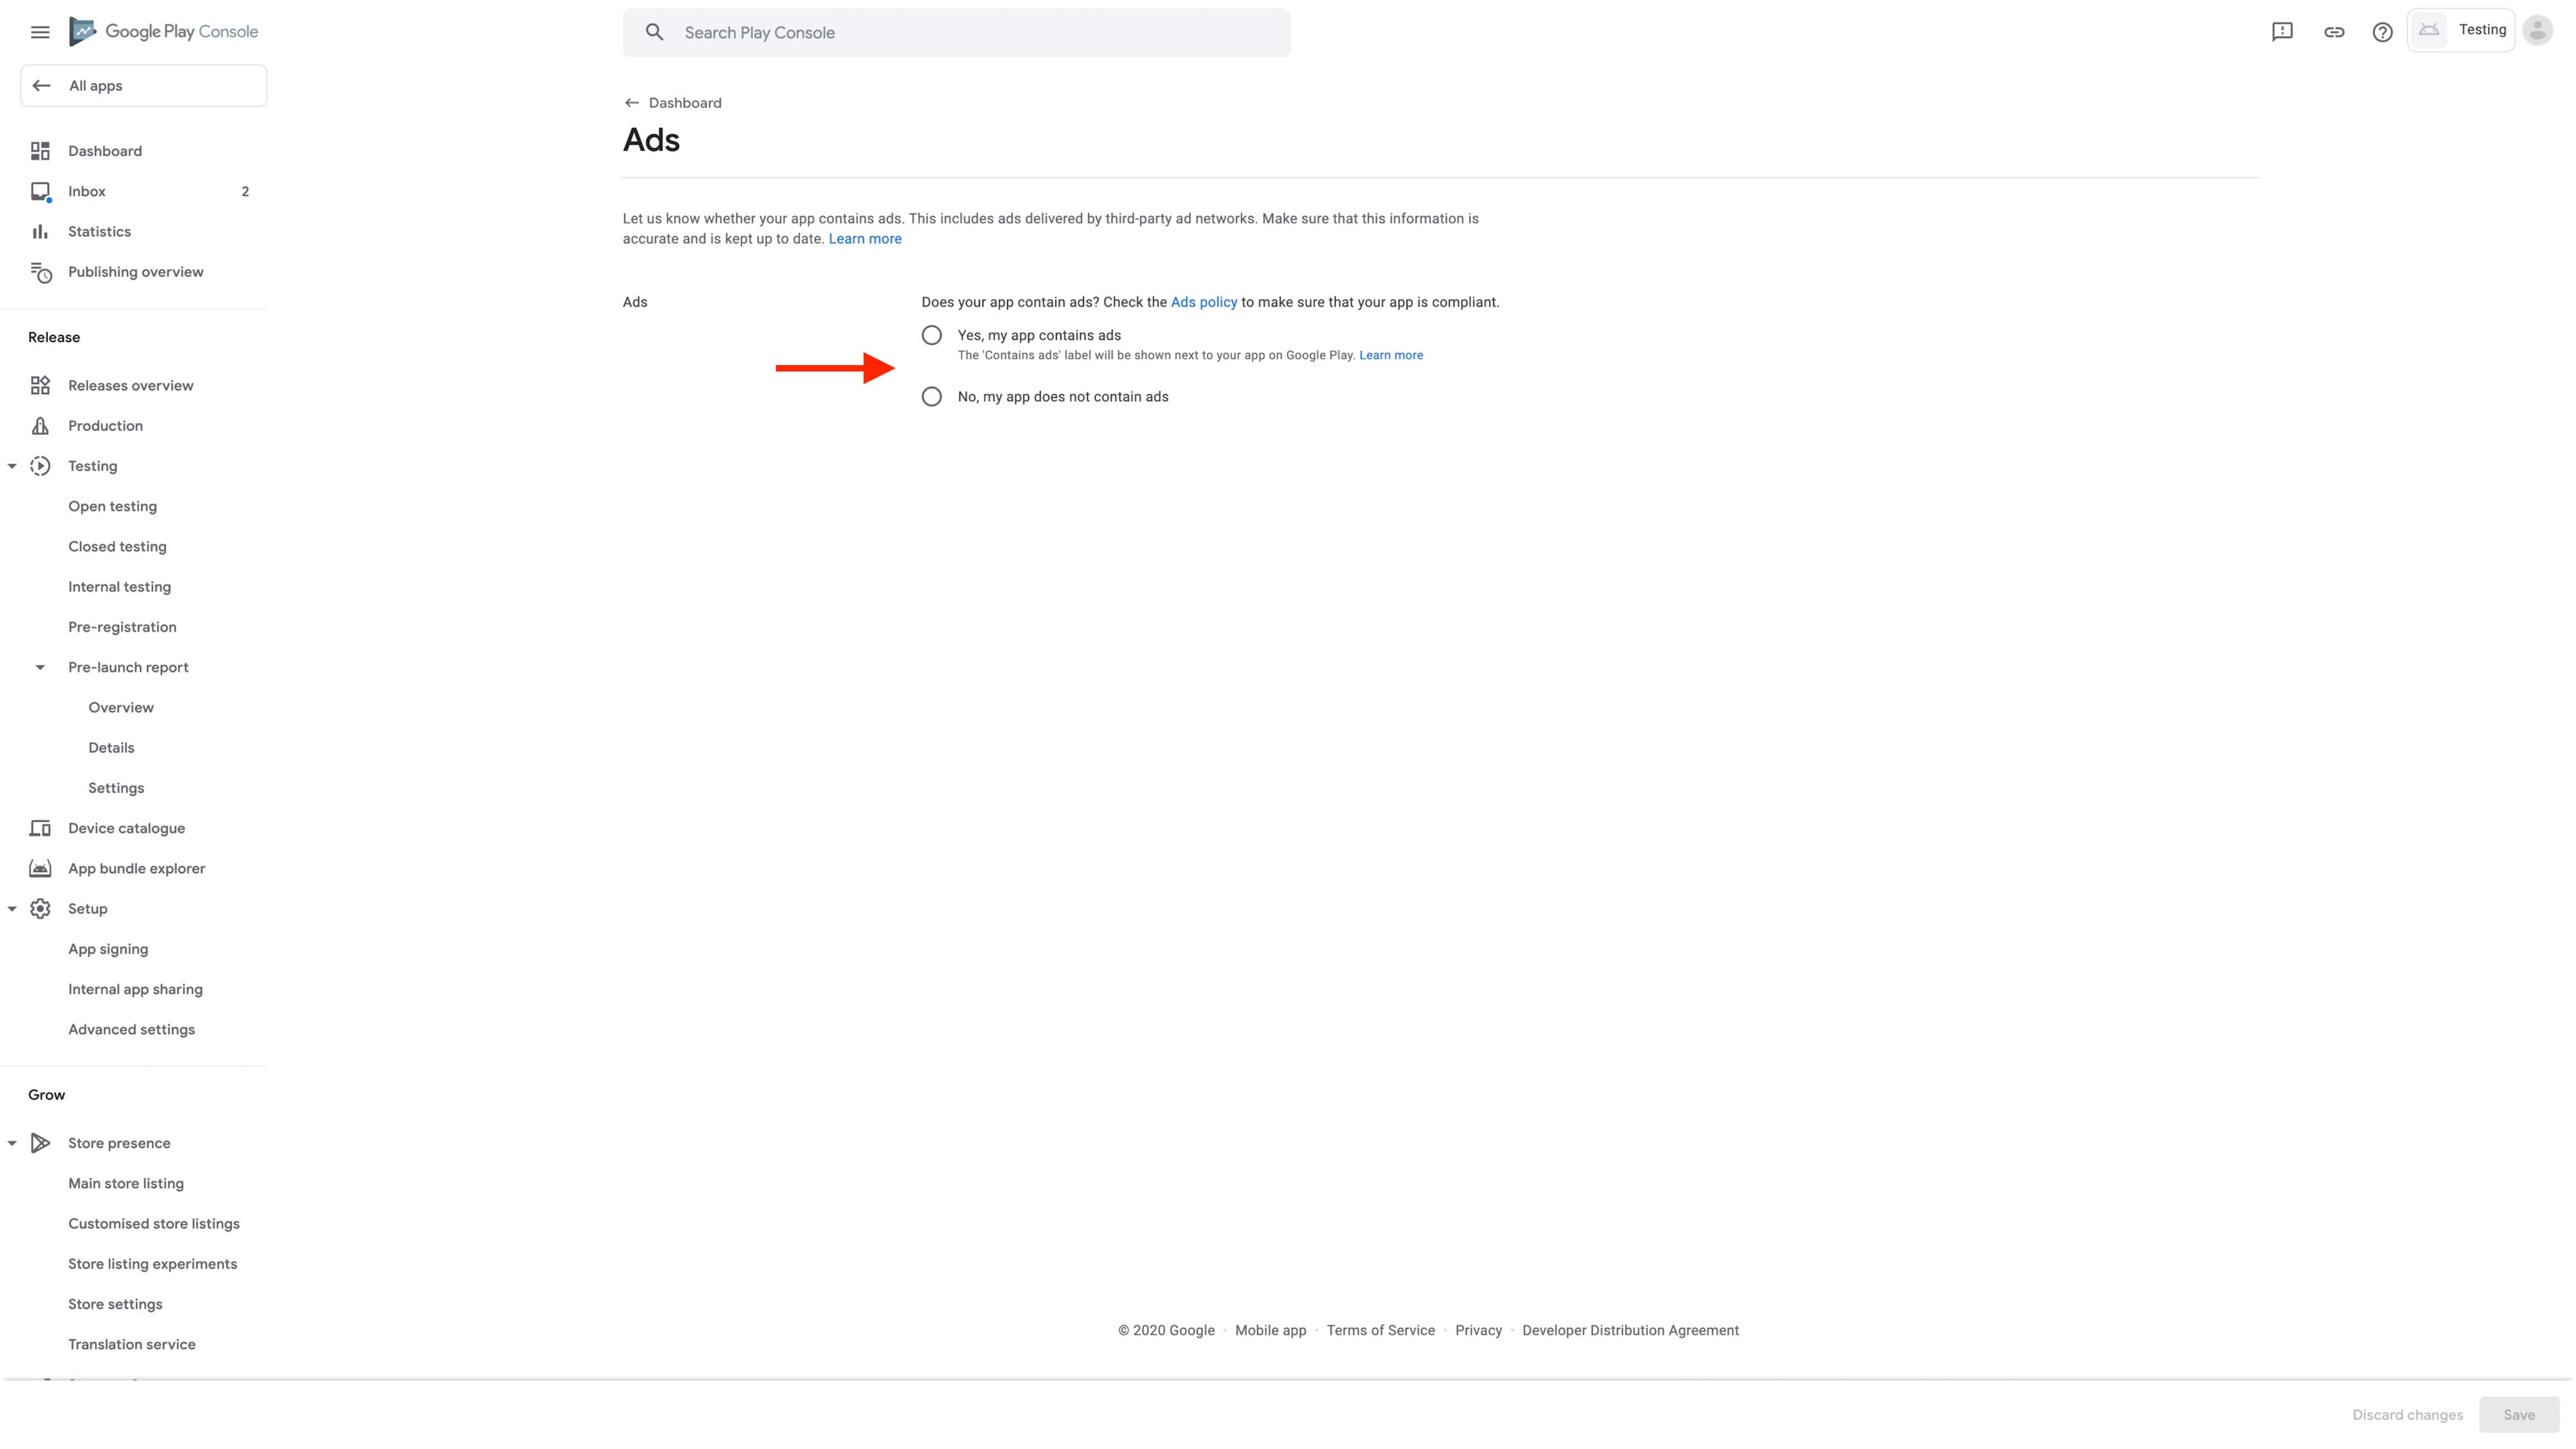
Step 12: Click on Save and click on dashboard for go back to dashboard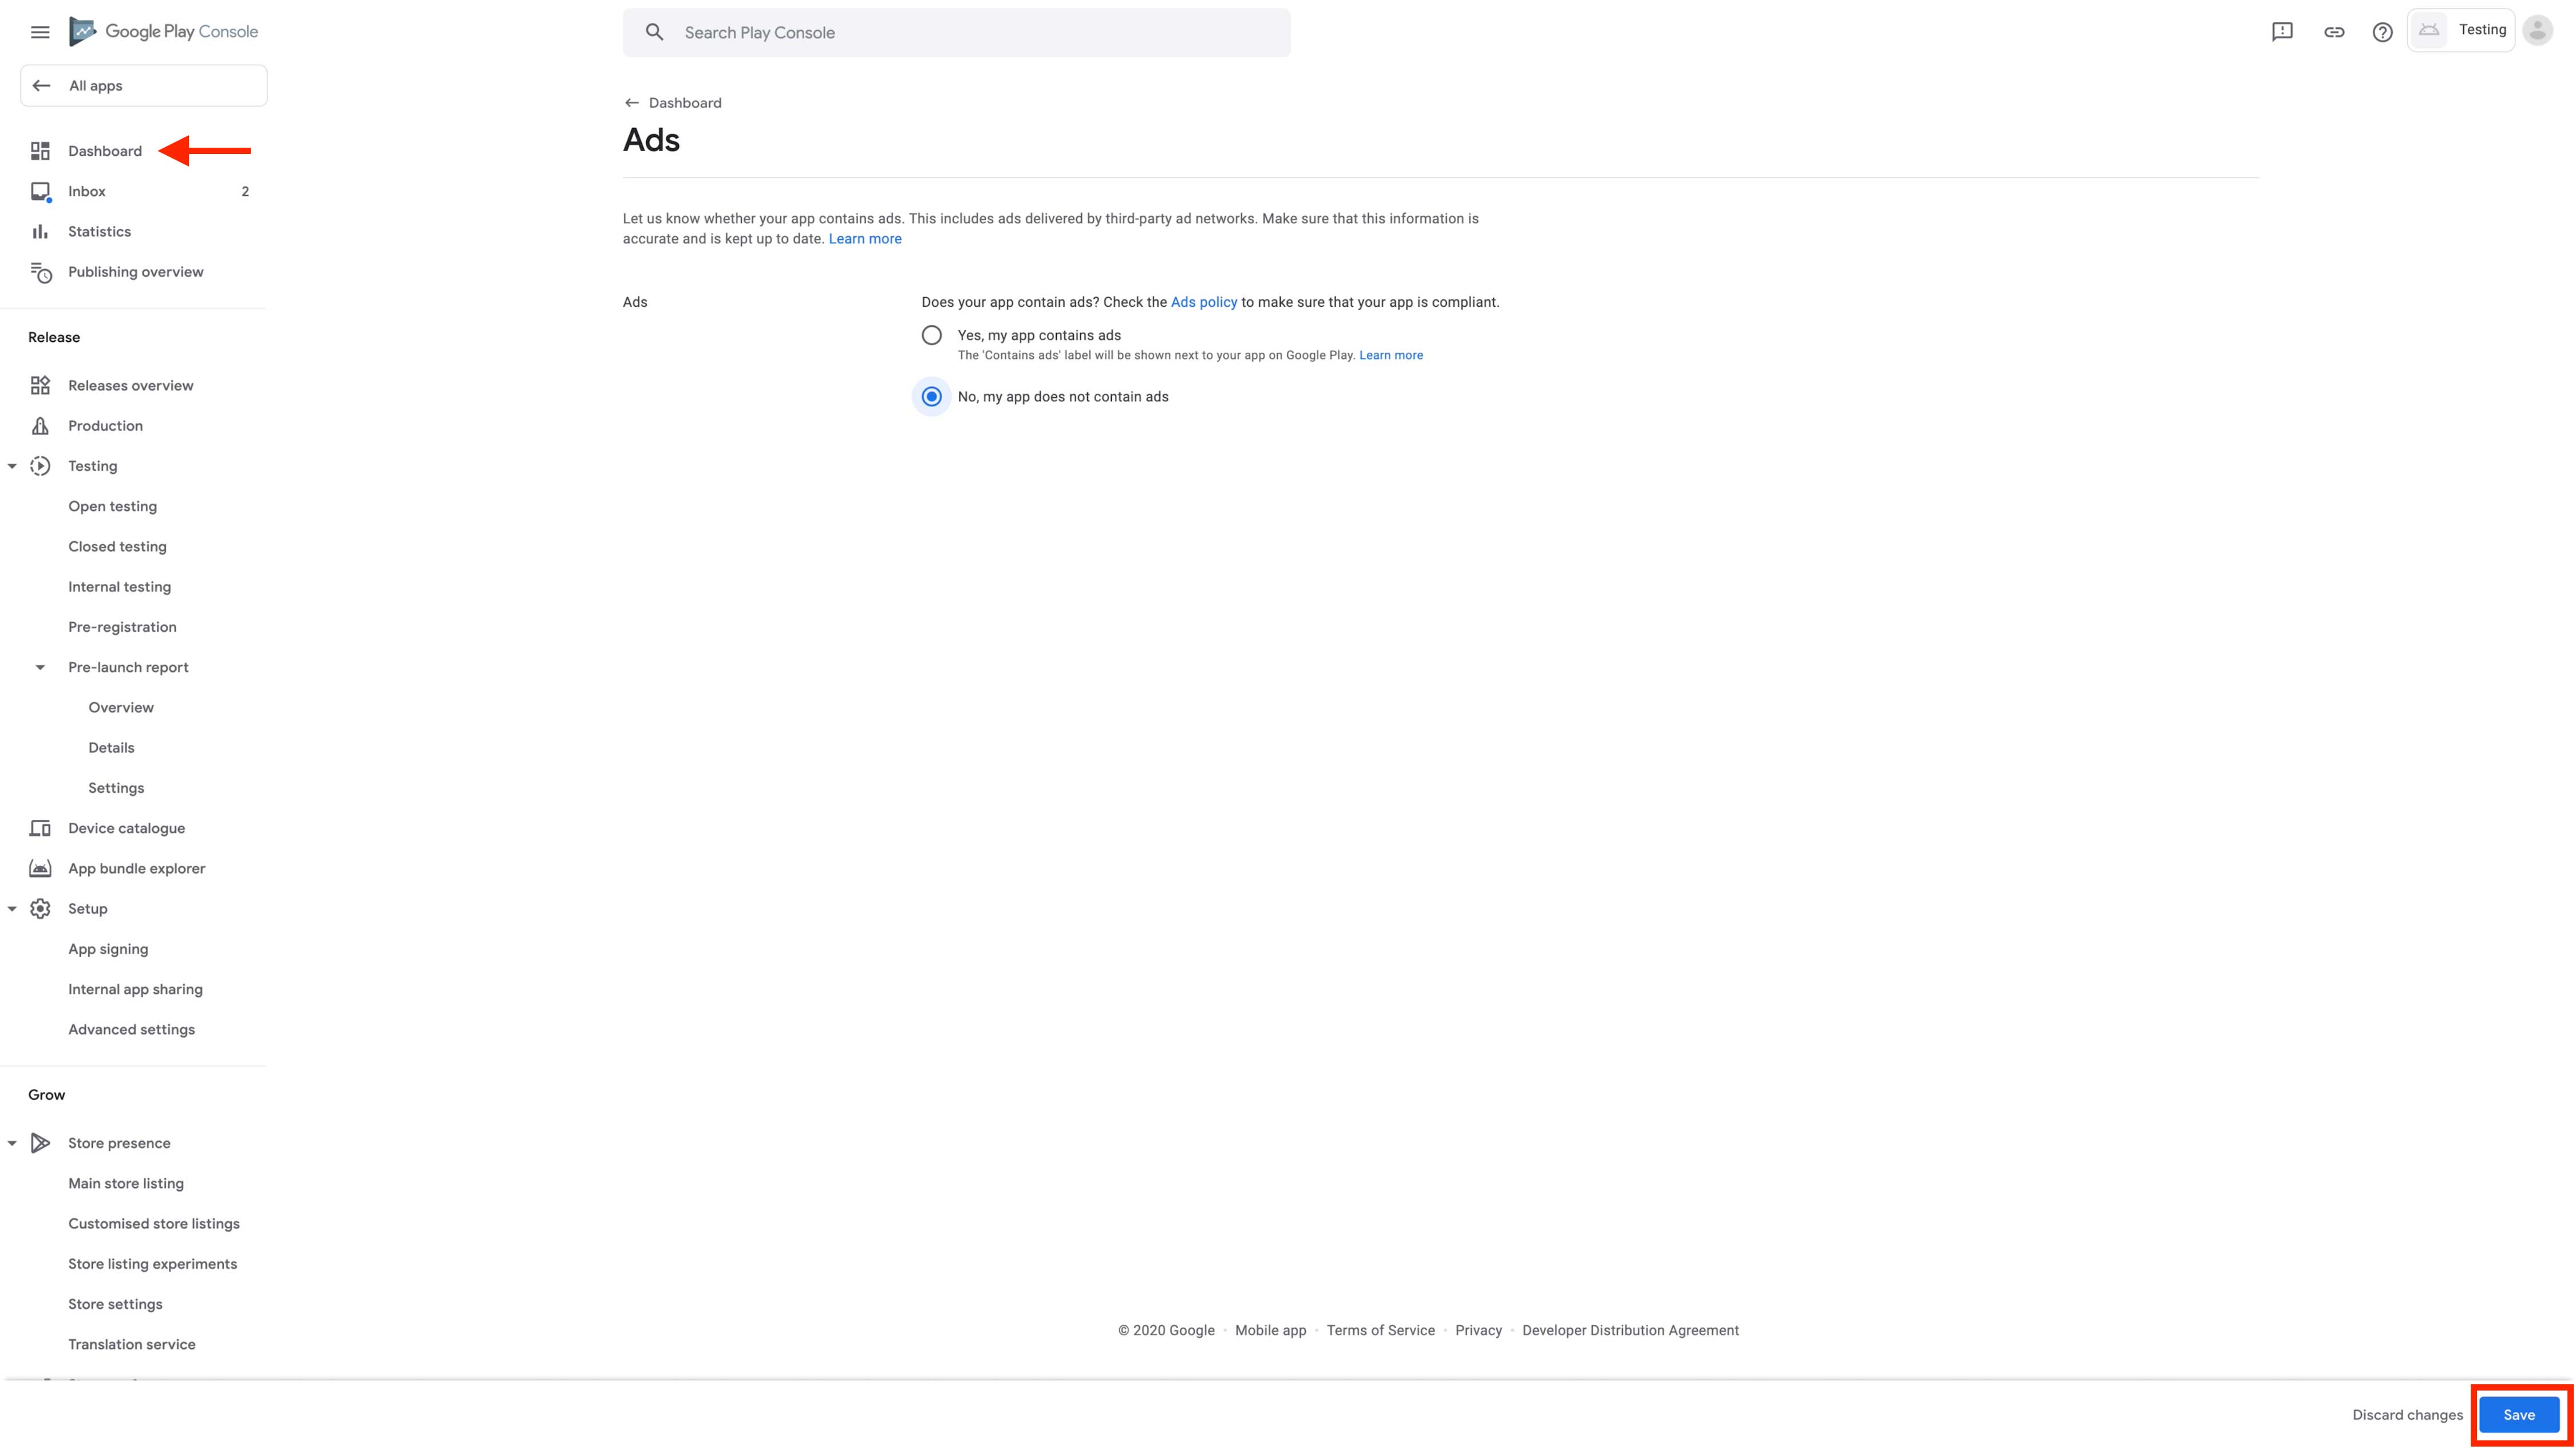
Step 13: Click on Content Rating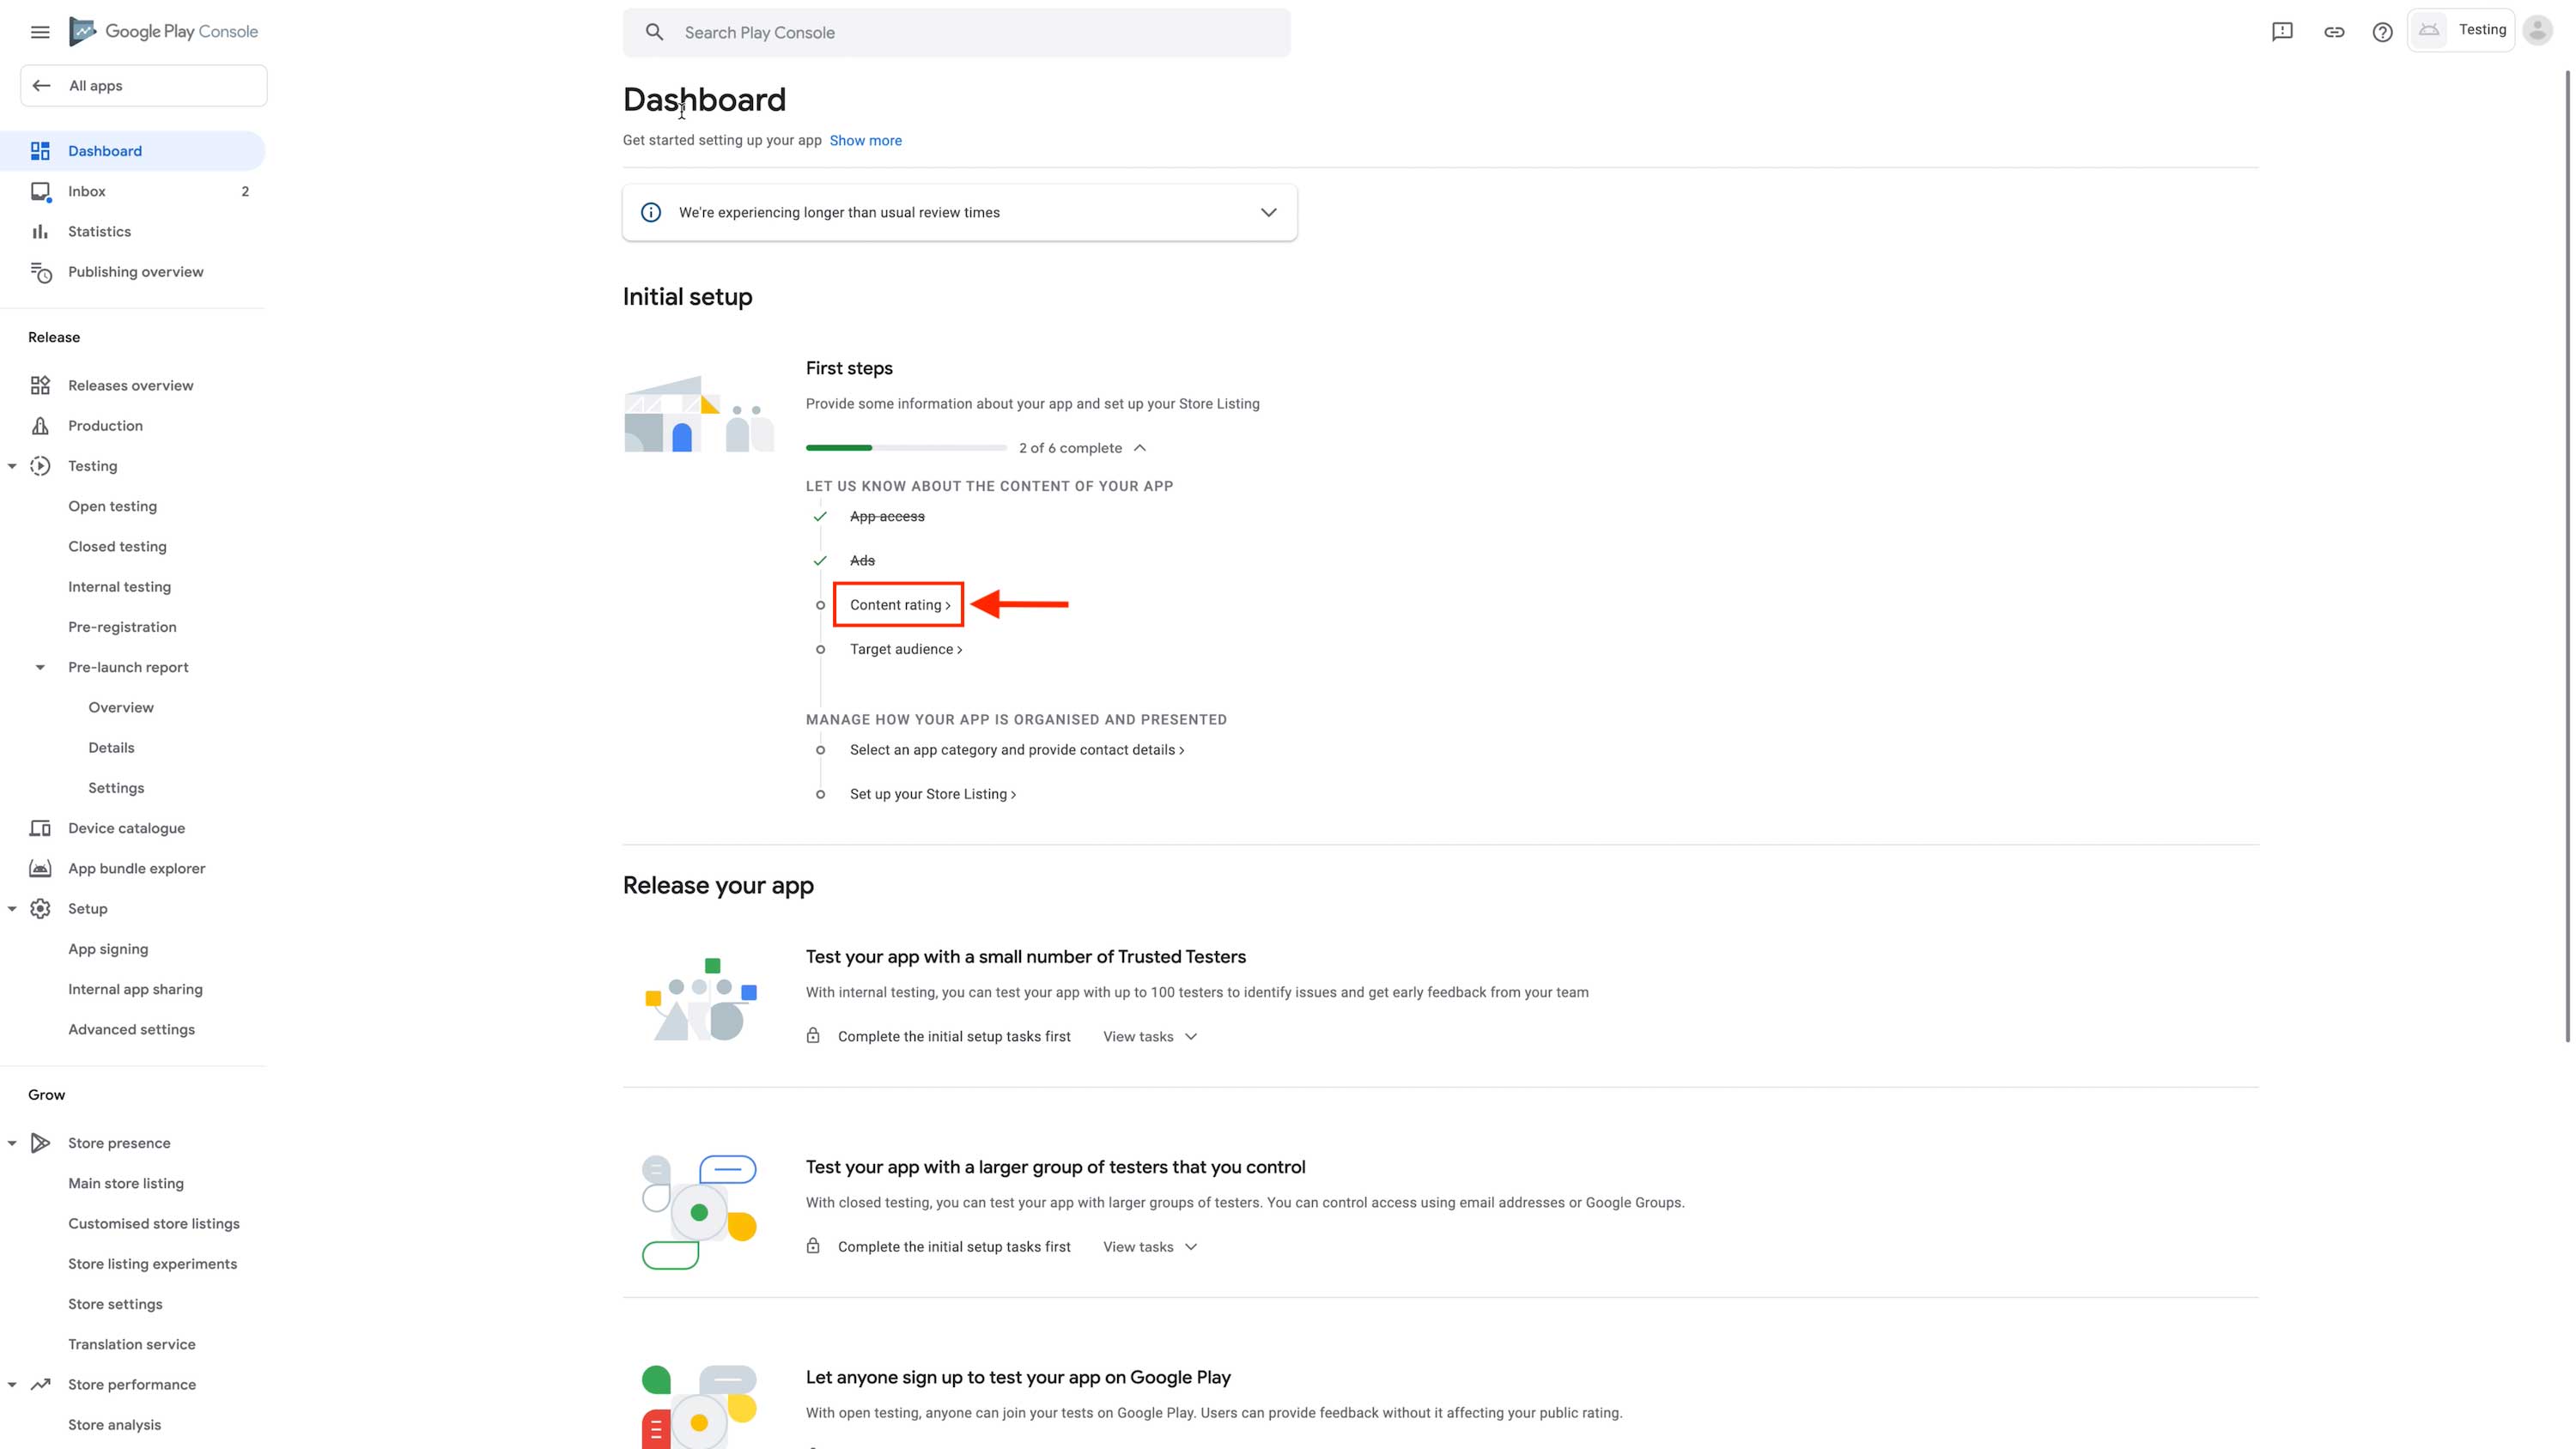
Step 14: Click on the Start Questionnaire button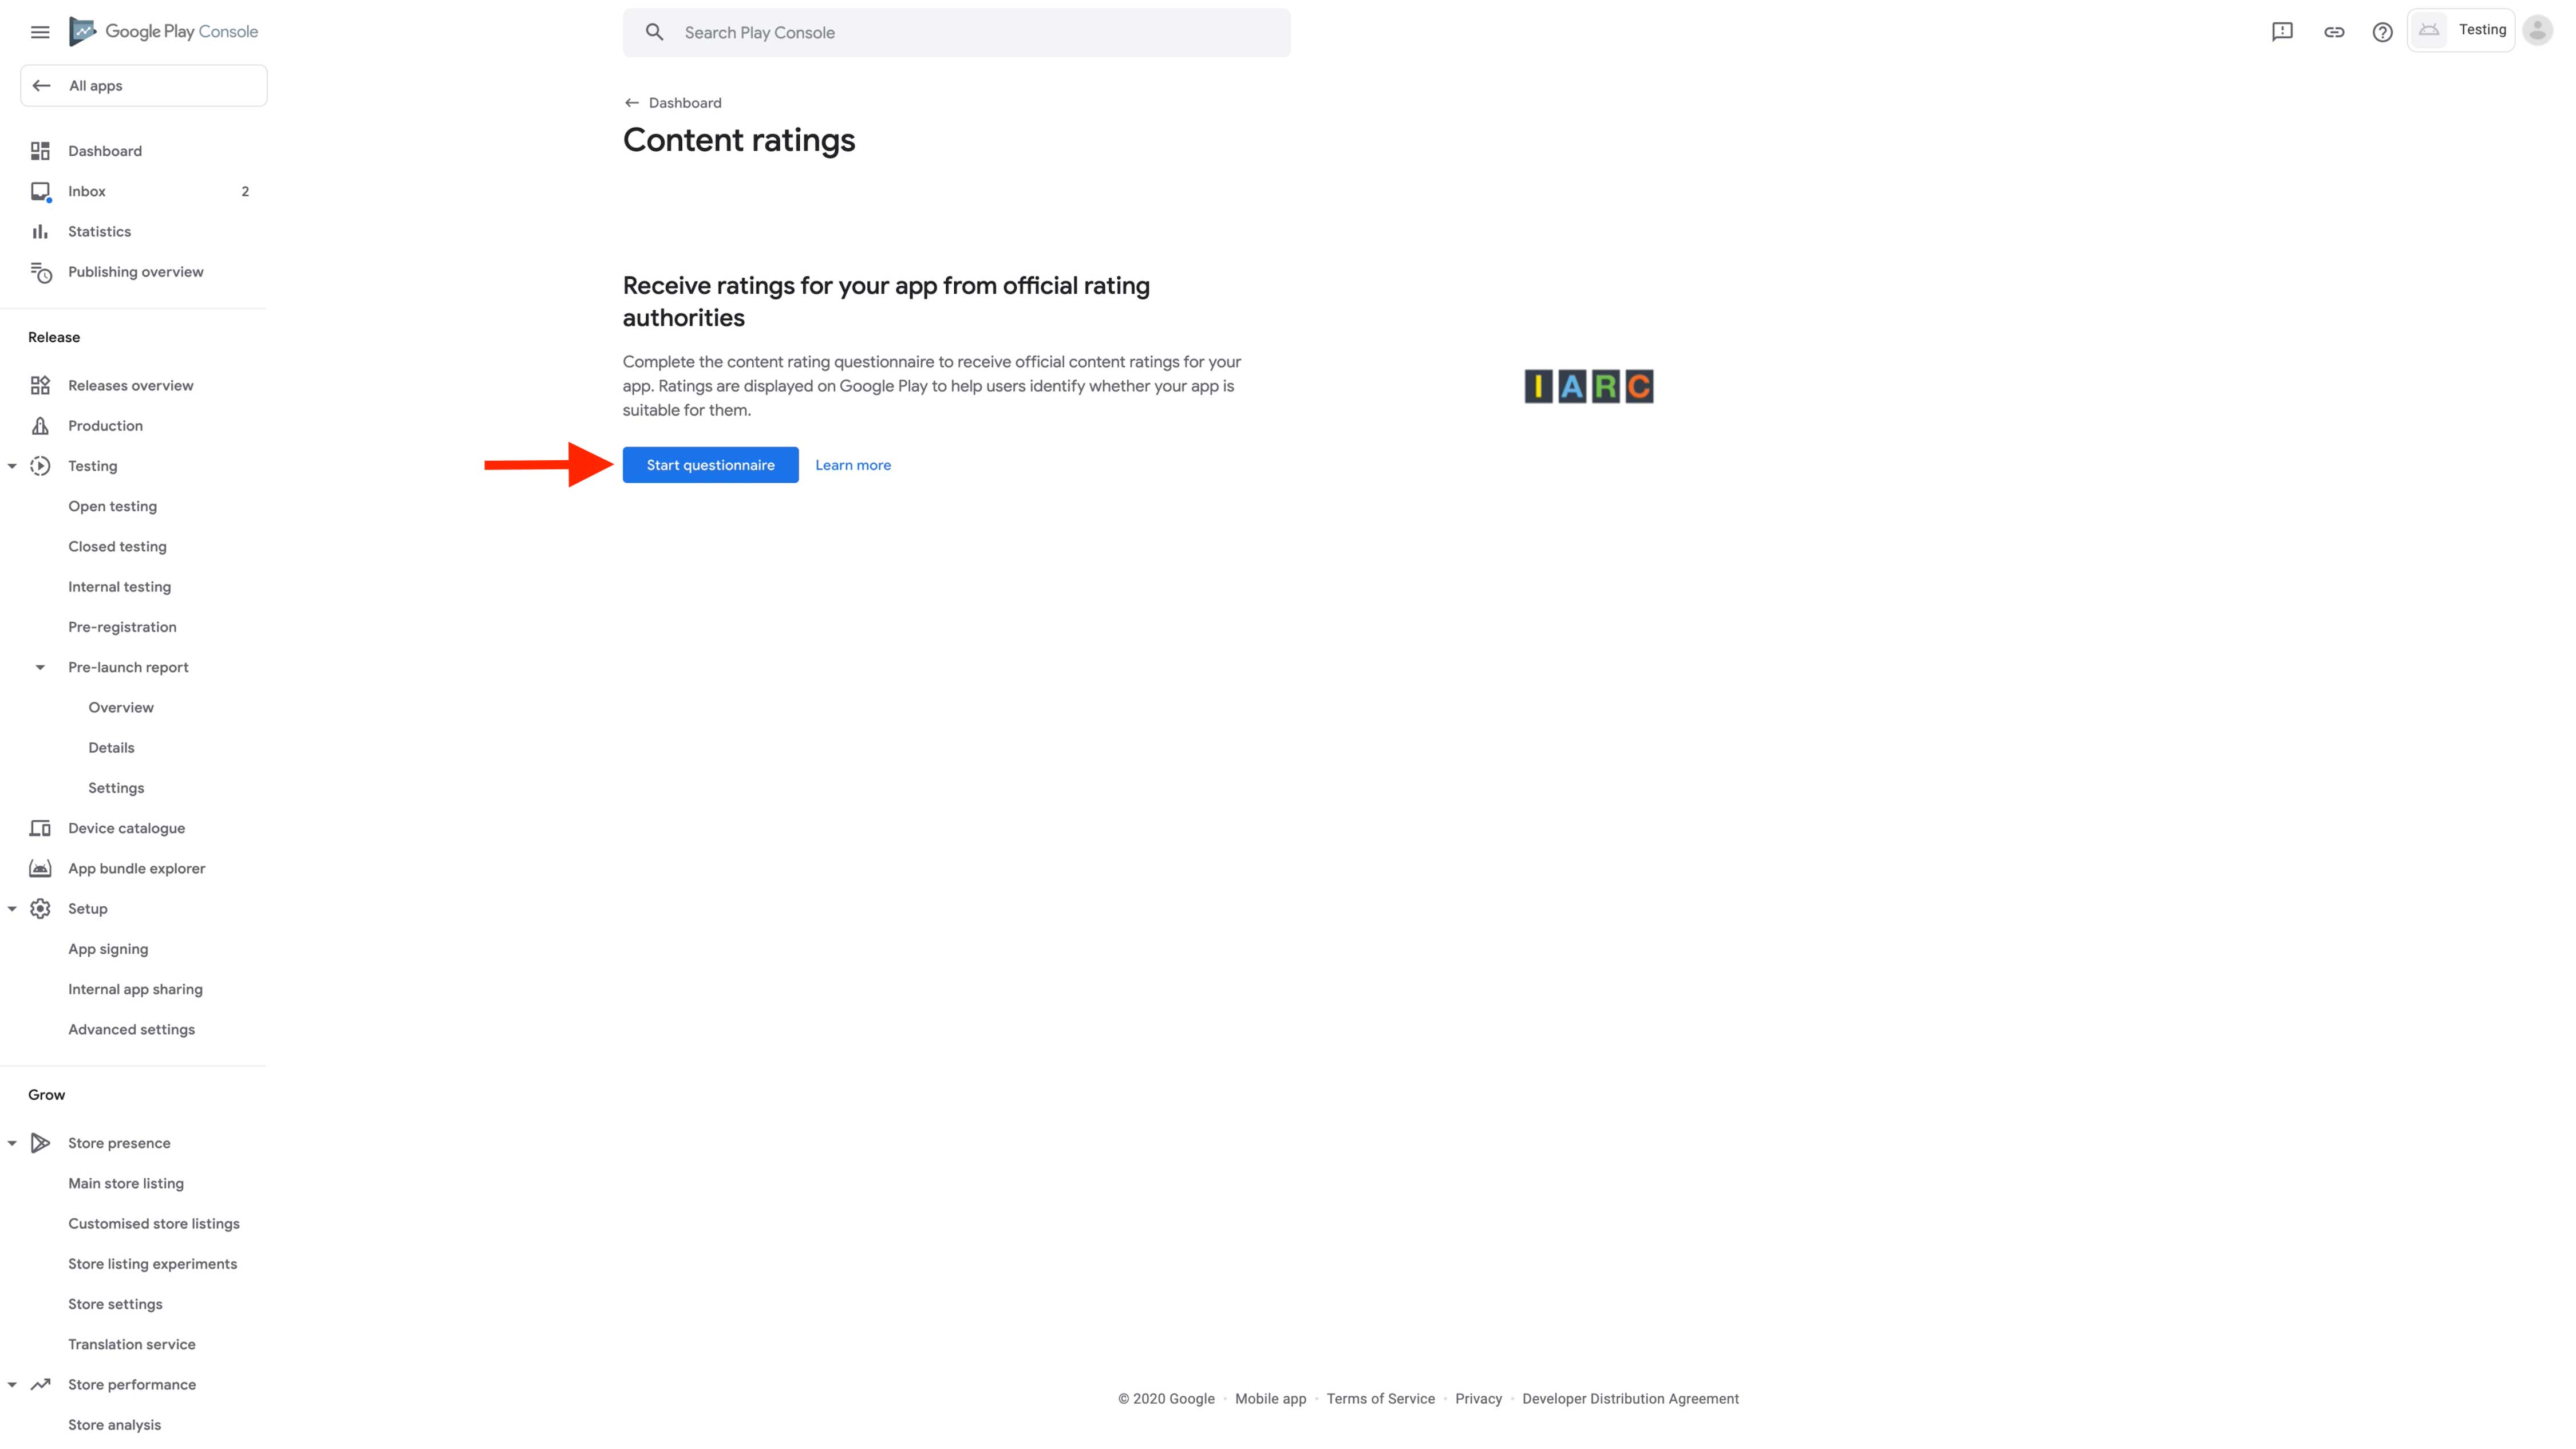
Step 15: Enter your Email address and Select the appropriate category of your app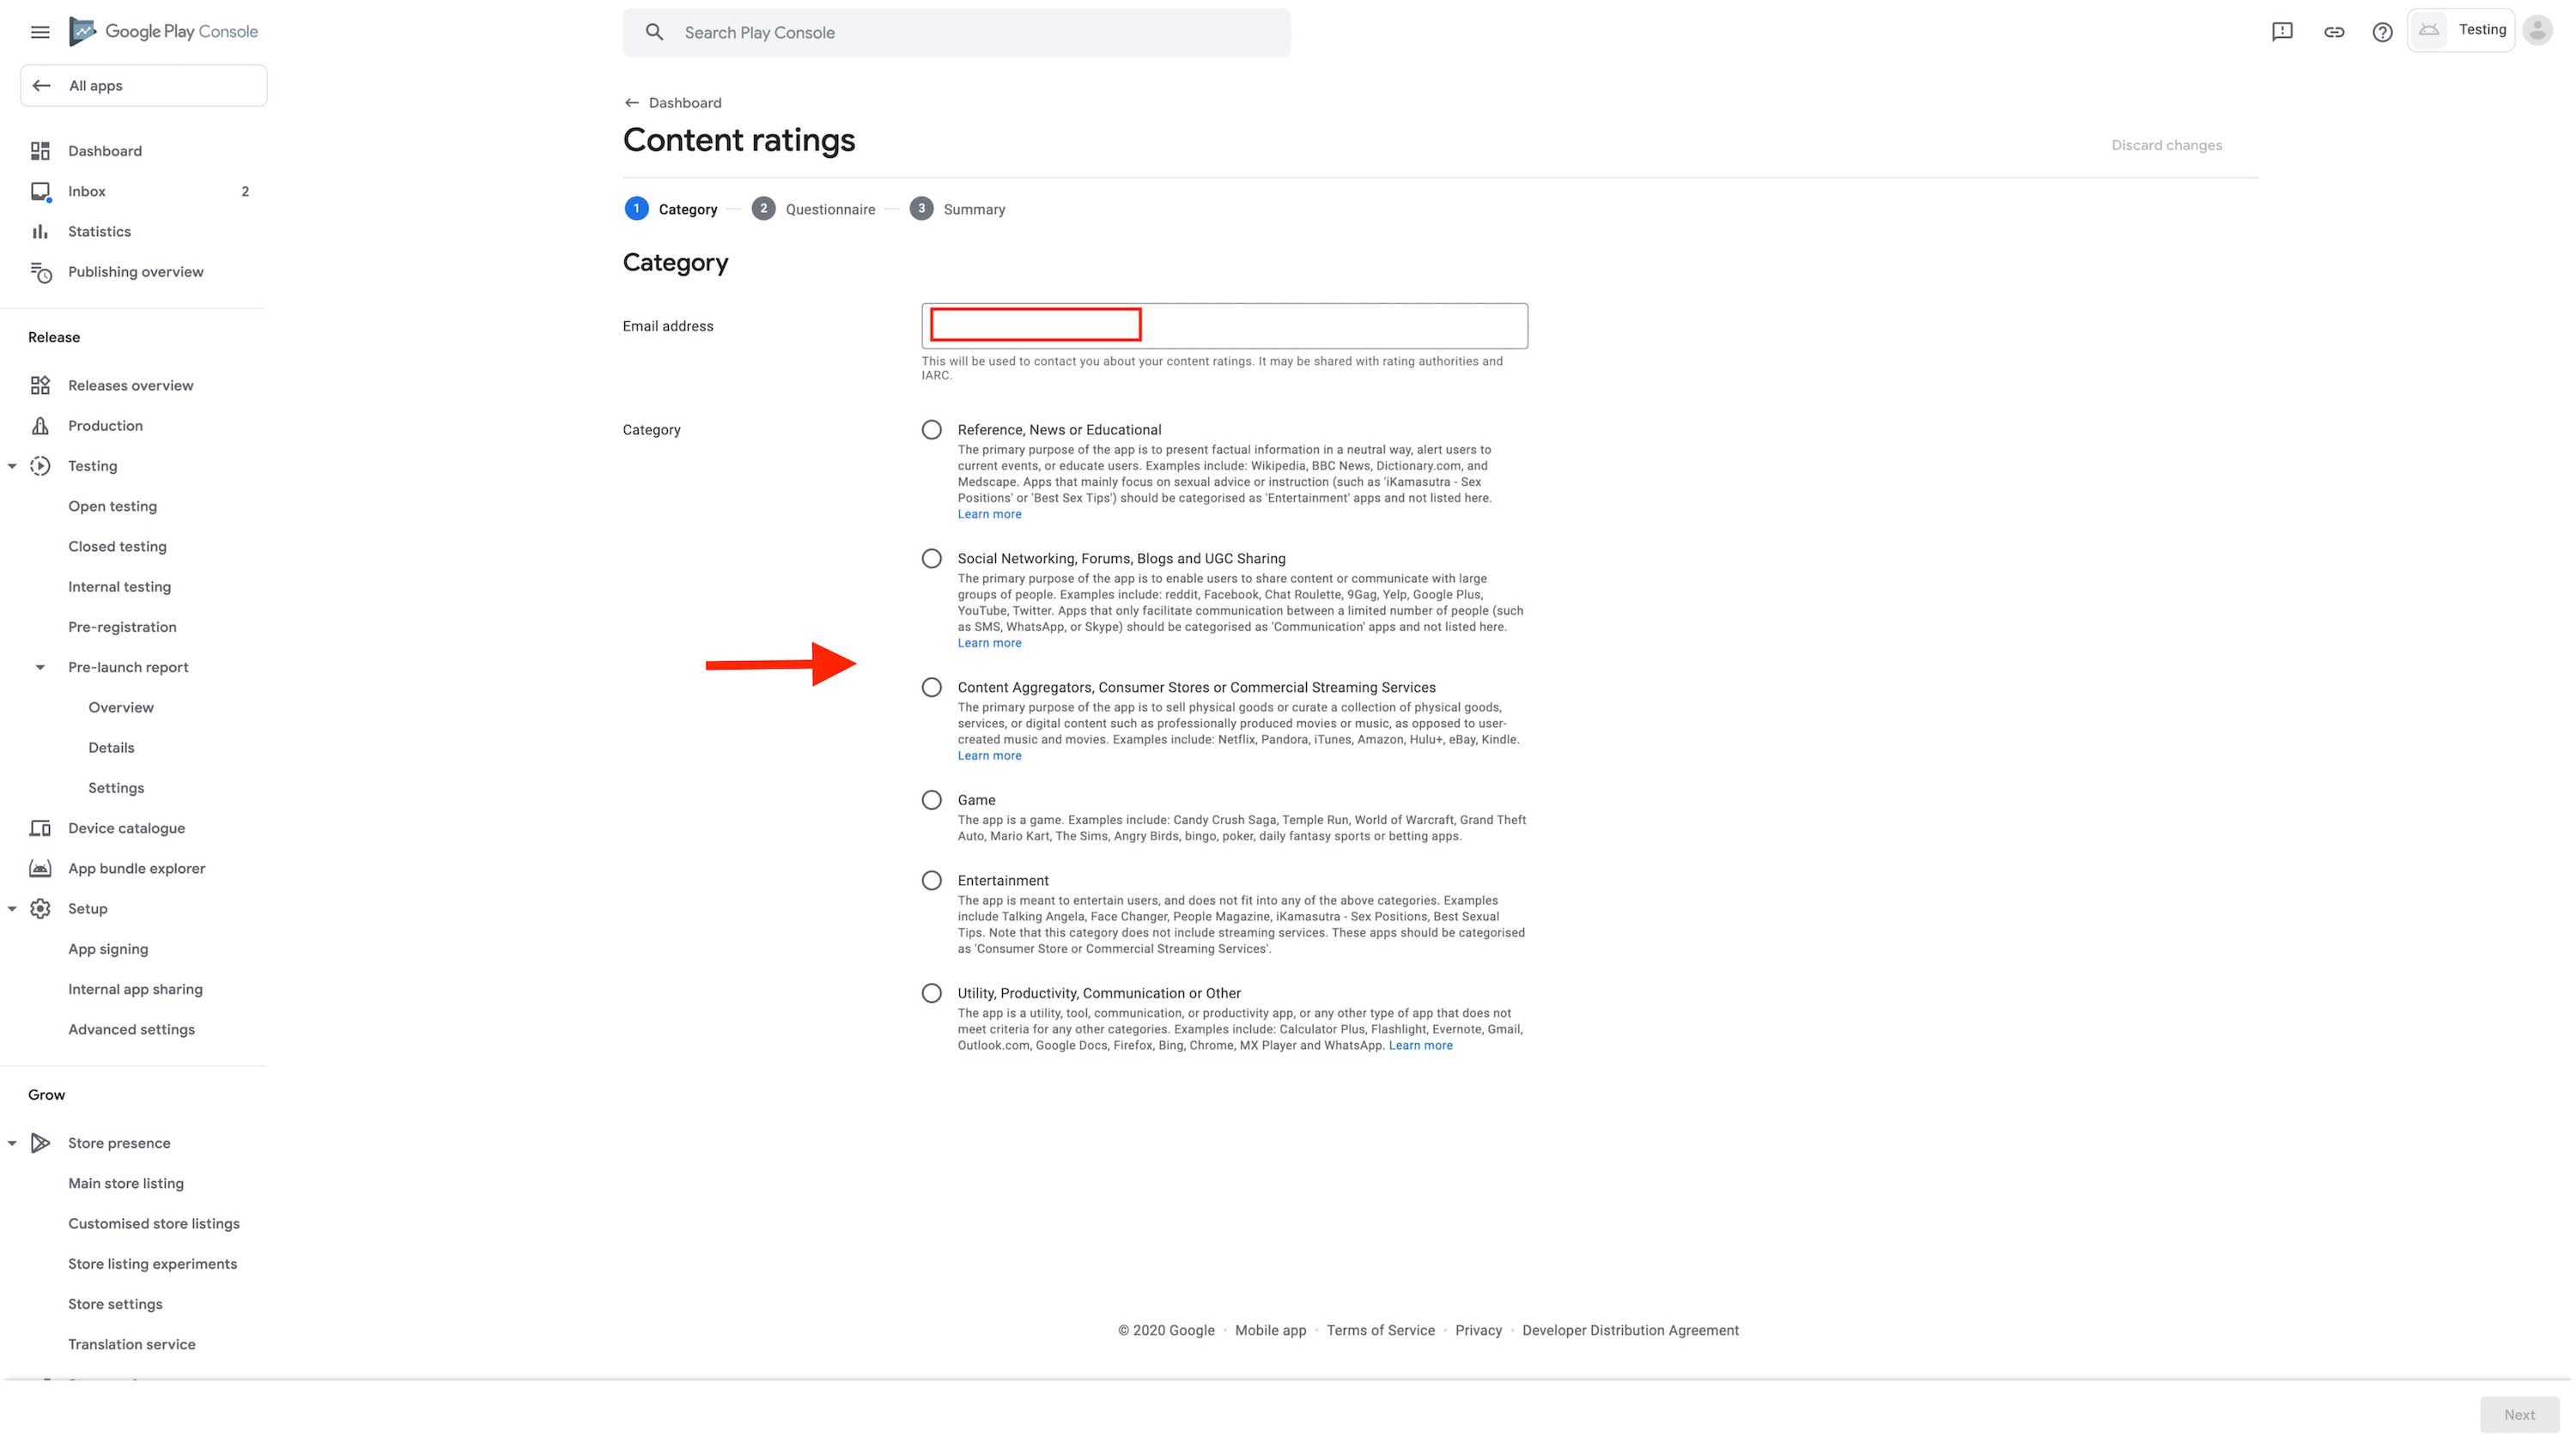
Step 16: Click on Next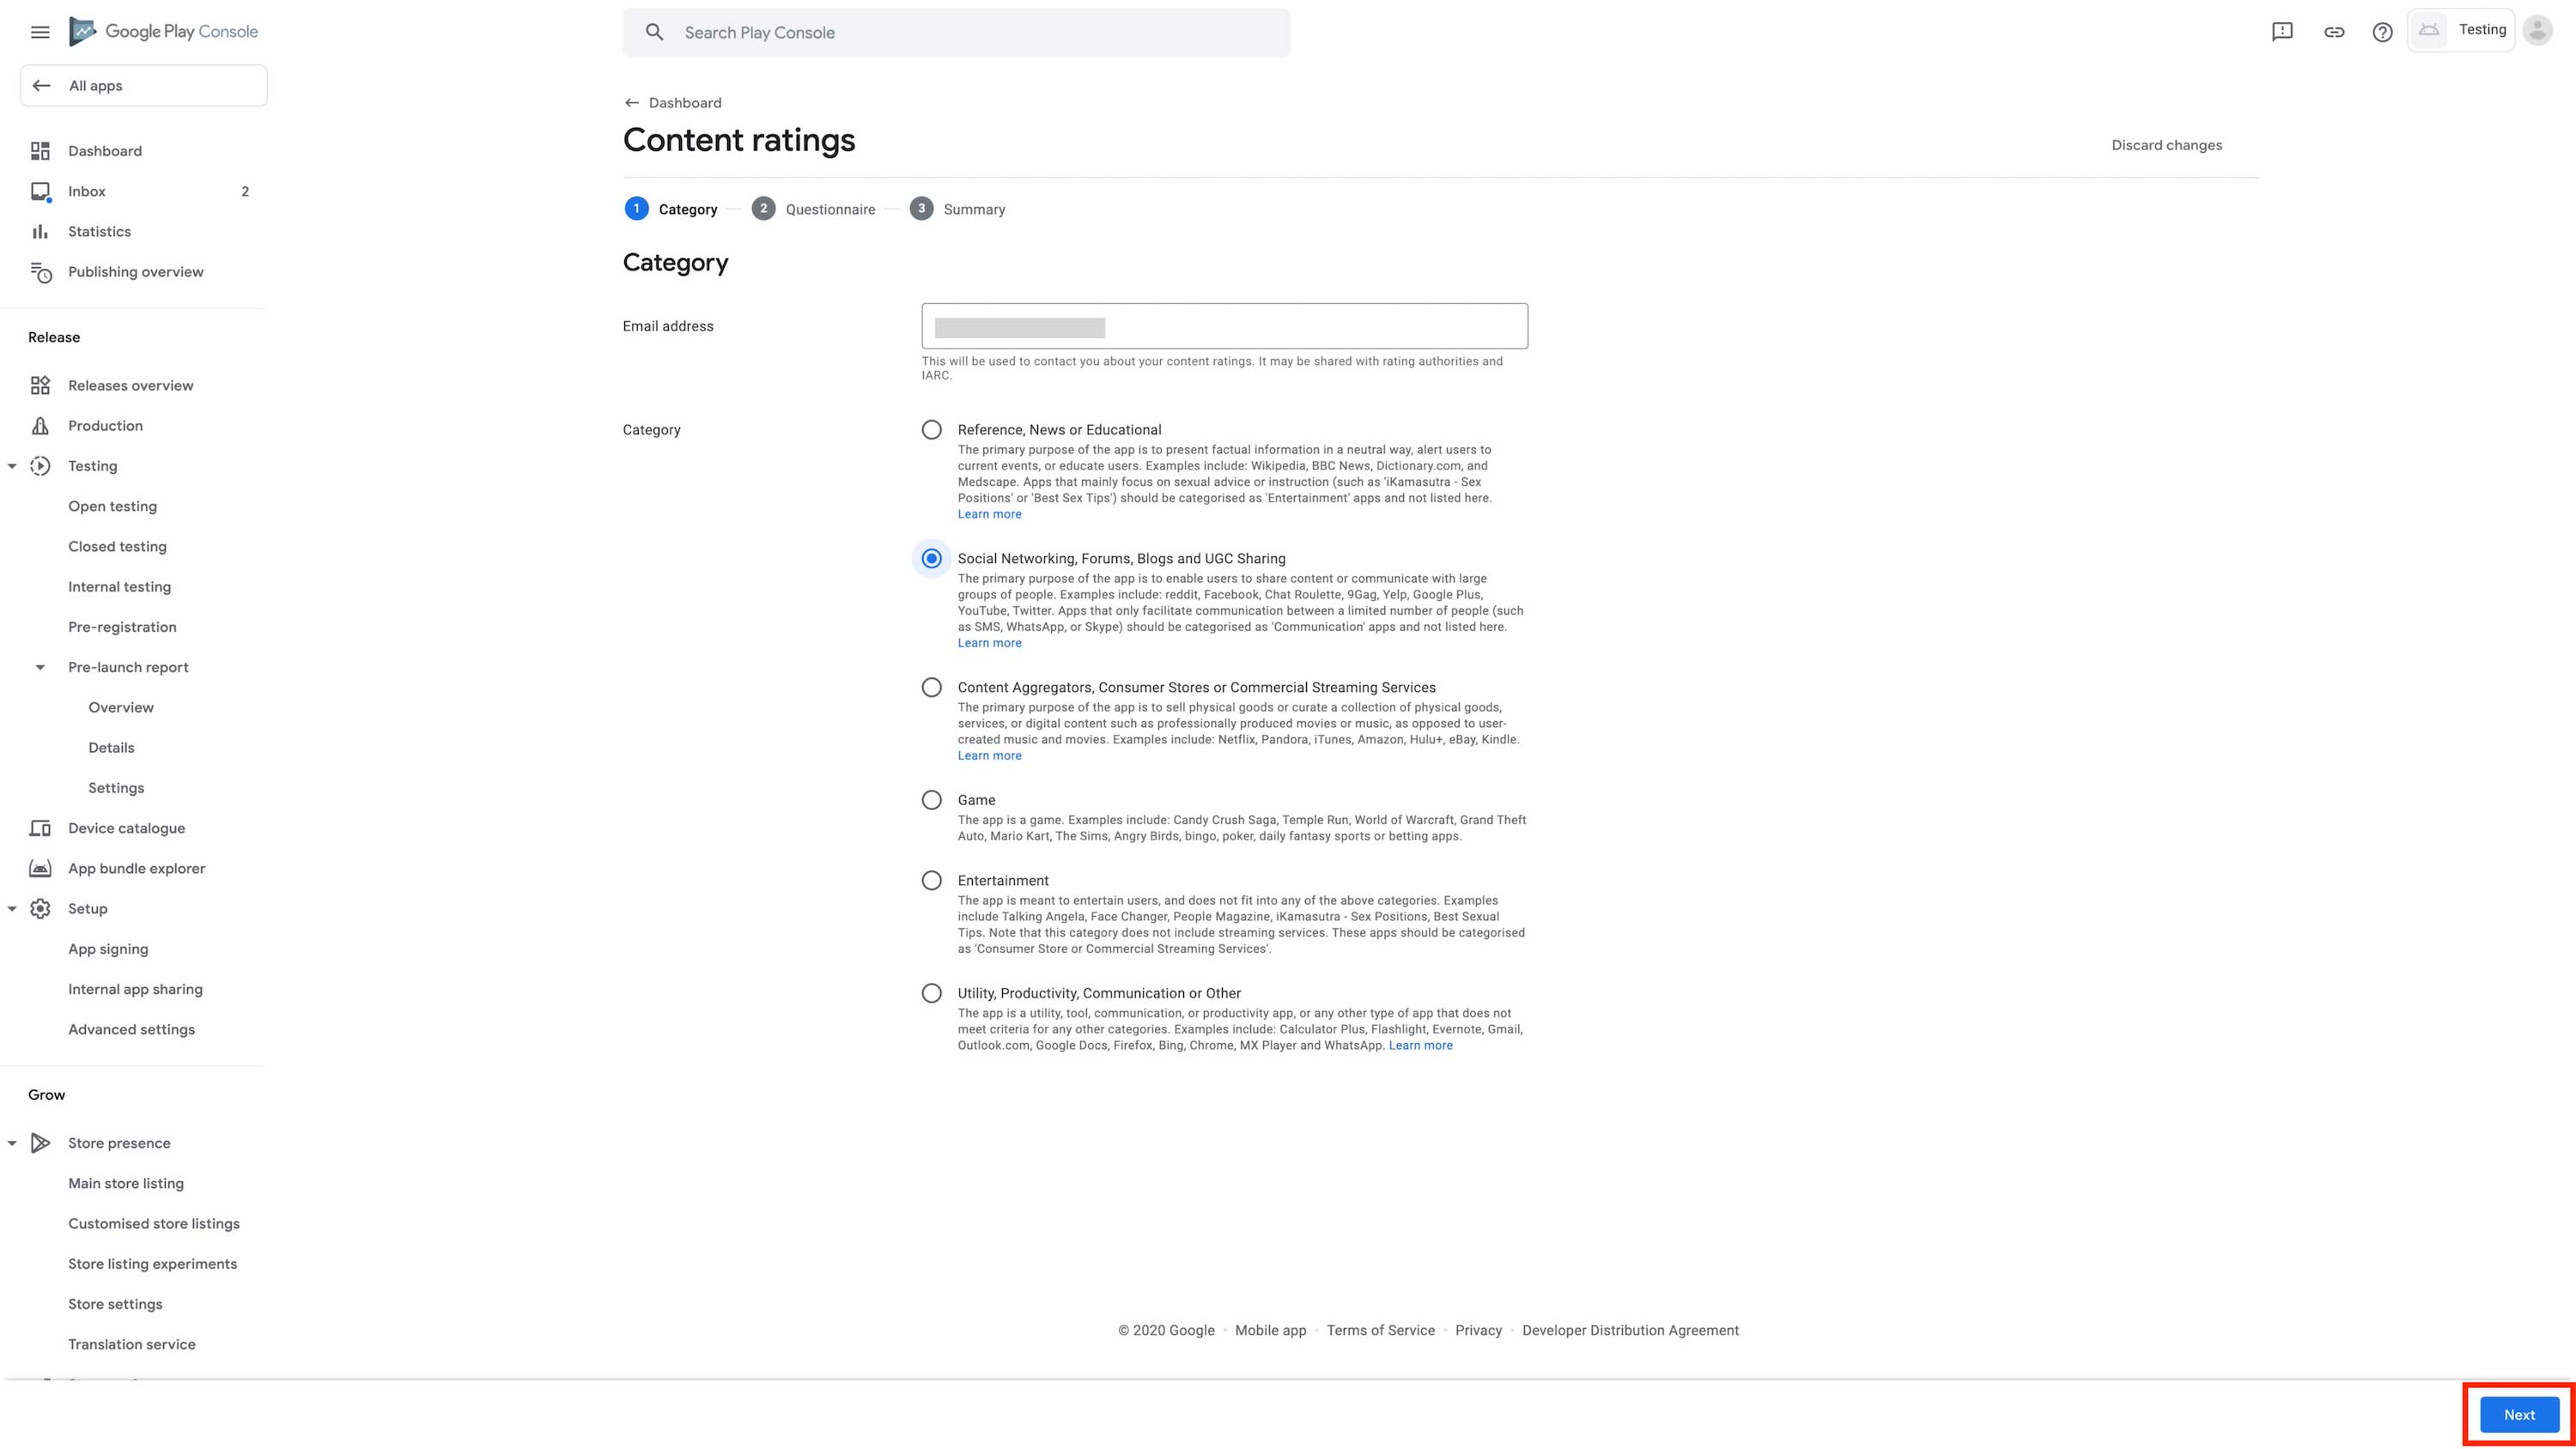
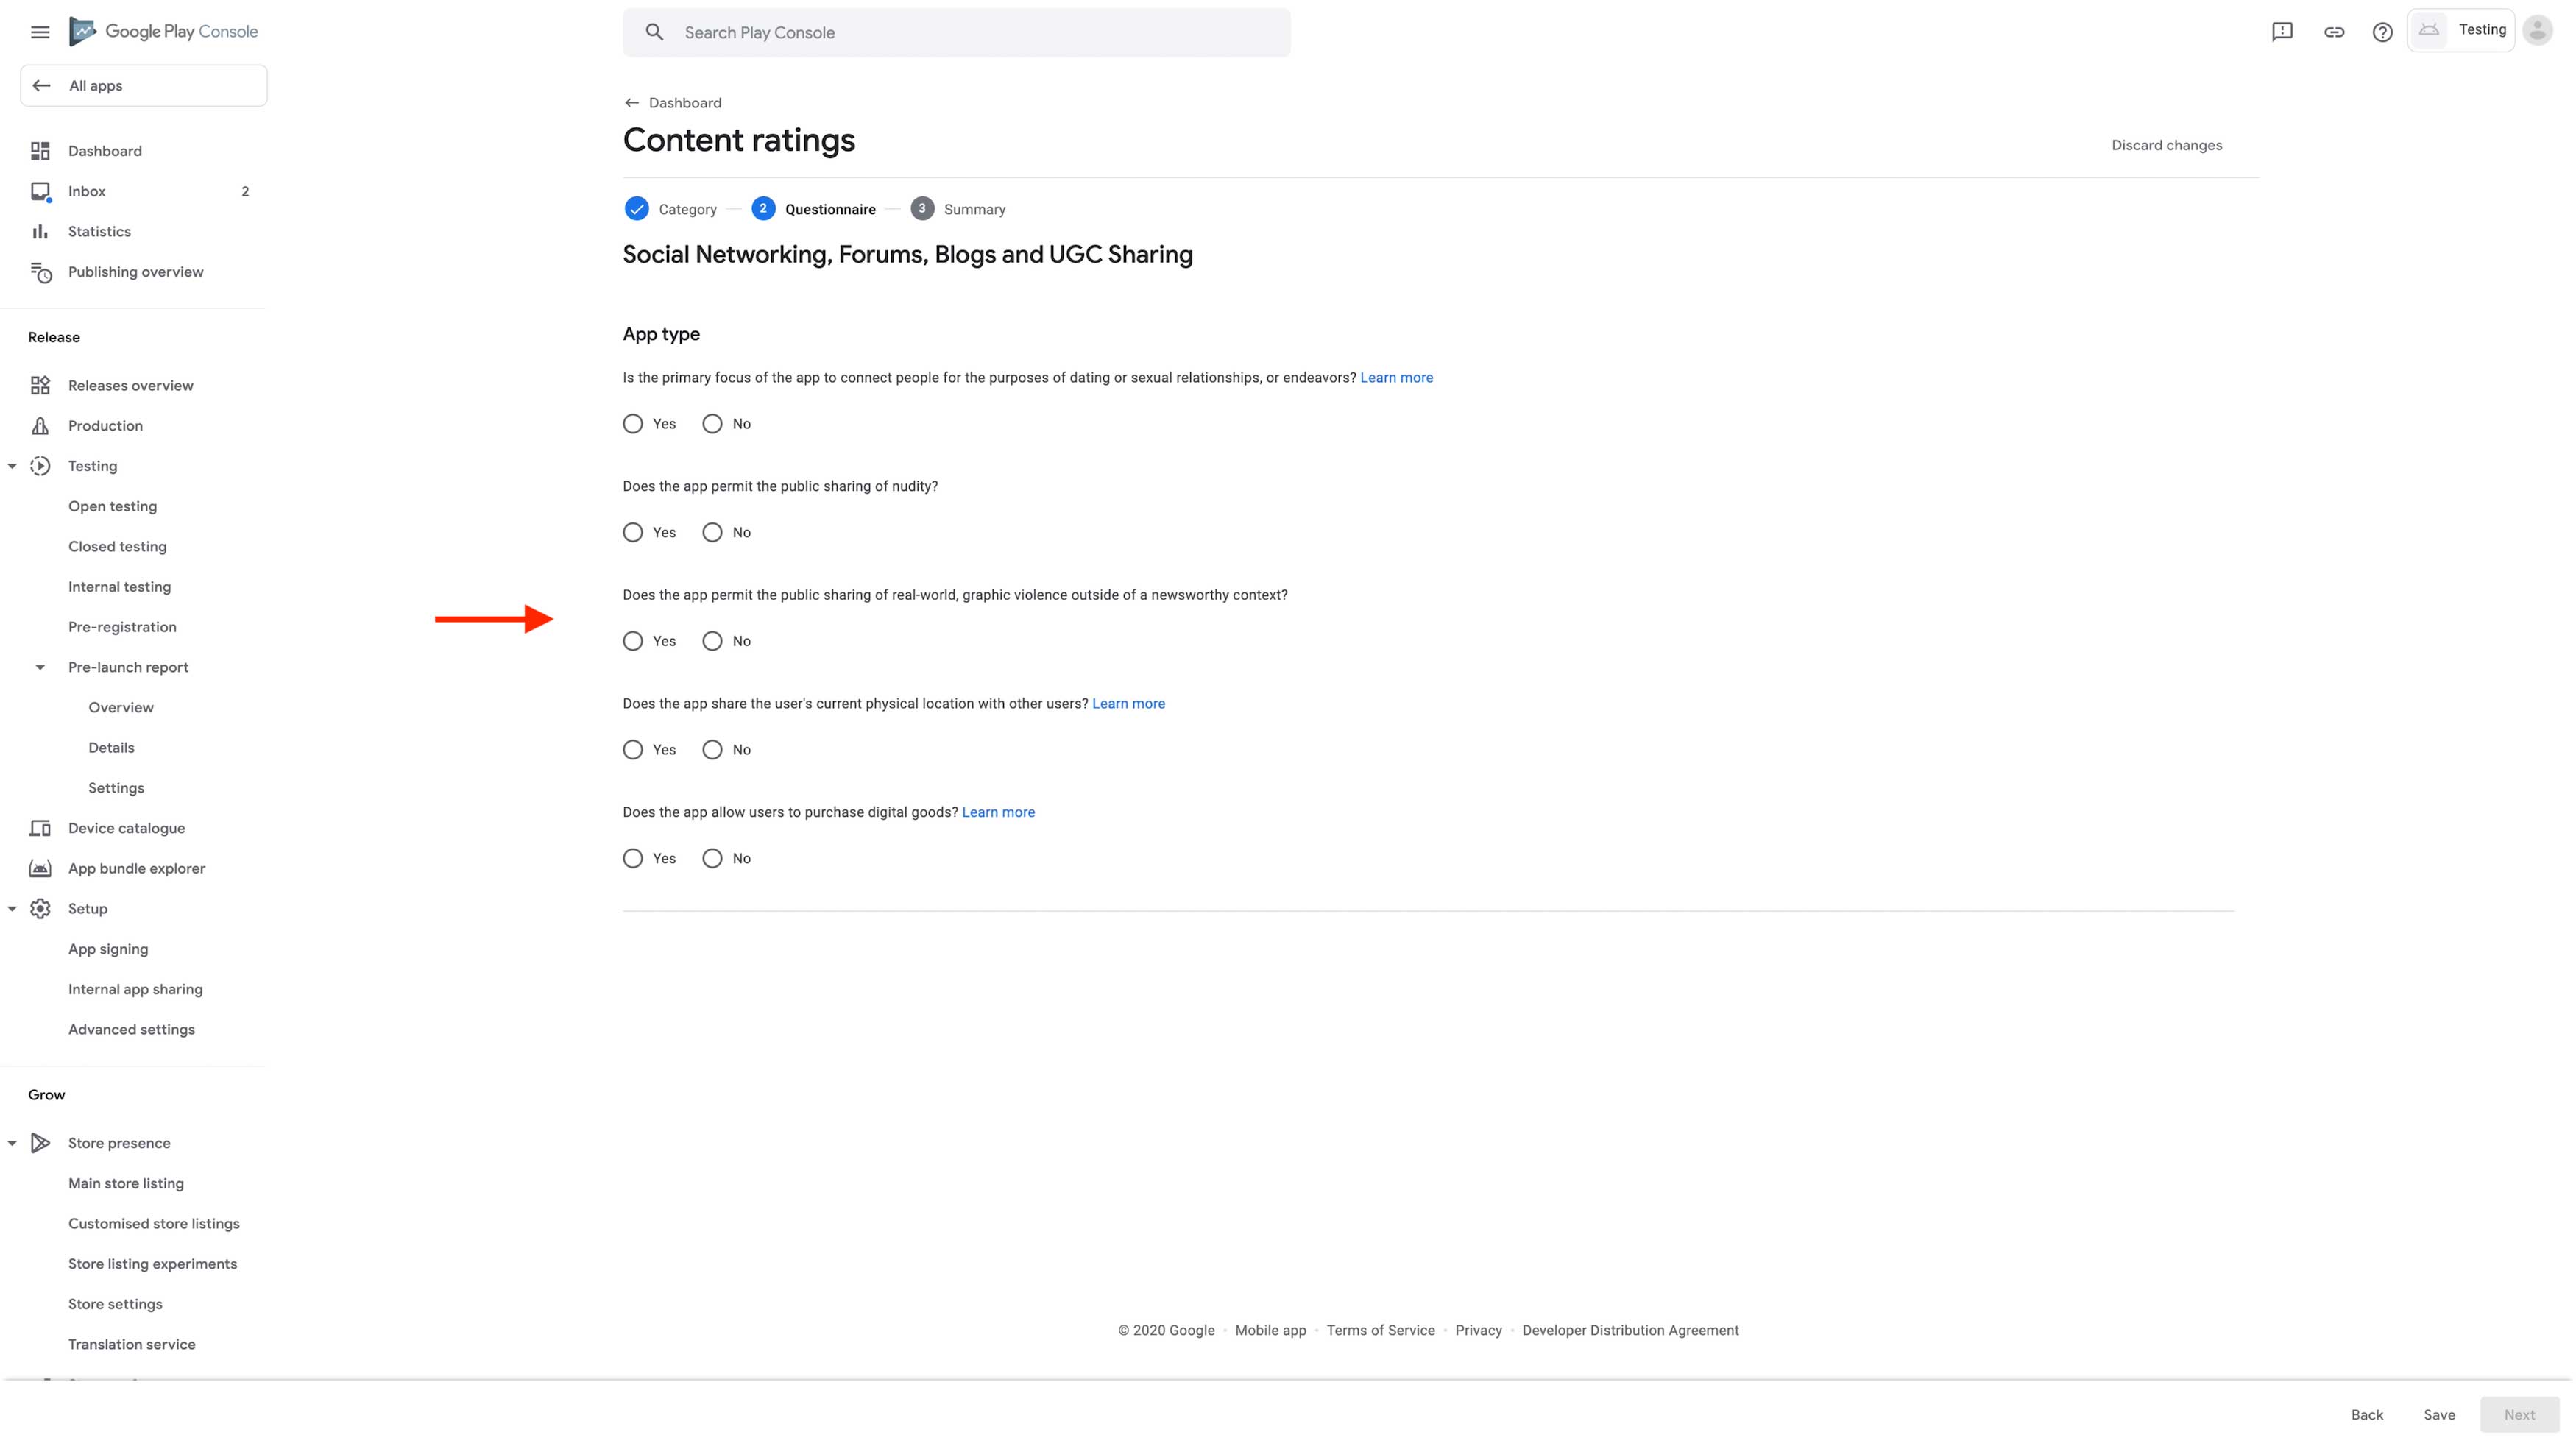
Step 17: Once you select the category, a few questions related to your app type will appear.Complete the Questionnaire by selecting Yes or No
Step 18: Click on Save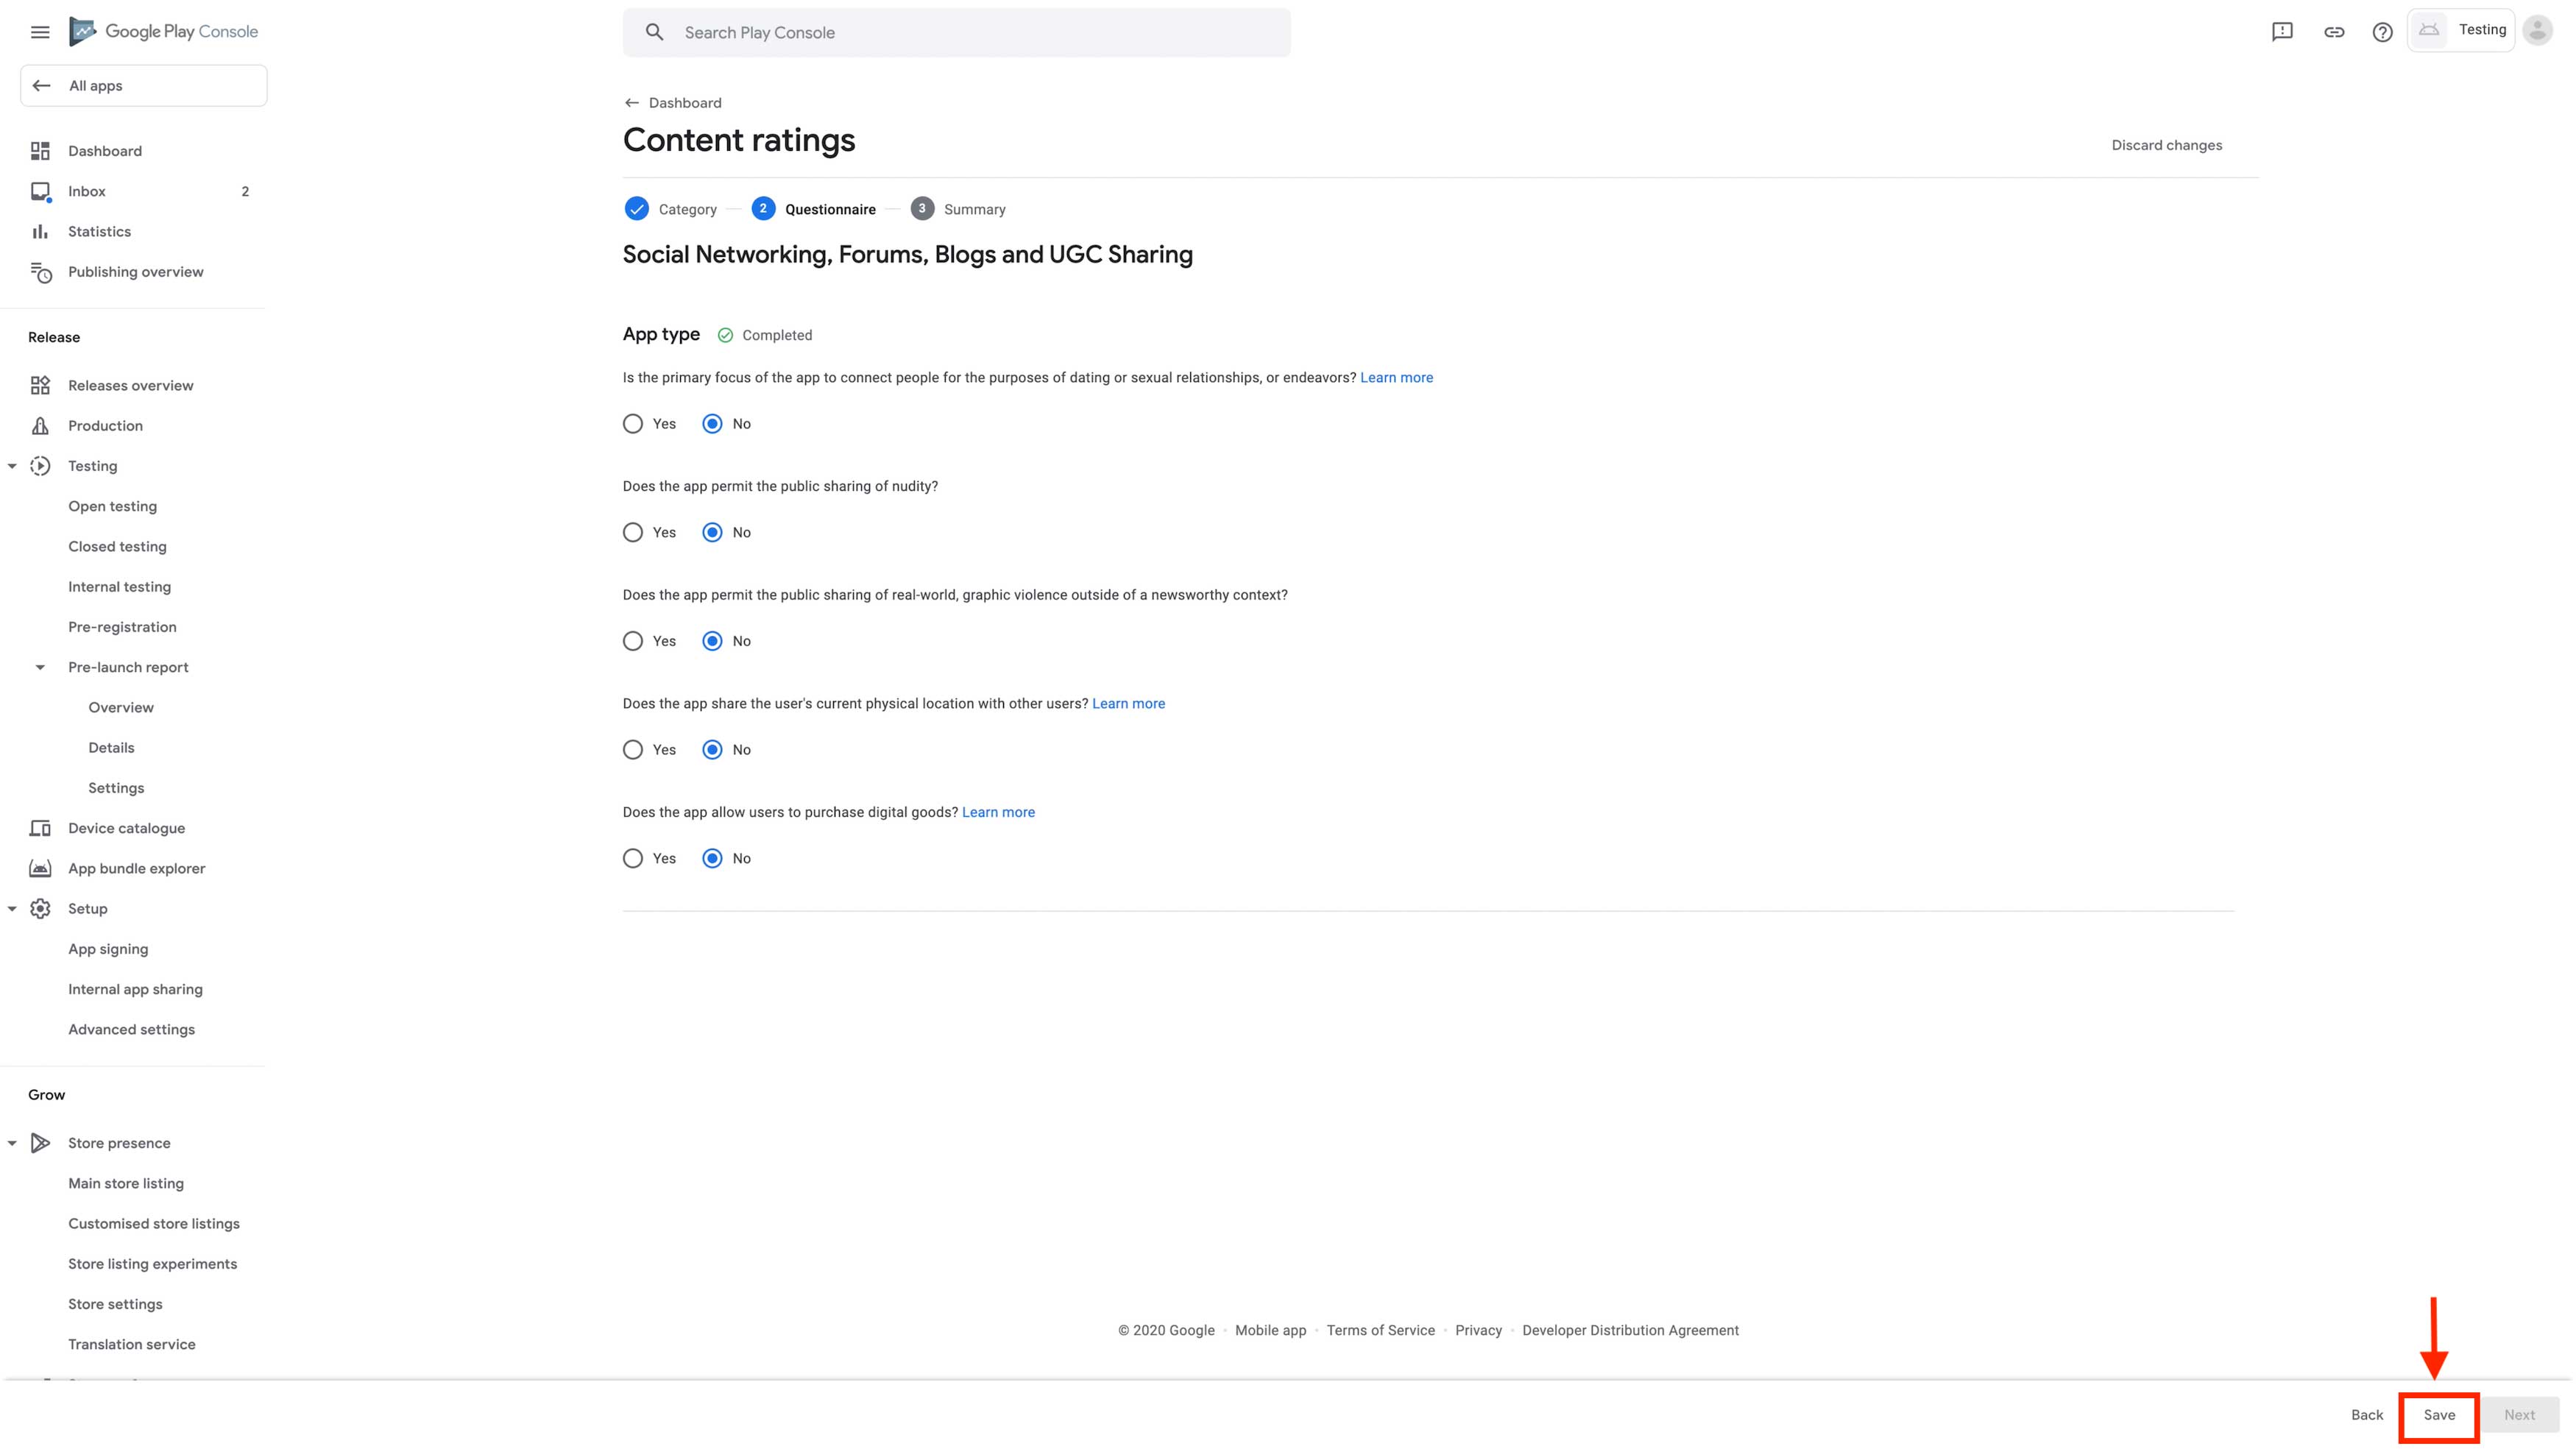
Step 19: Click on Next 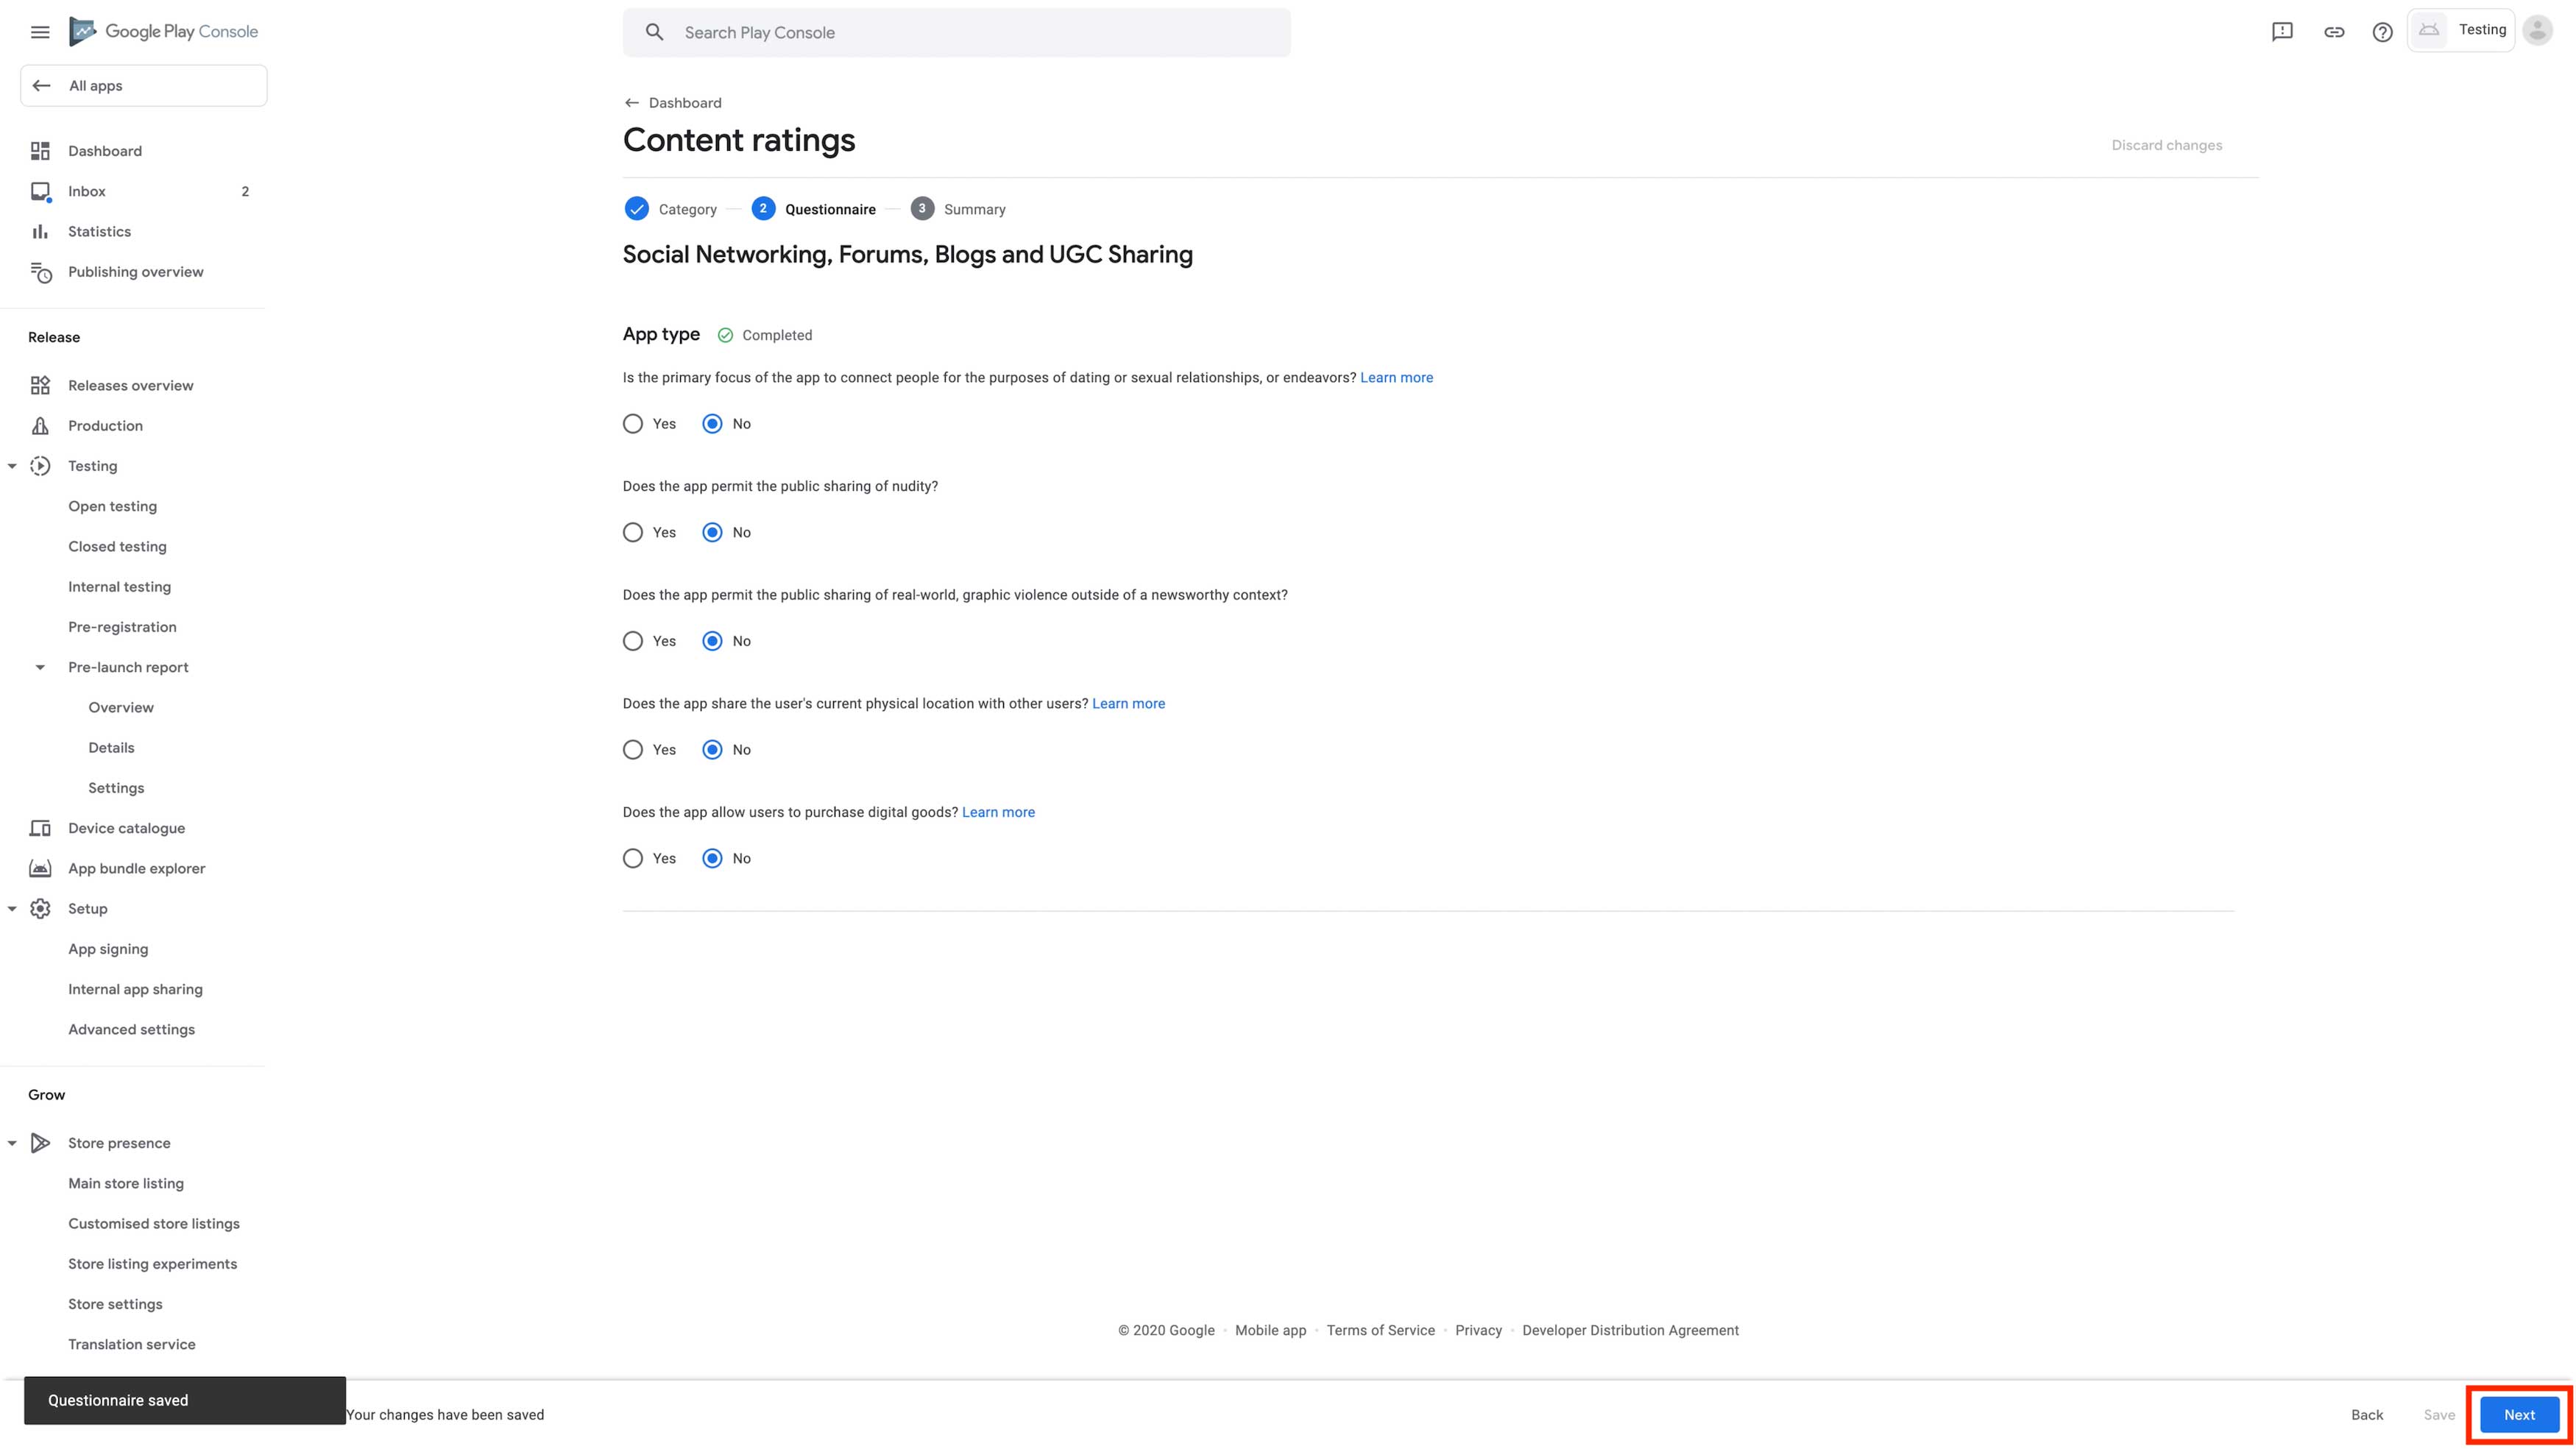
Step 20: You will be redirected to the Rating summary section , Check your calculated rating and click on Submit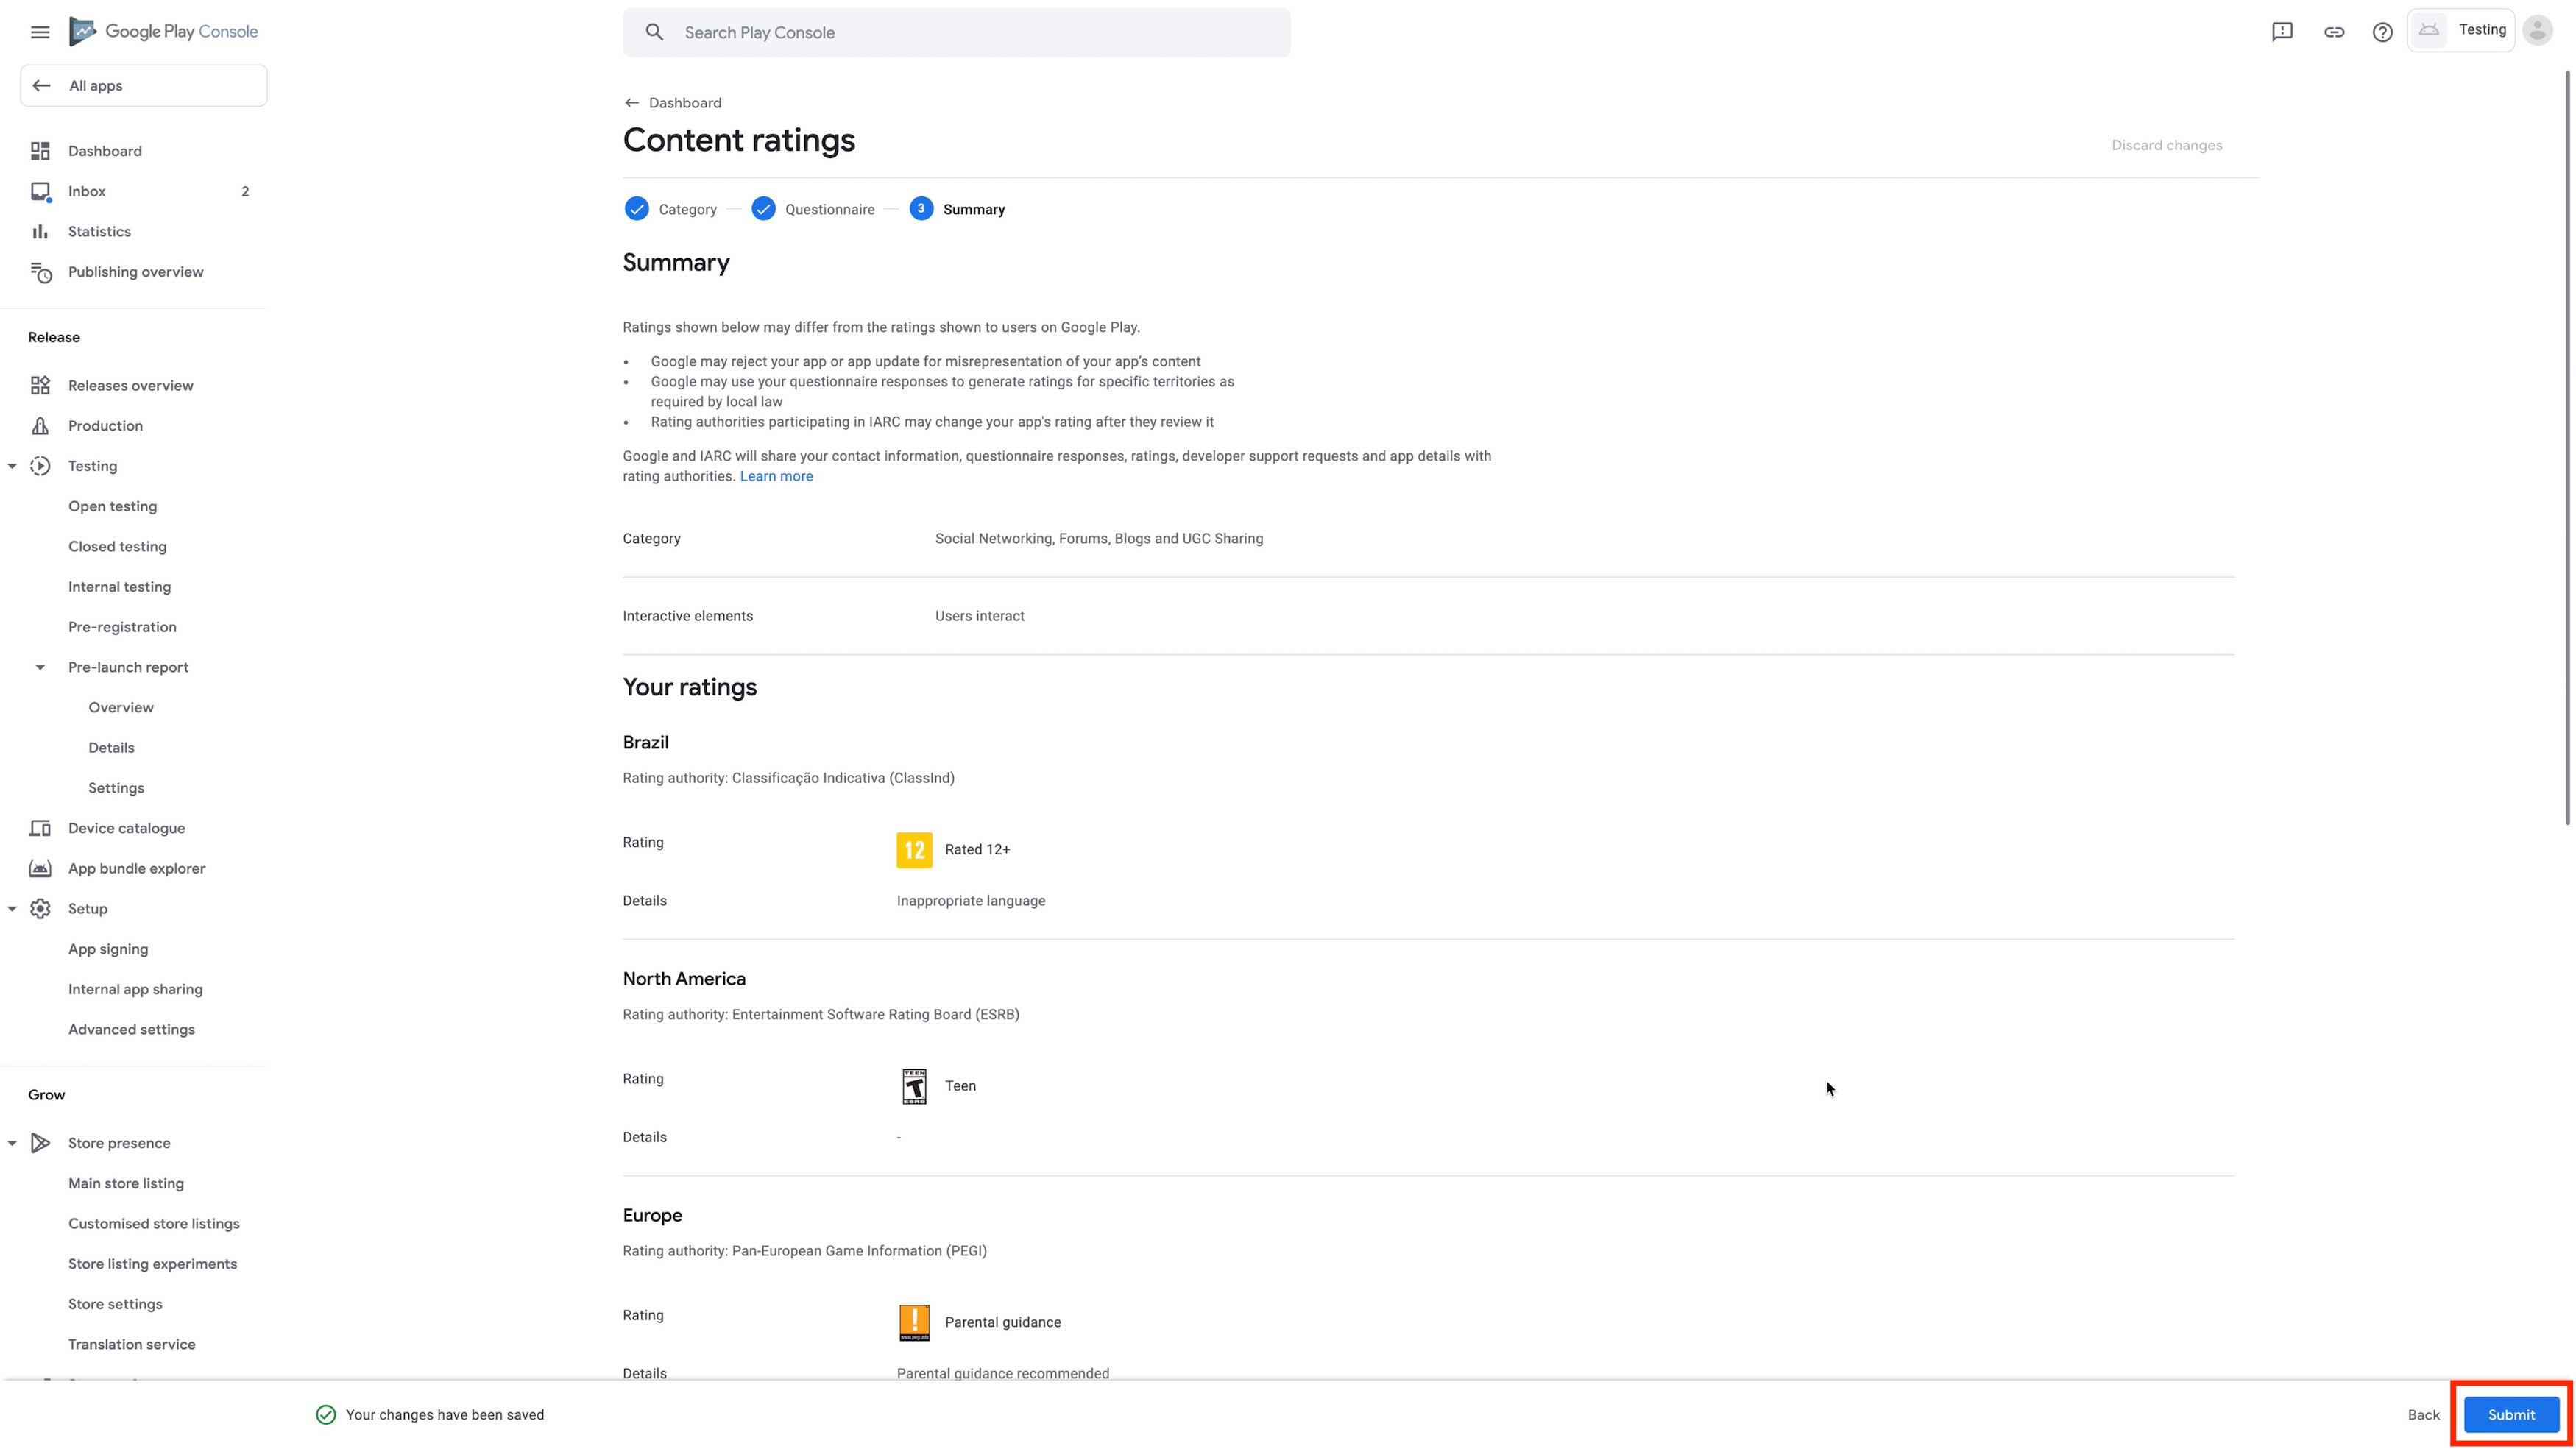
Step 21: Click on App Content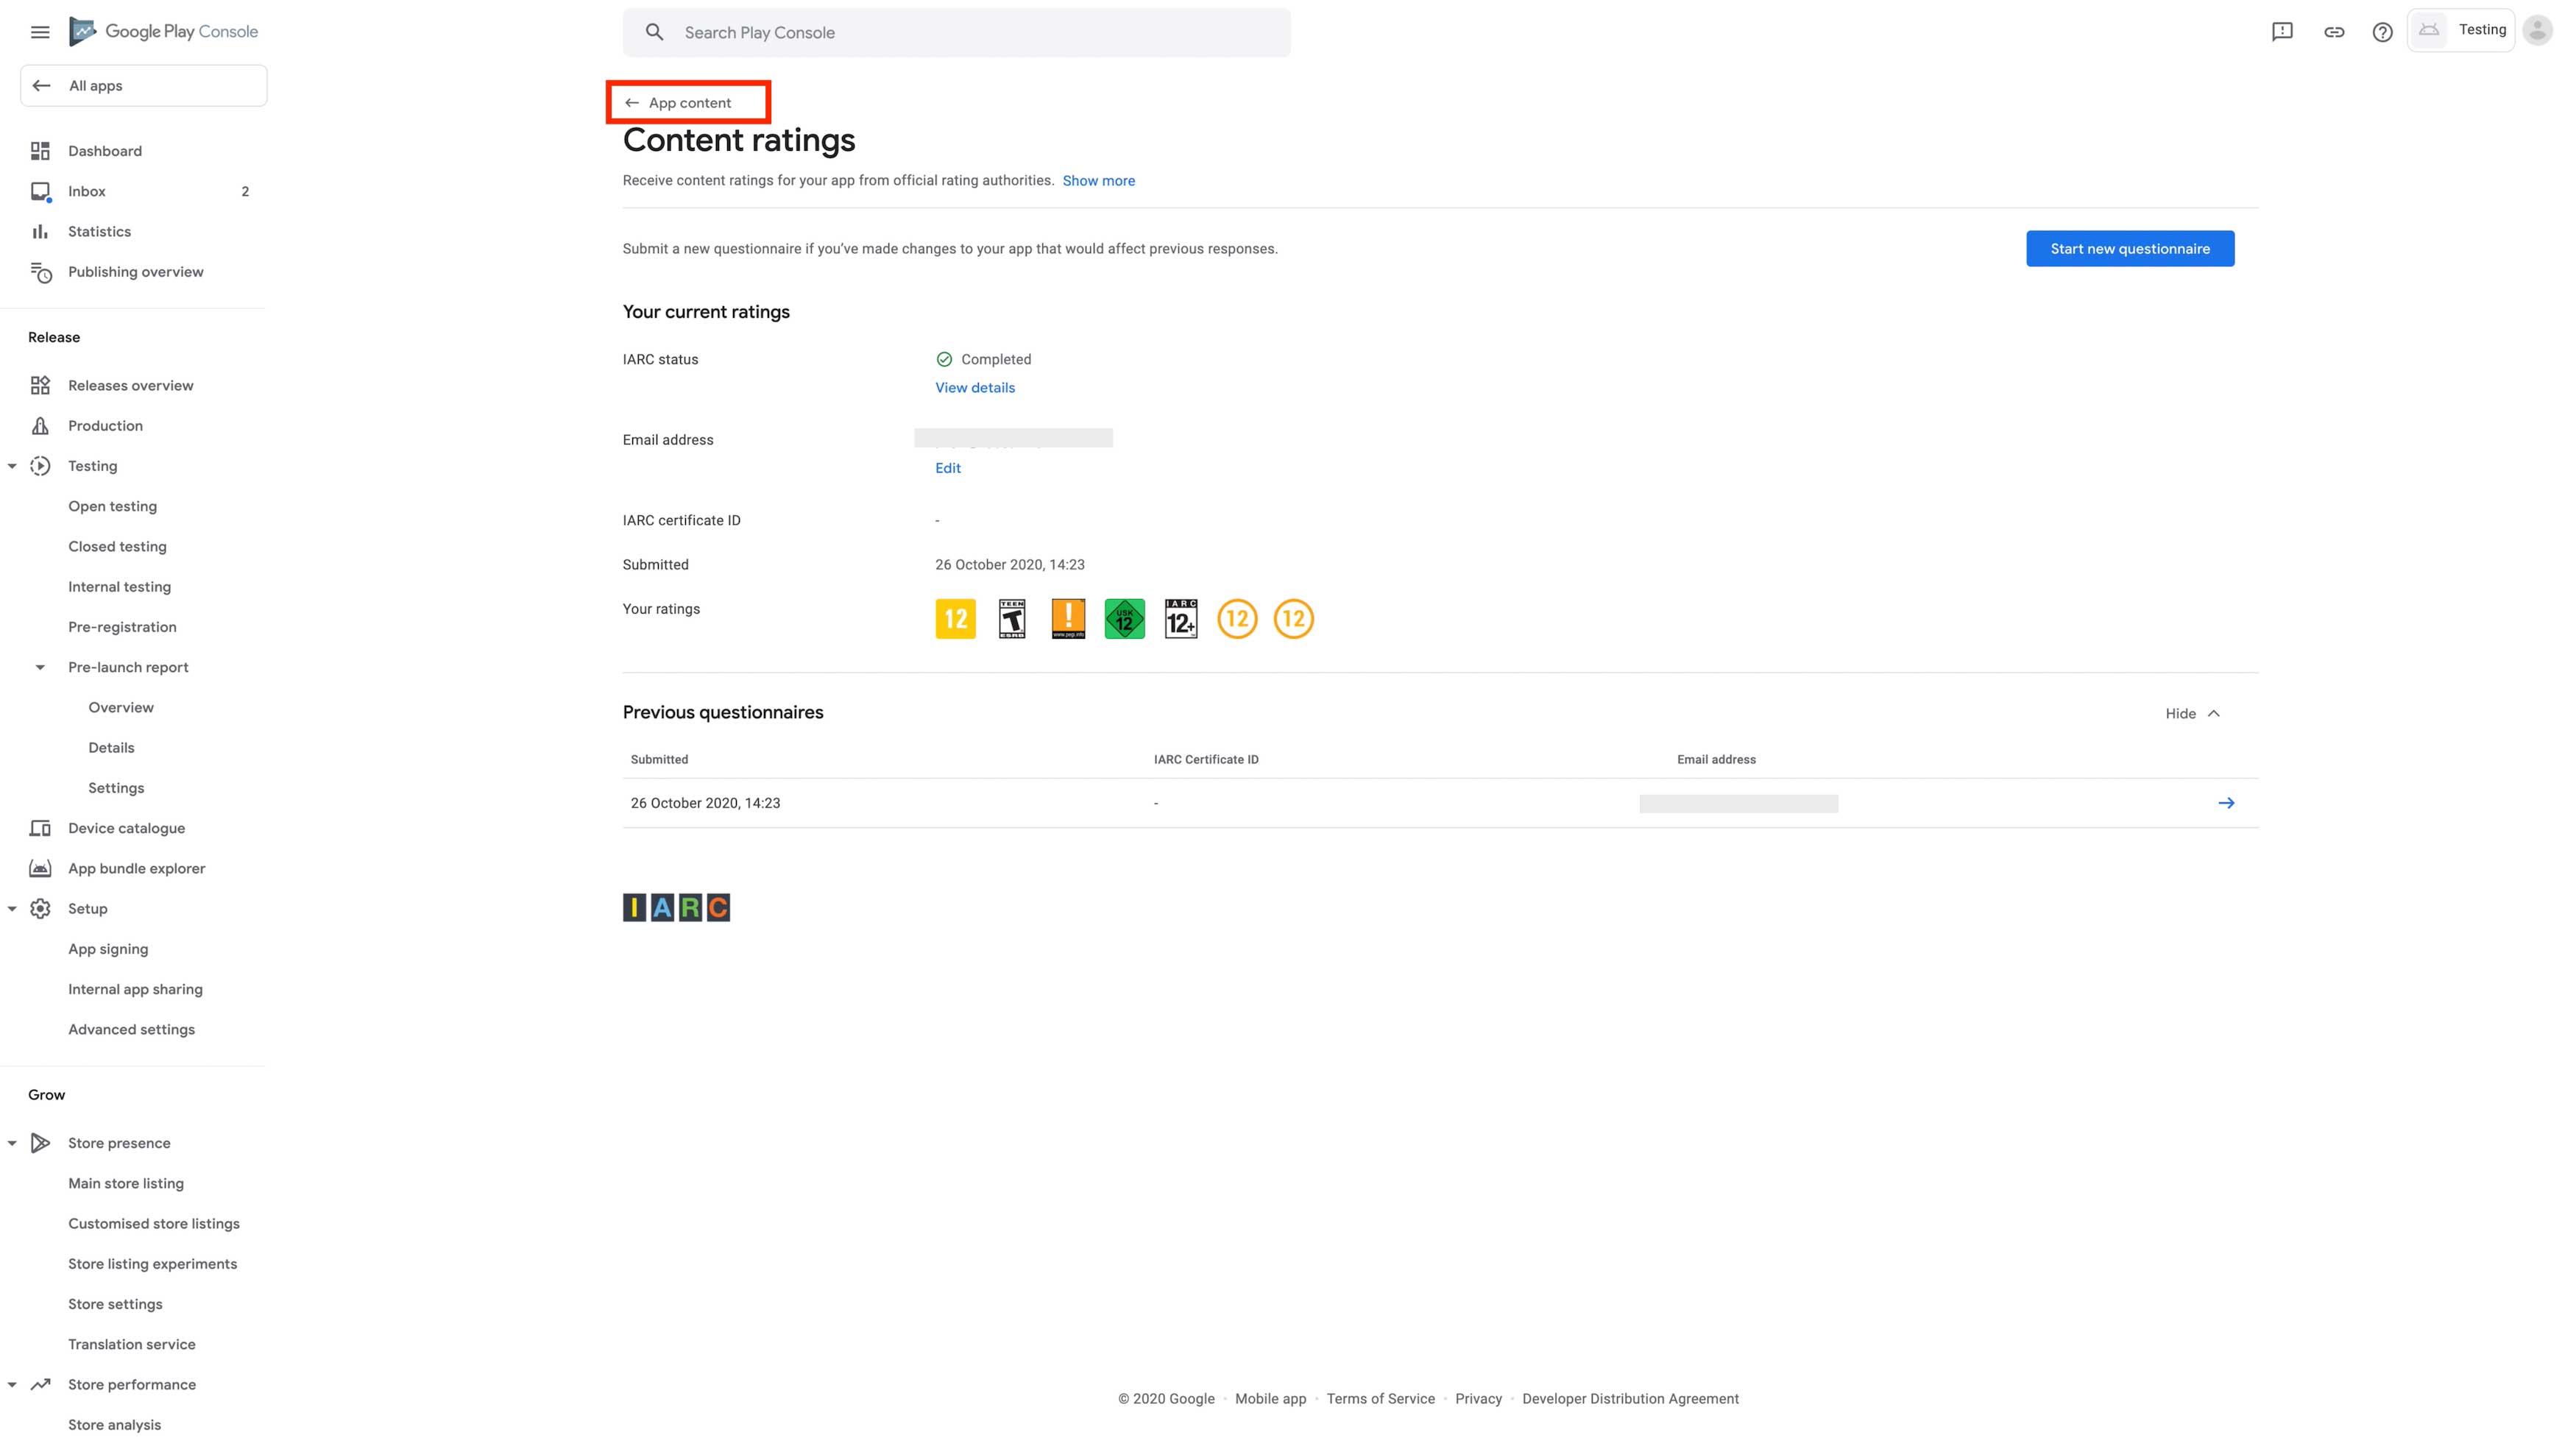
Step 22: Click on Start to add a Privacy Policy.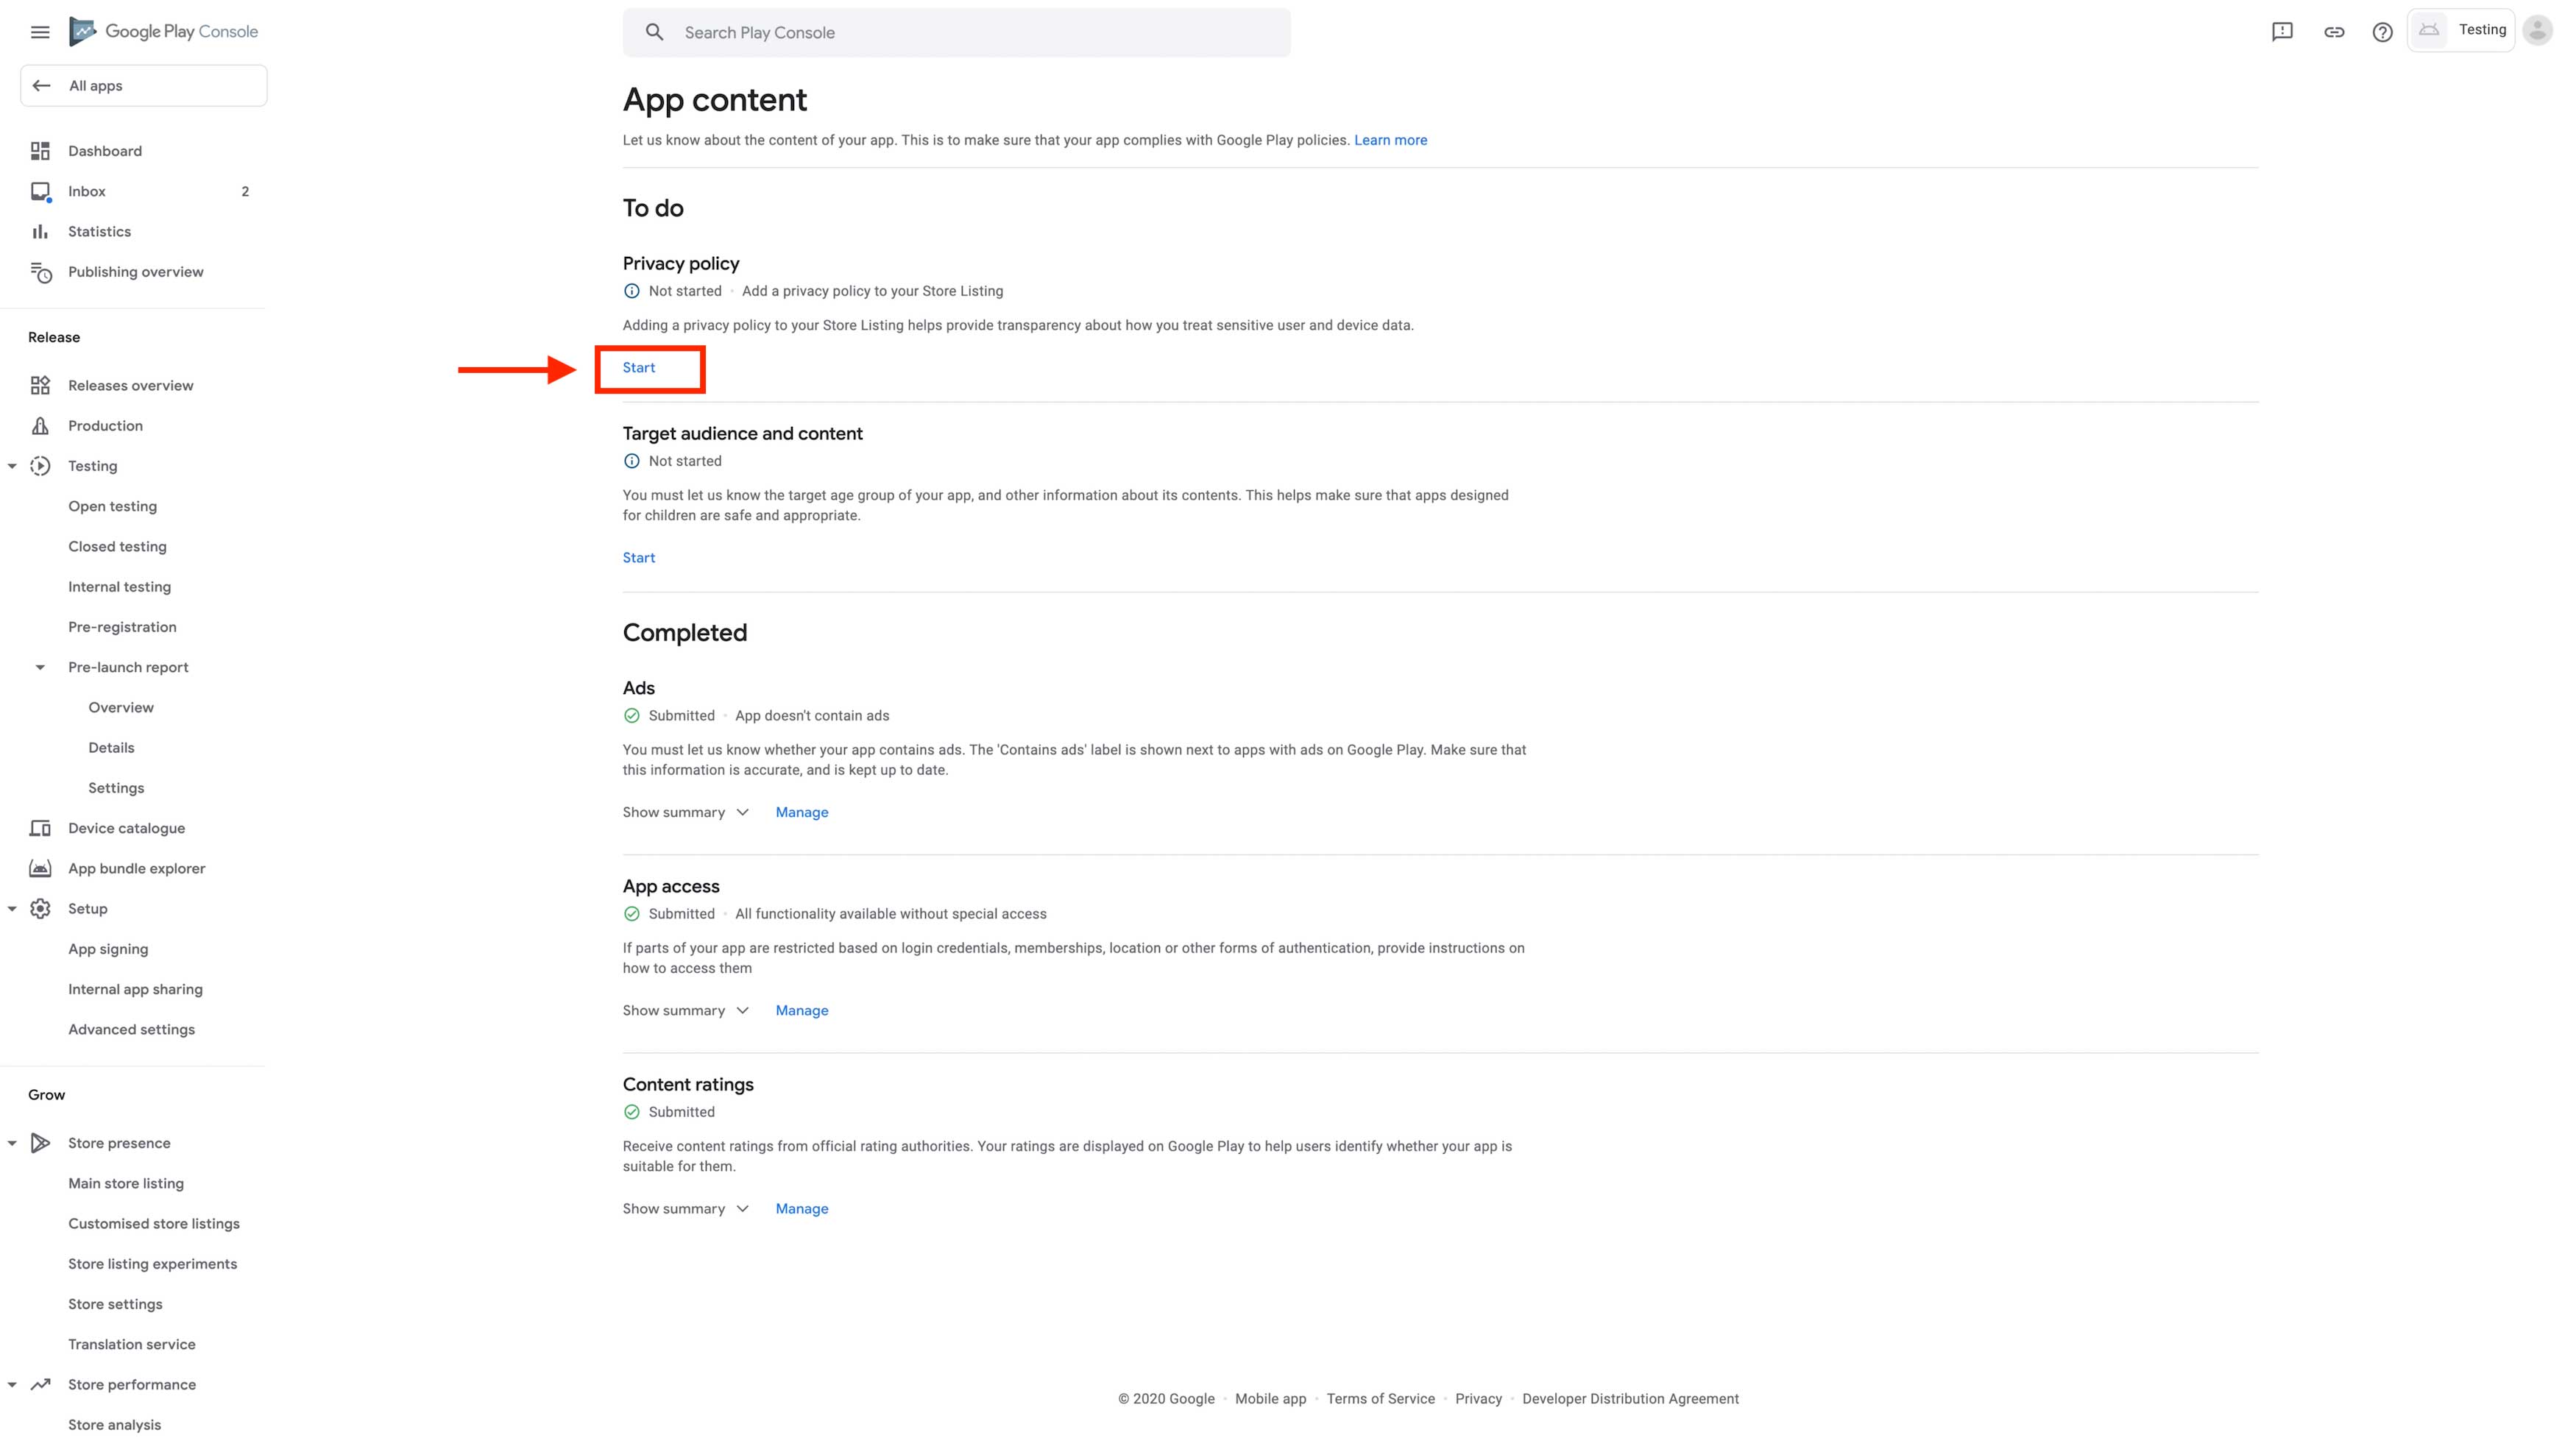
Step 23: Enter a valid privacy policy URL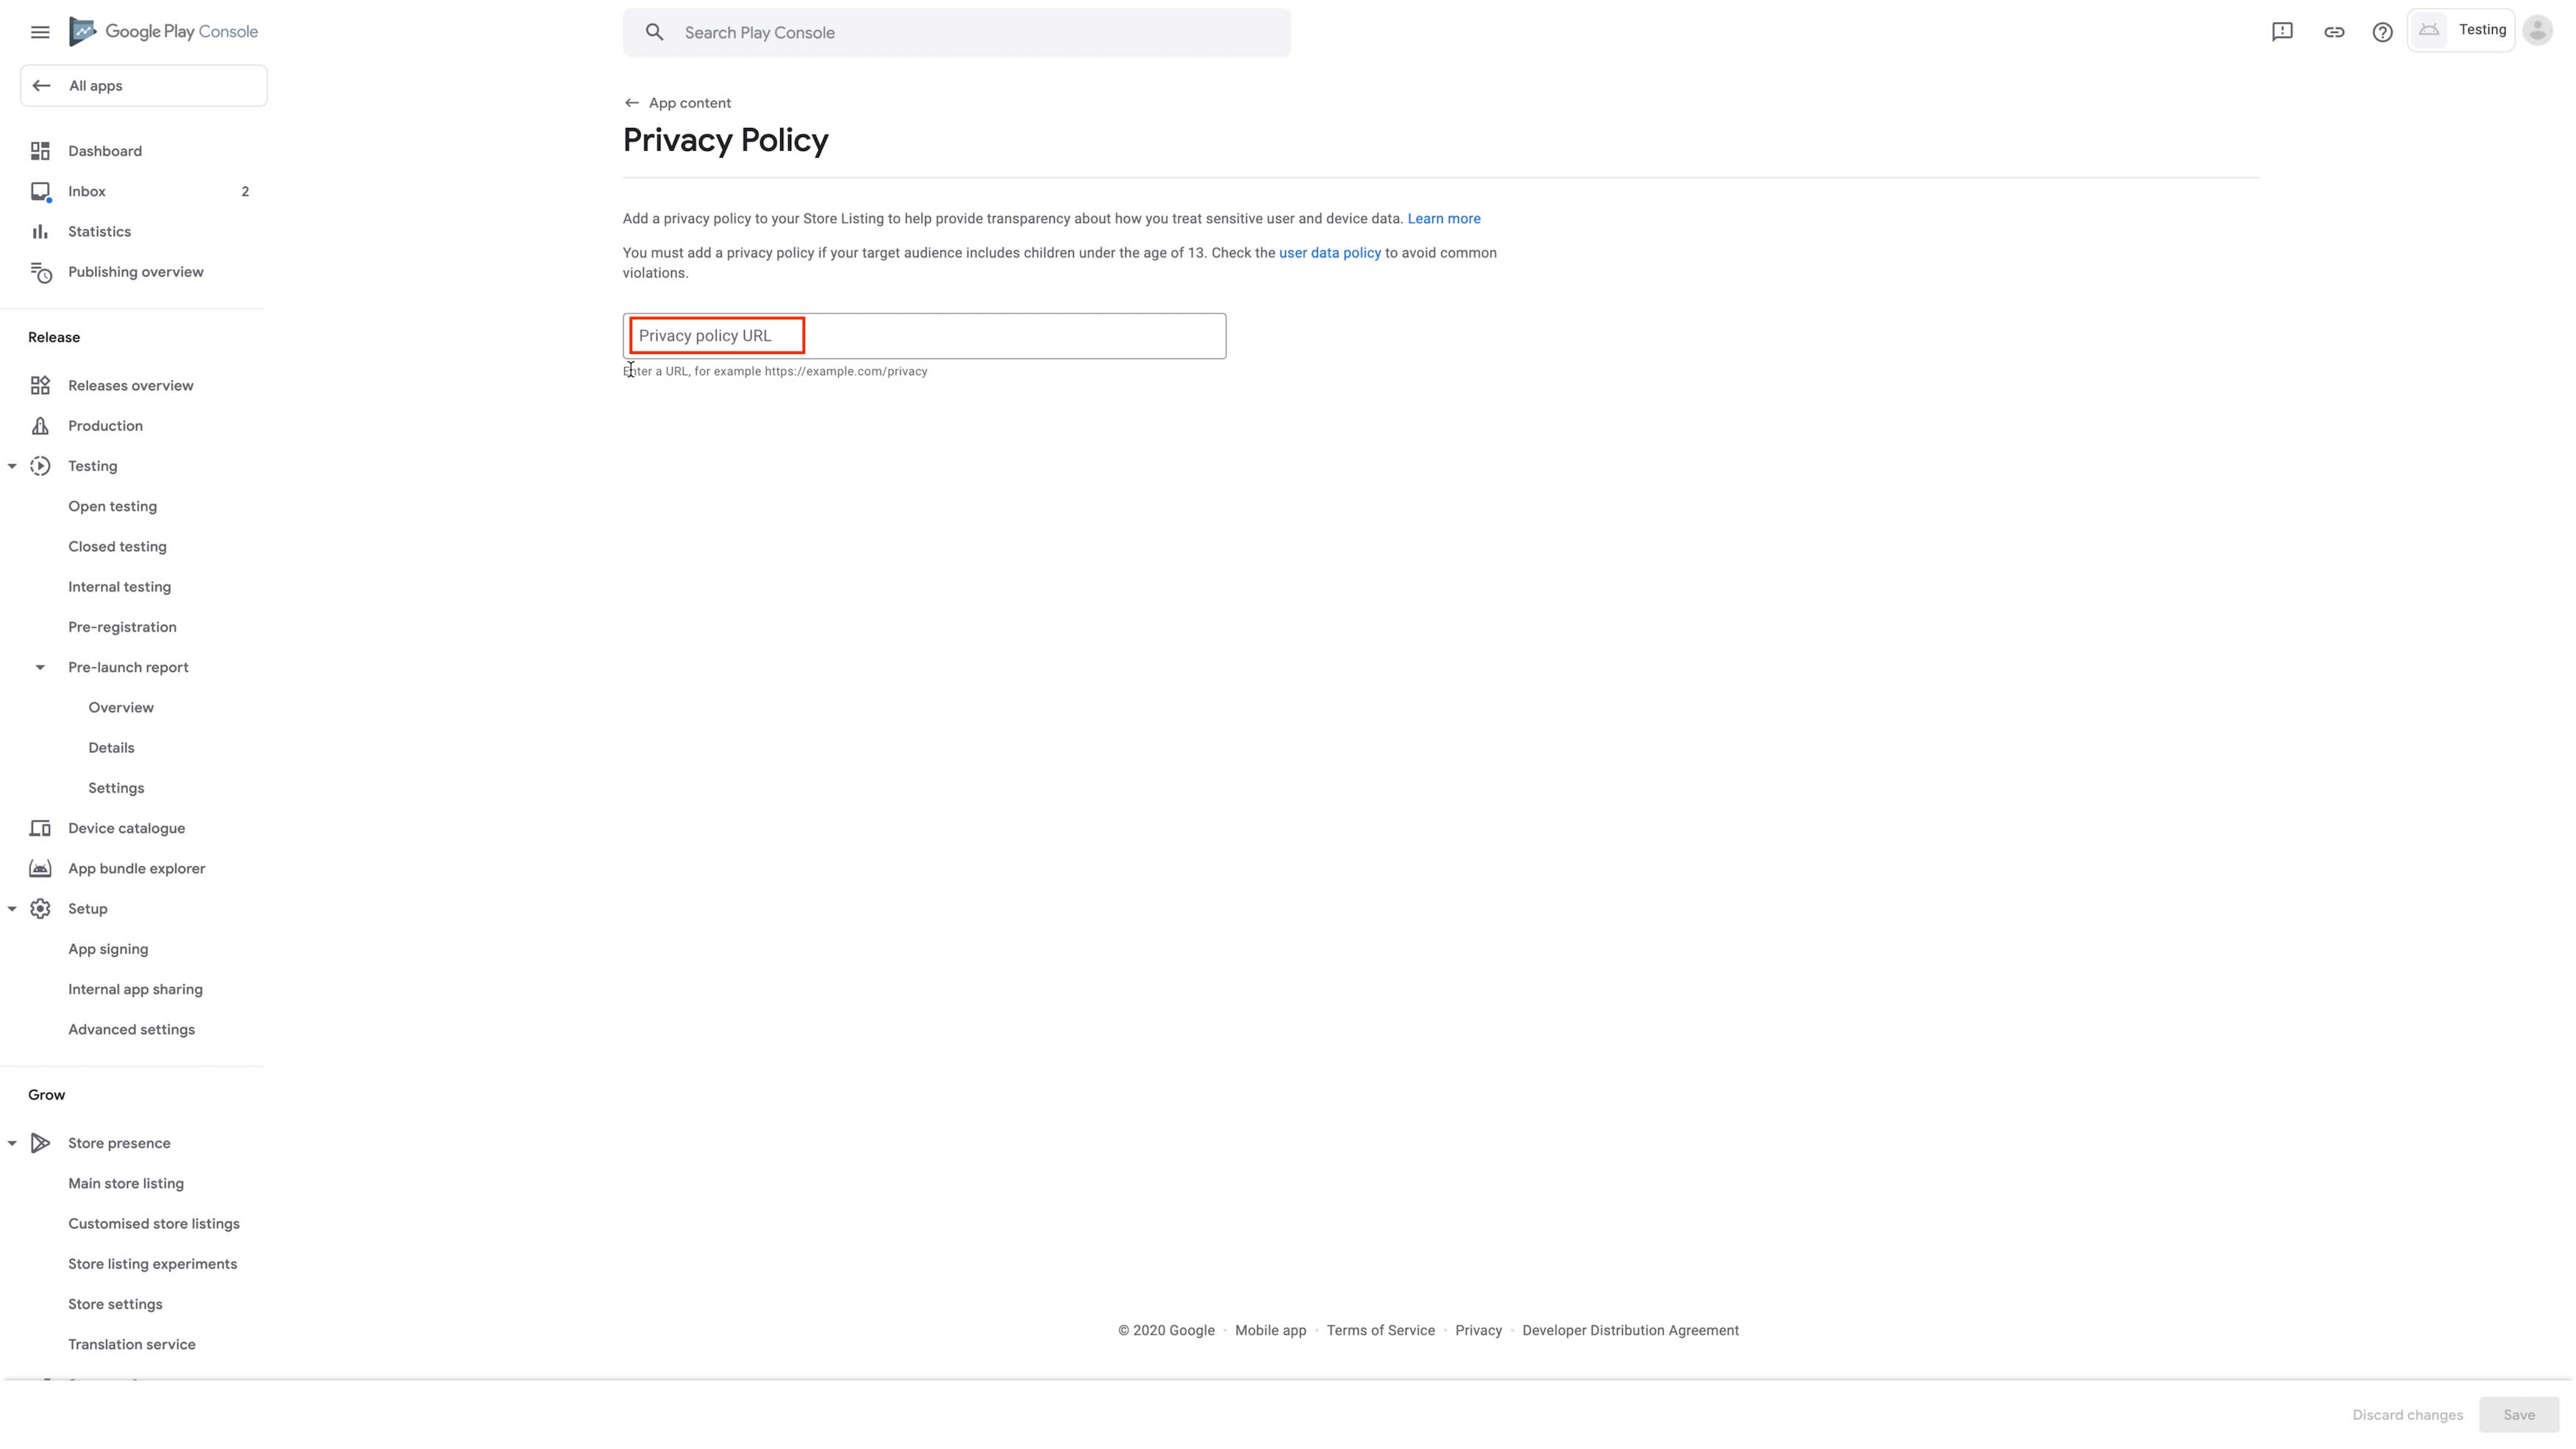
Step 24: Click on Save and Go back to the app content to define the target audience of your app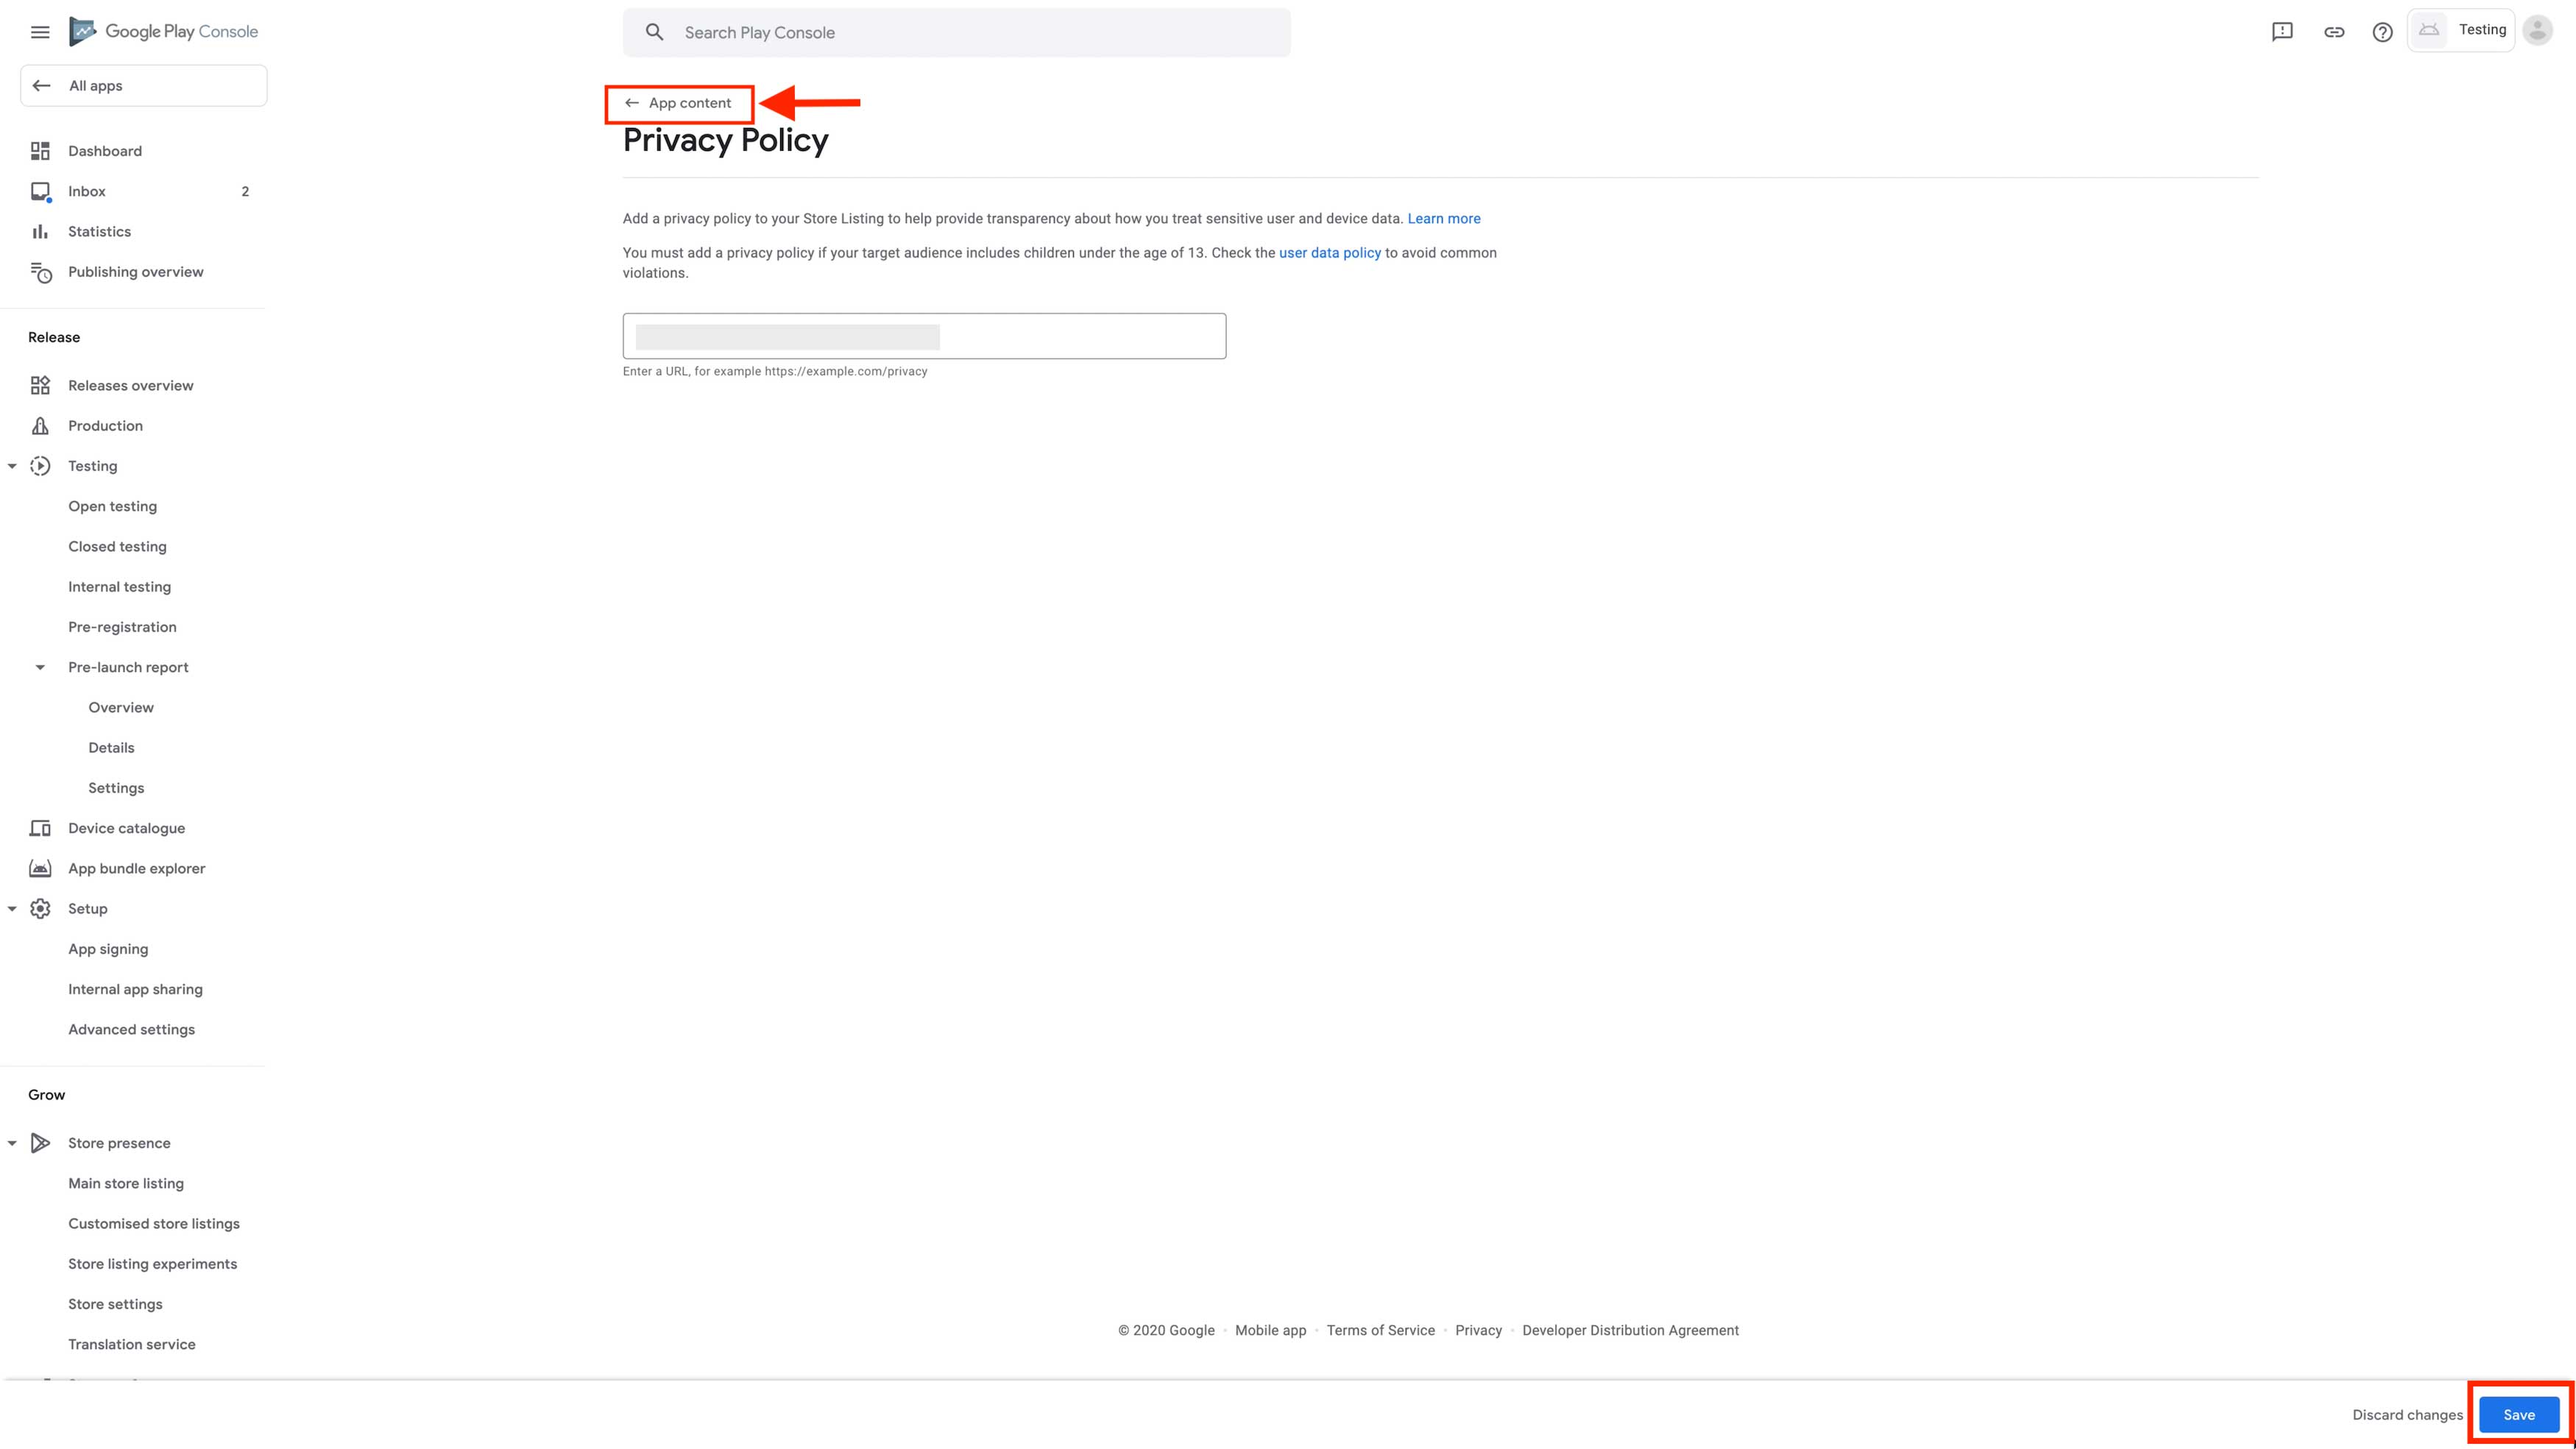
Step 25: Click on Start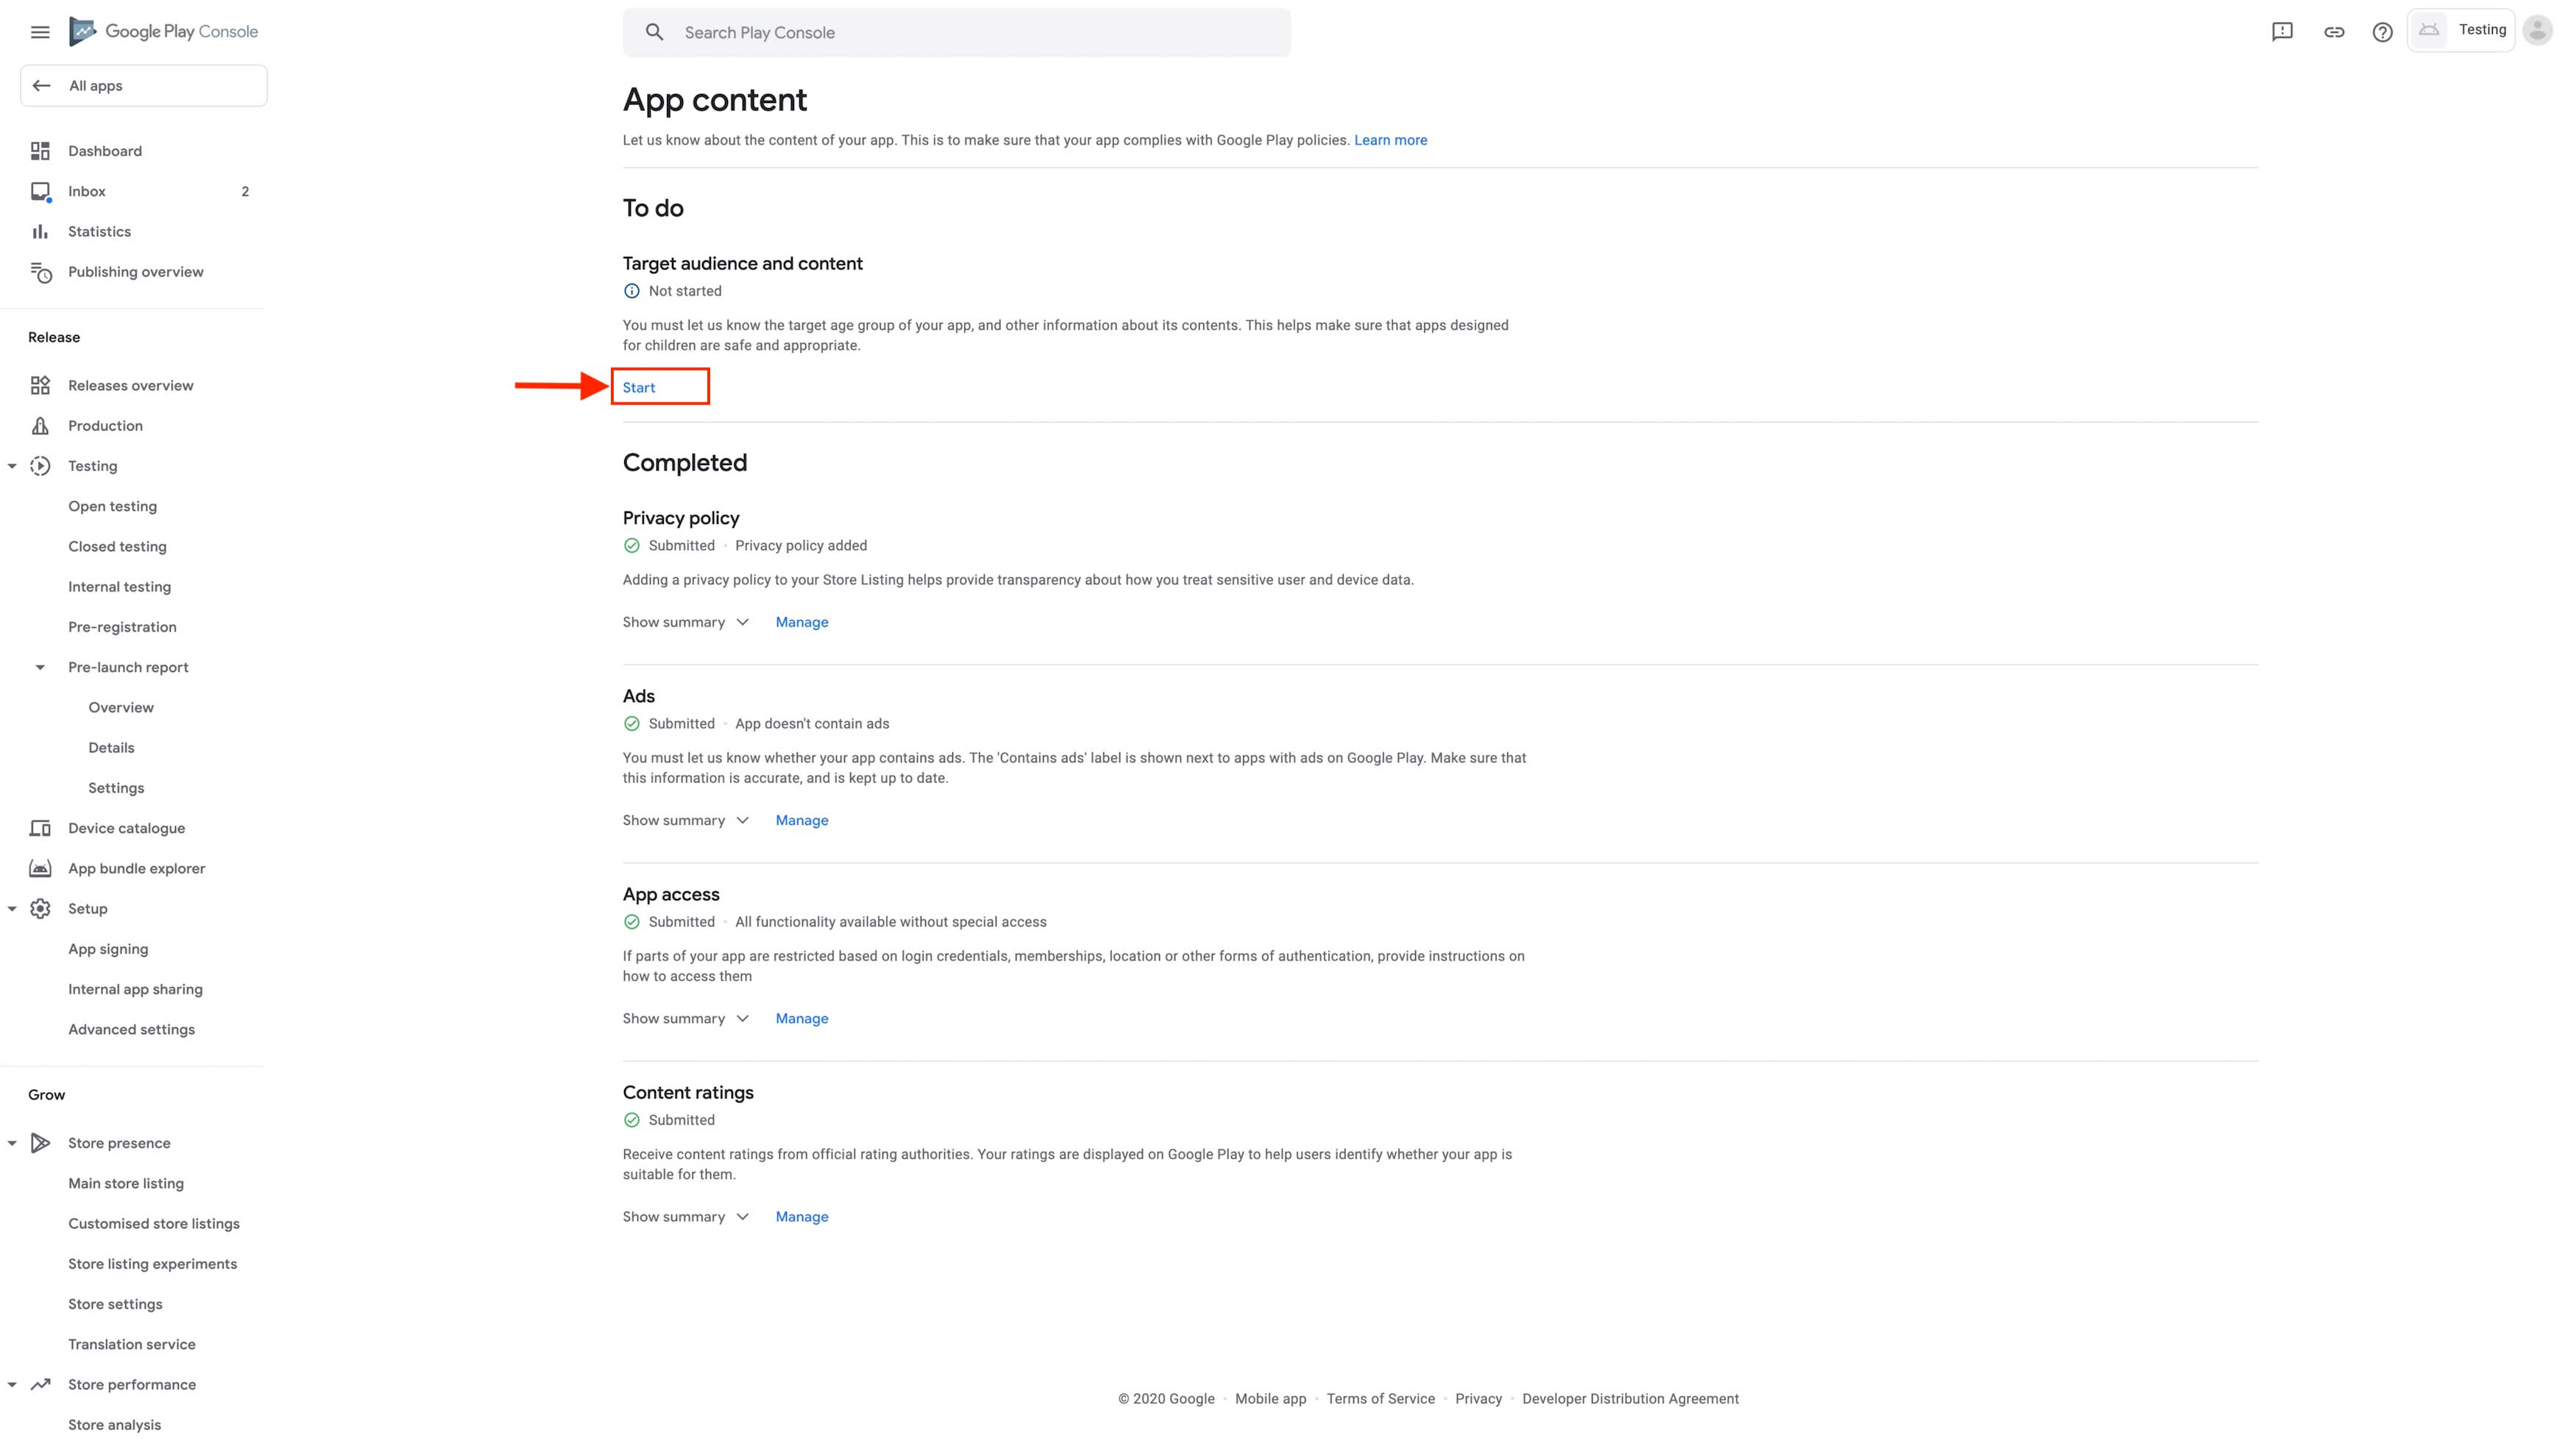 Step 26 : Select the Target age group of your app from the options.
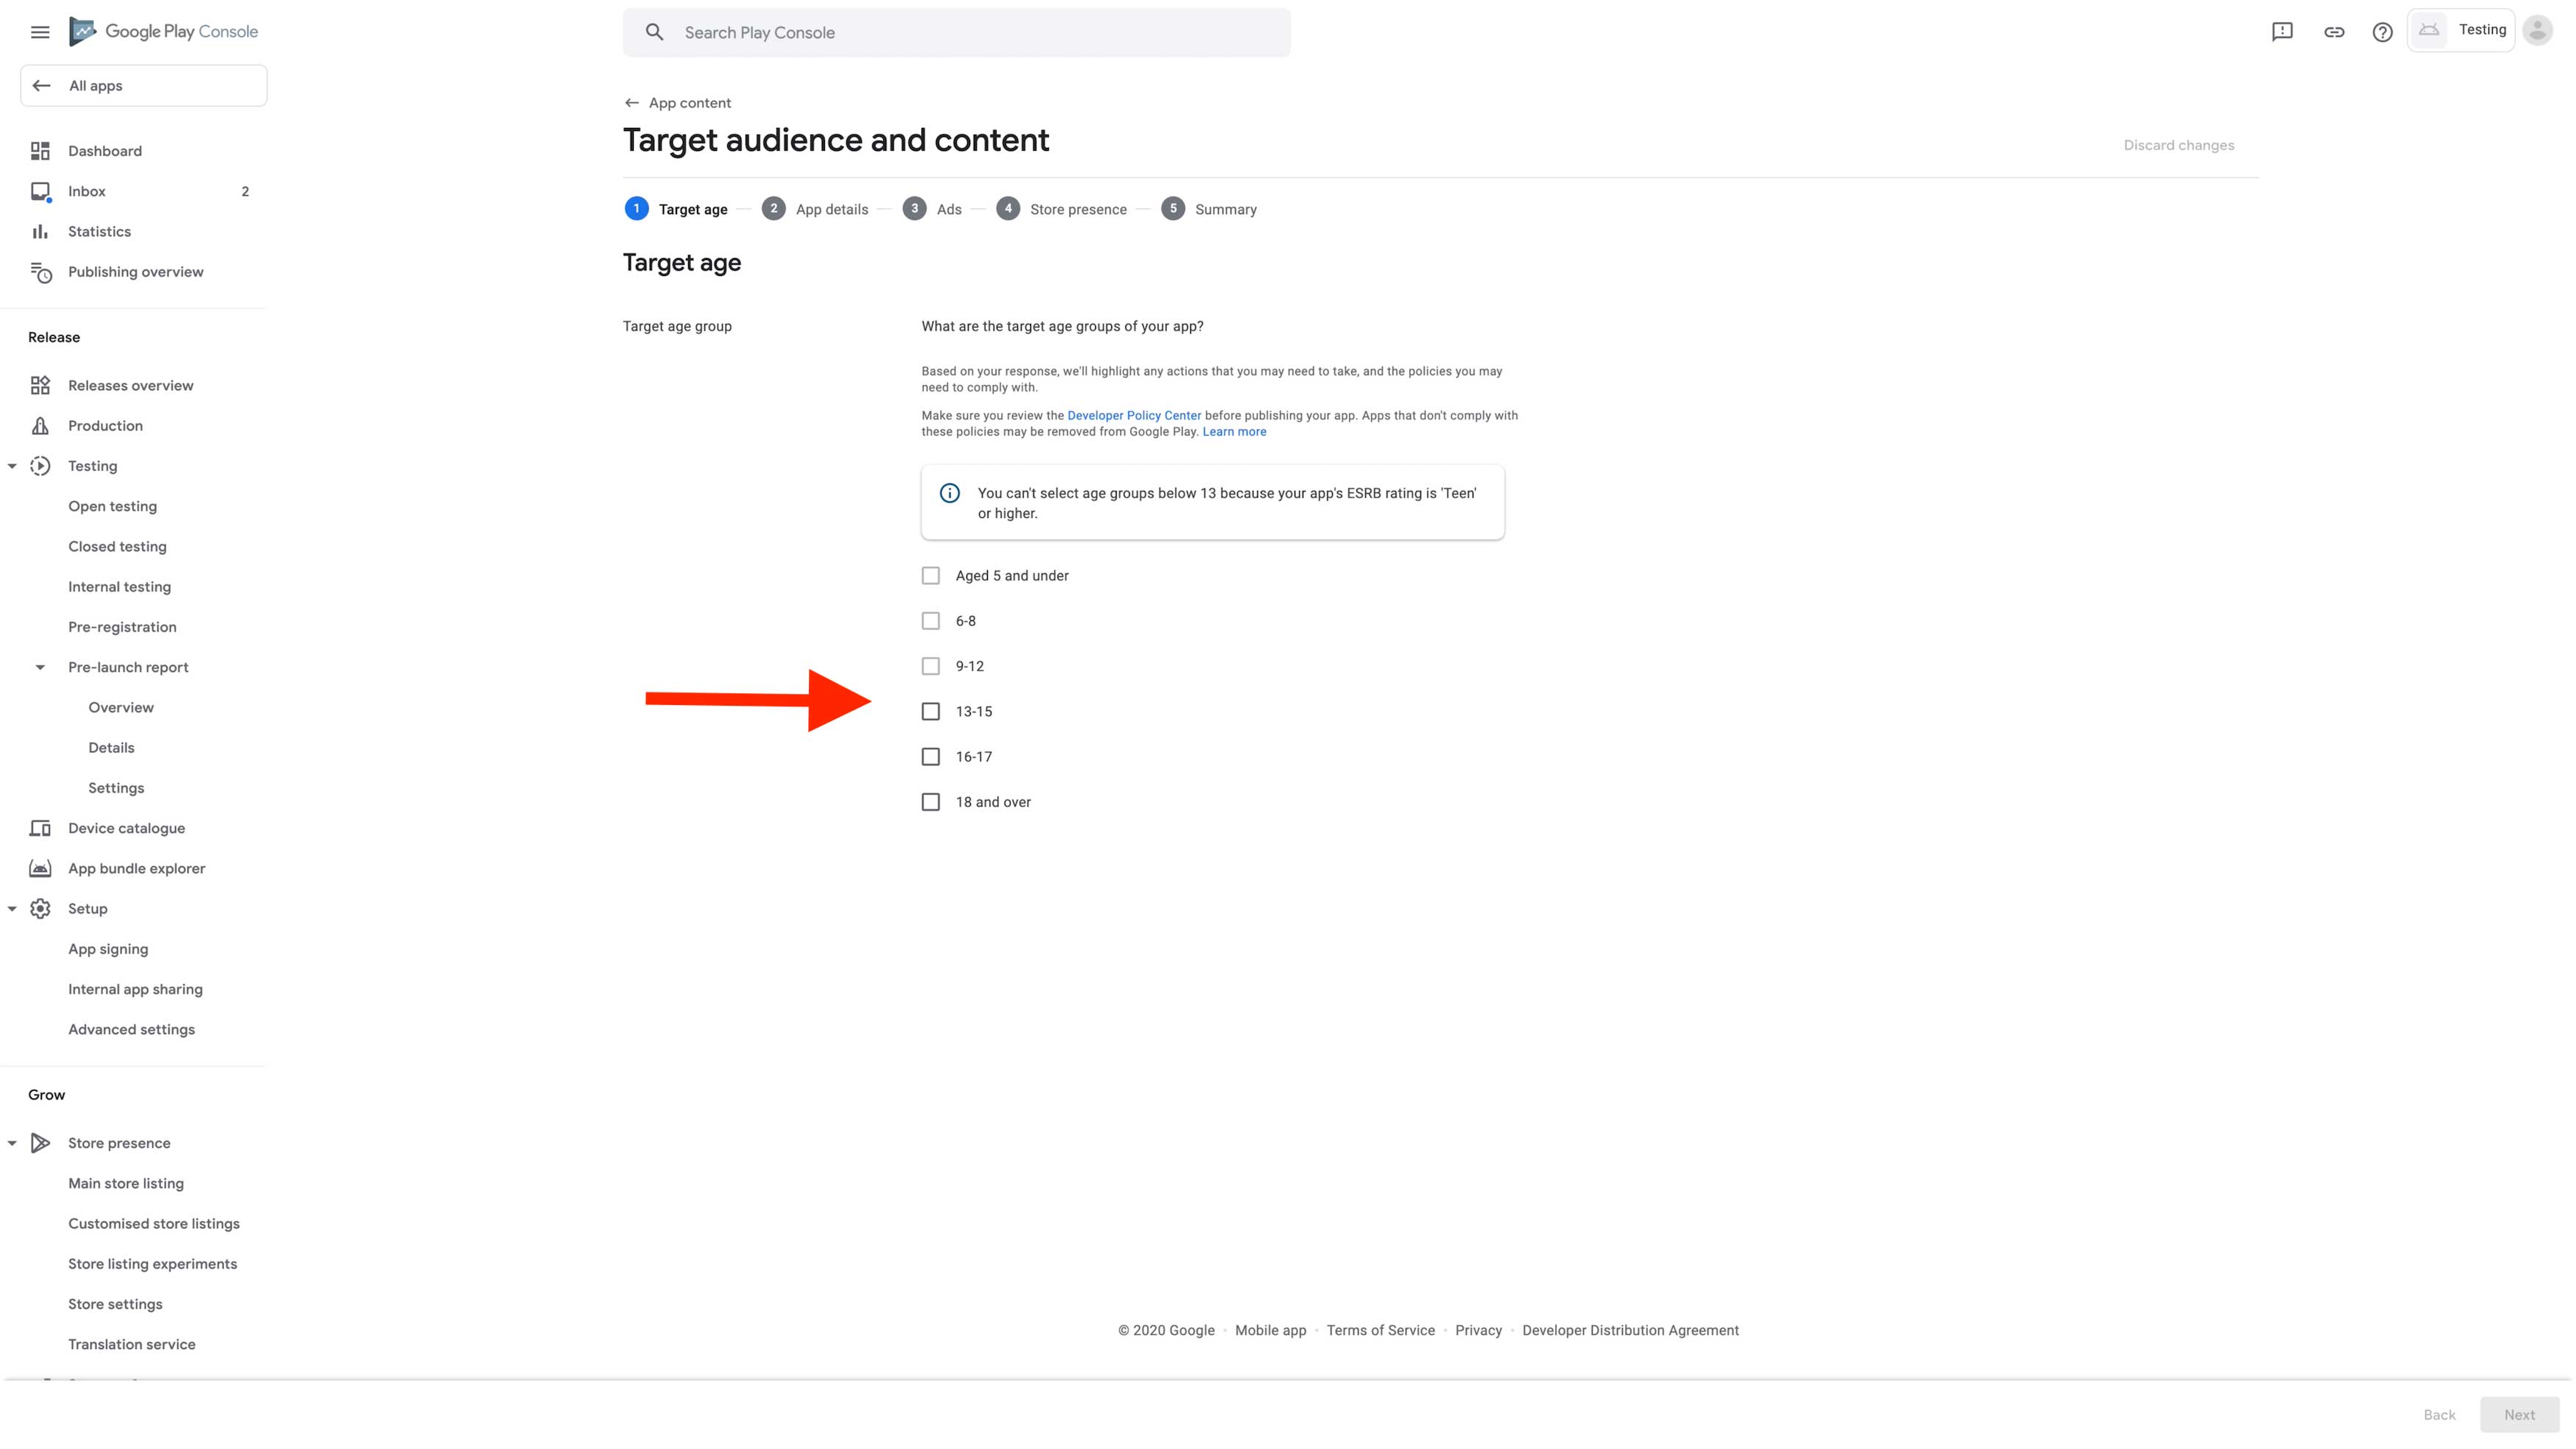
Step 27 : Click on Next 
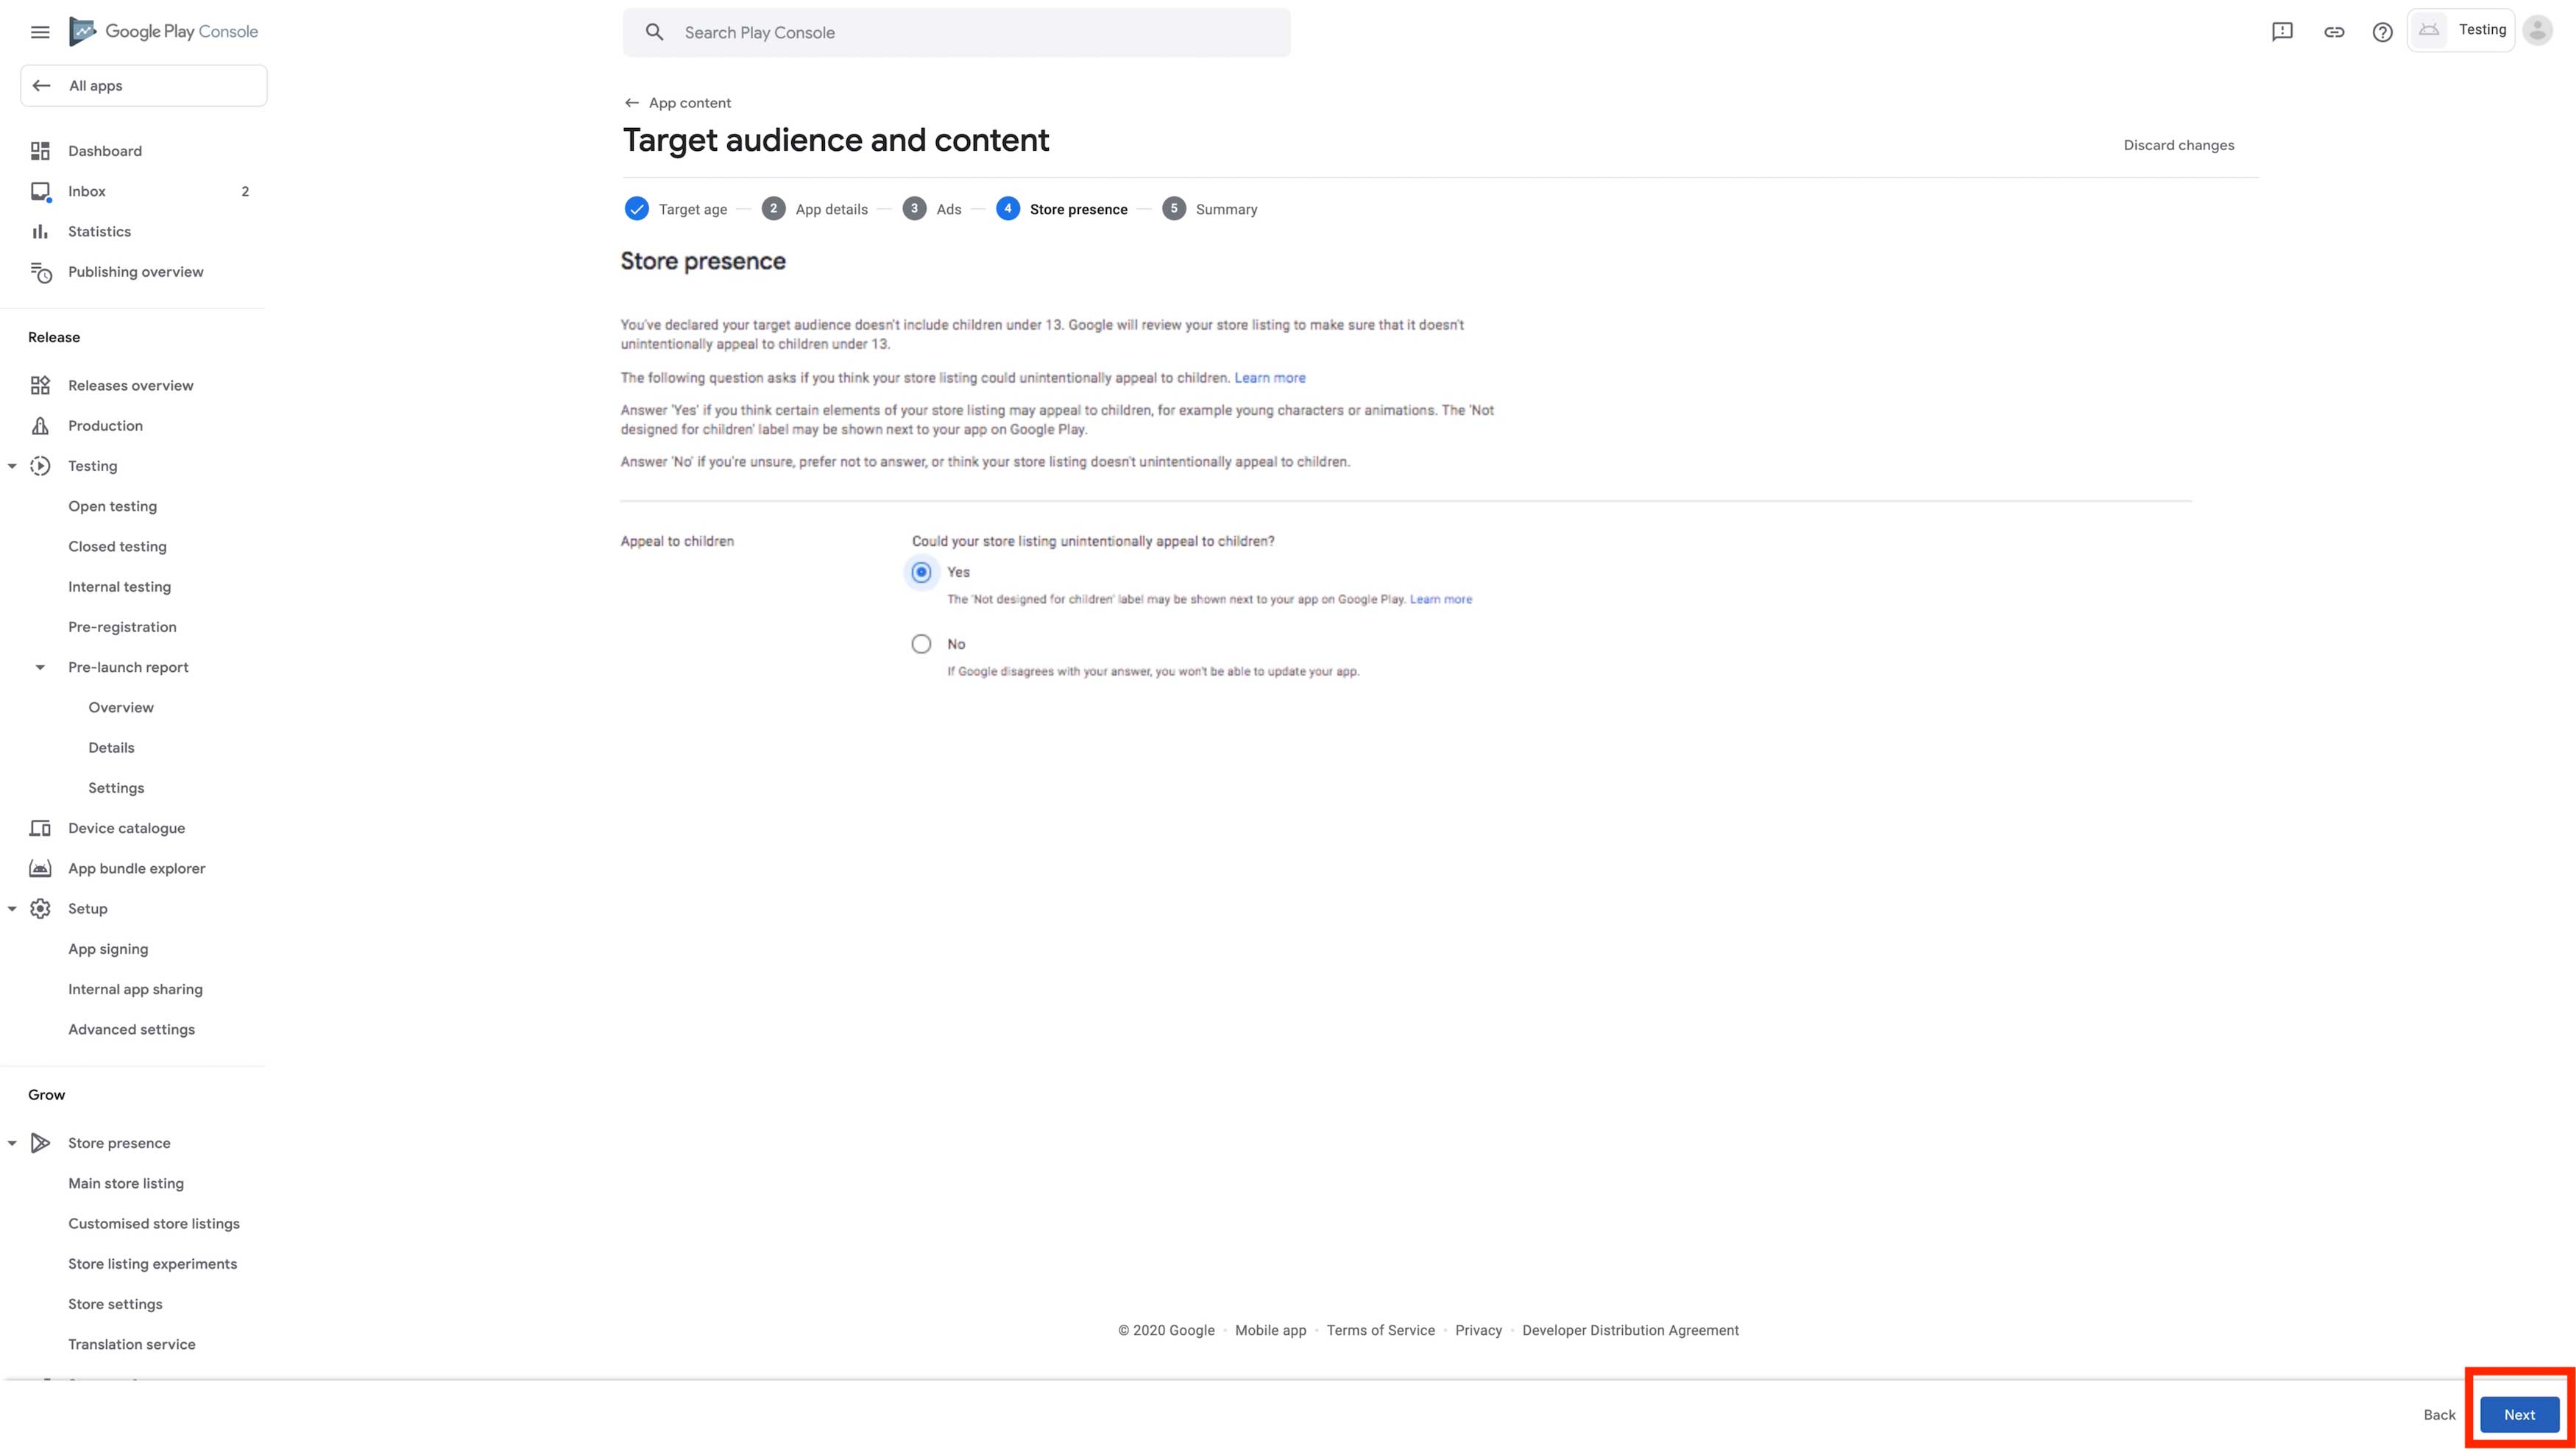
Step 28 : Select Appeal option yes or no
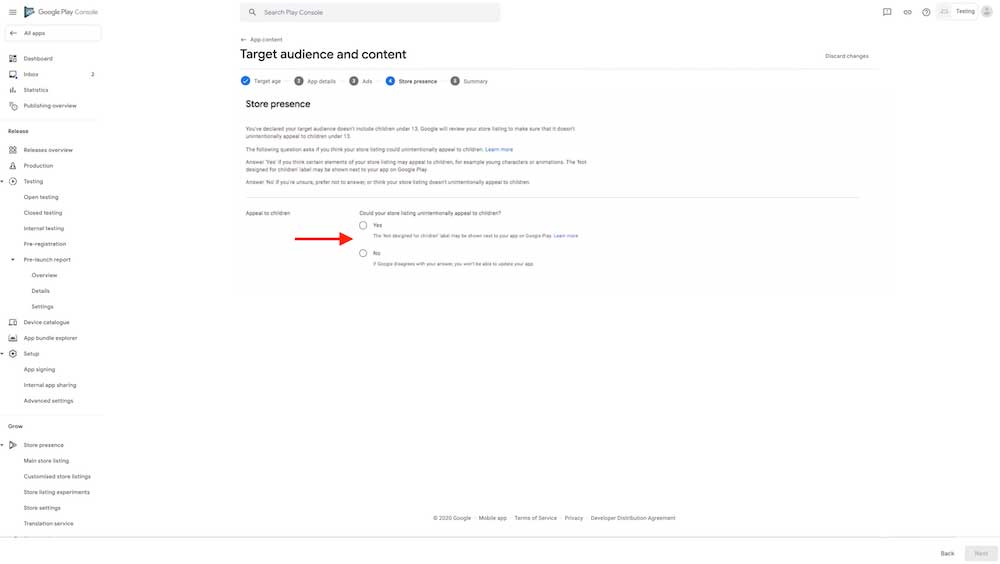
Step 29 : Click on Next
Step 30 : Once you have checked your details in the summary, click on Save.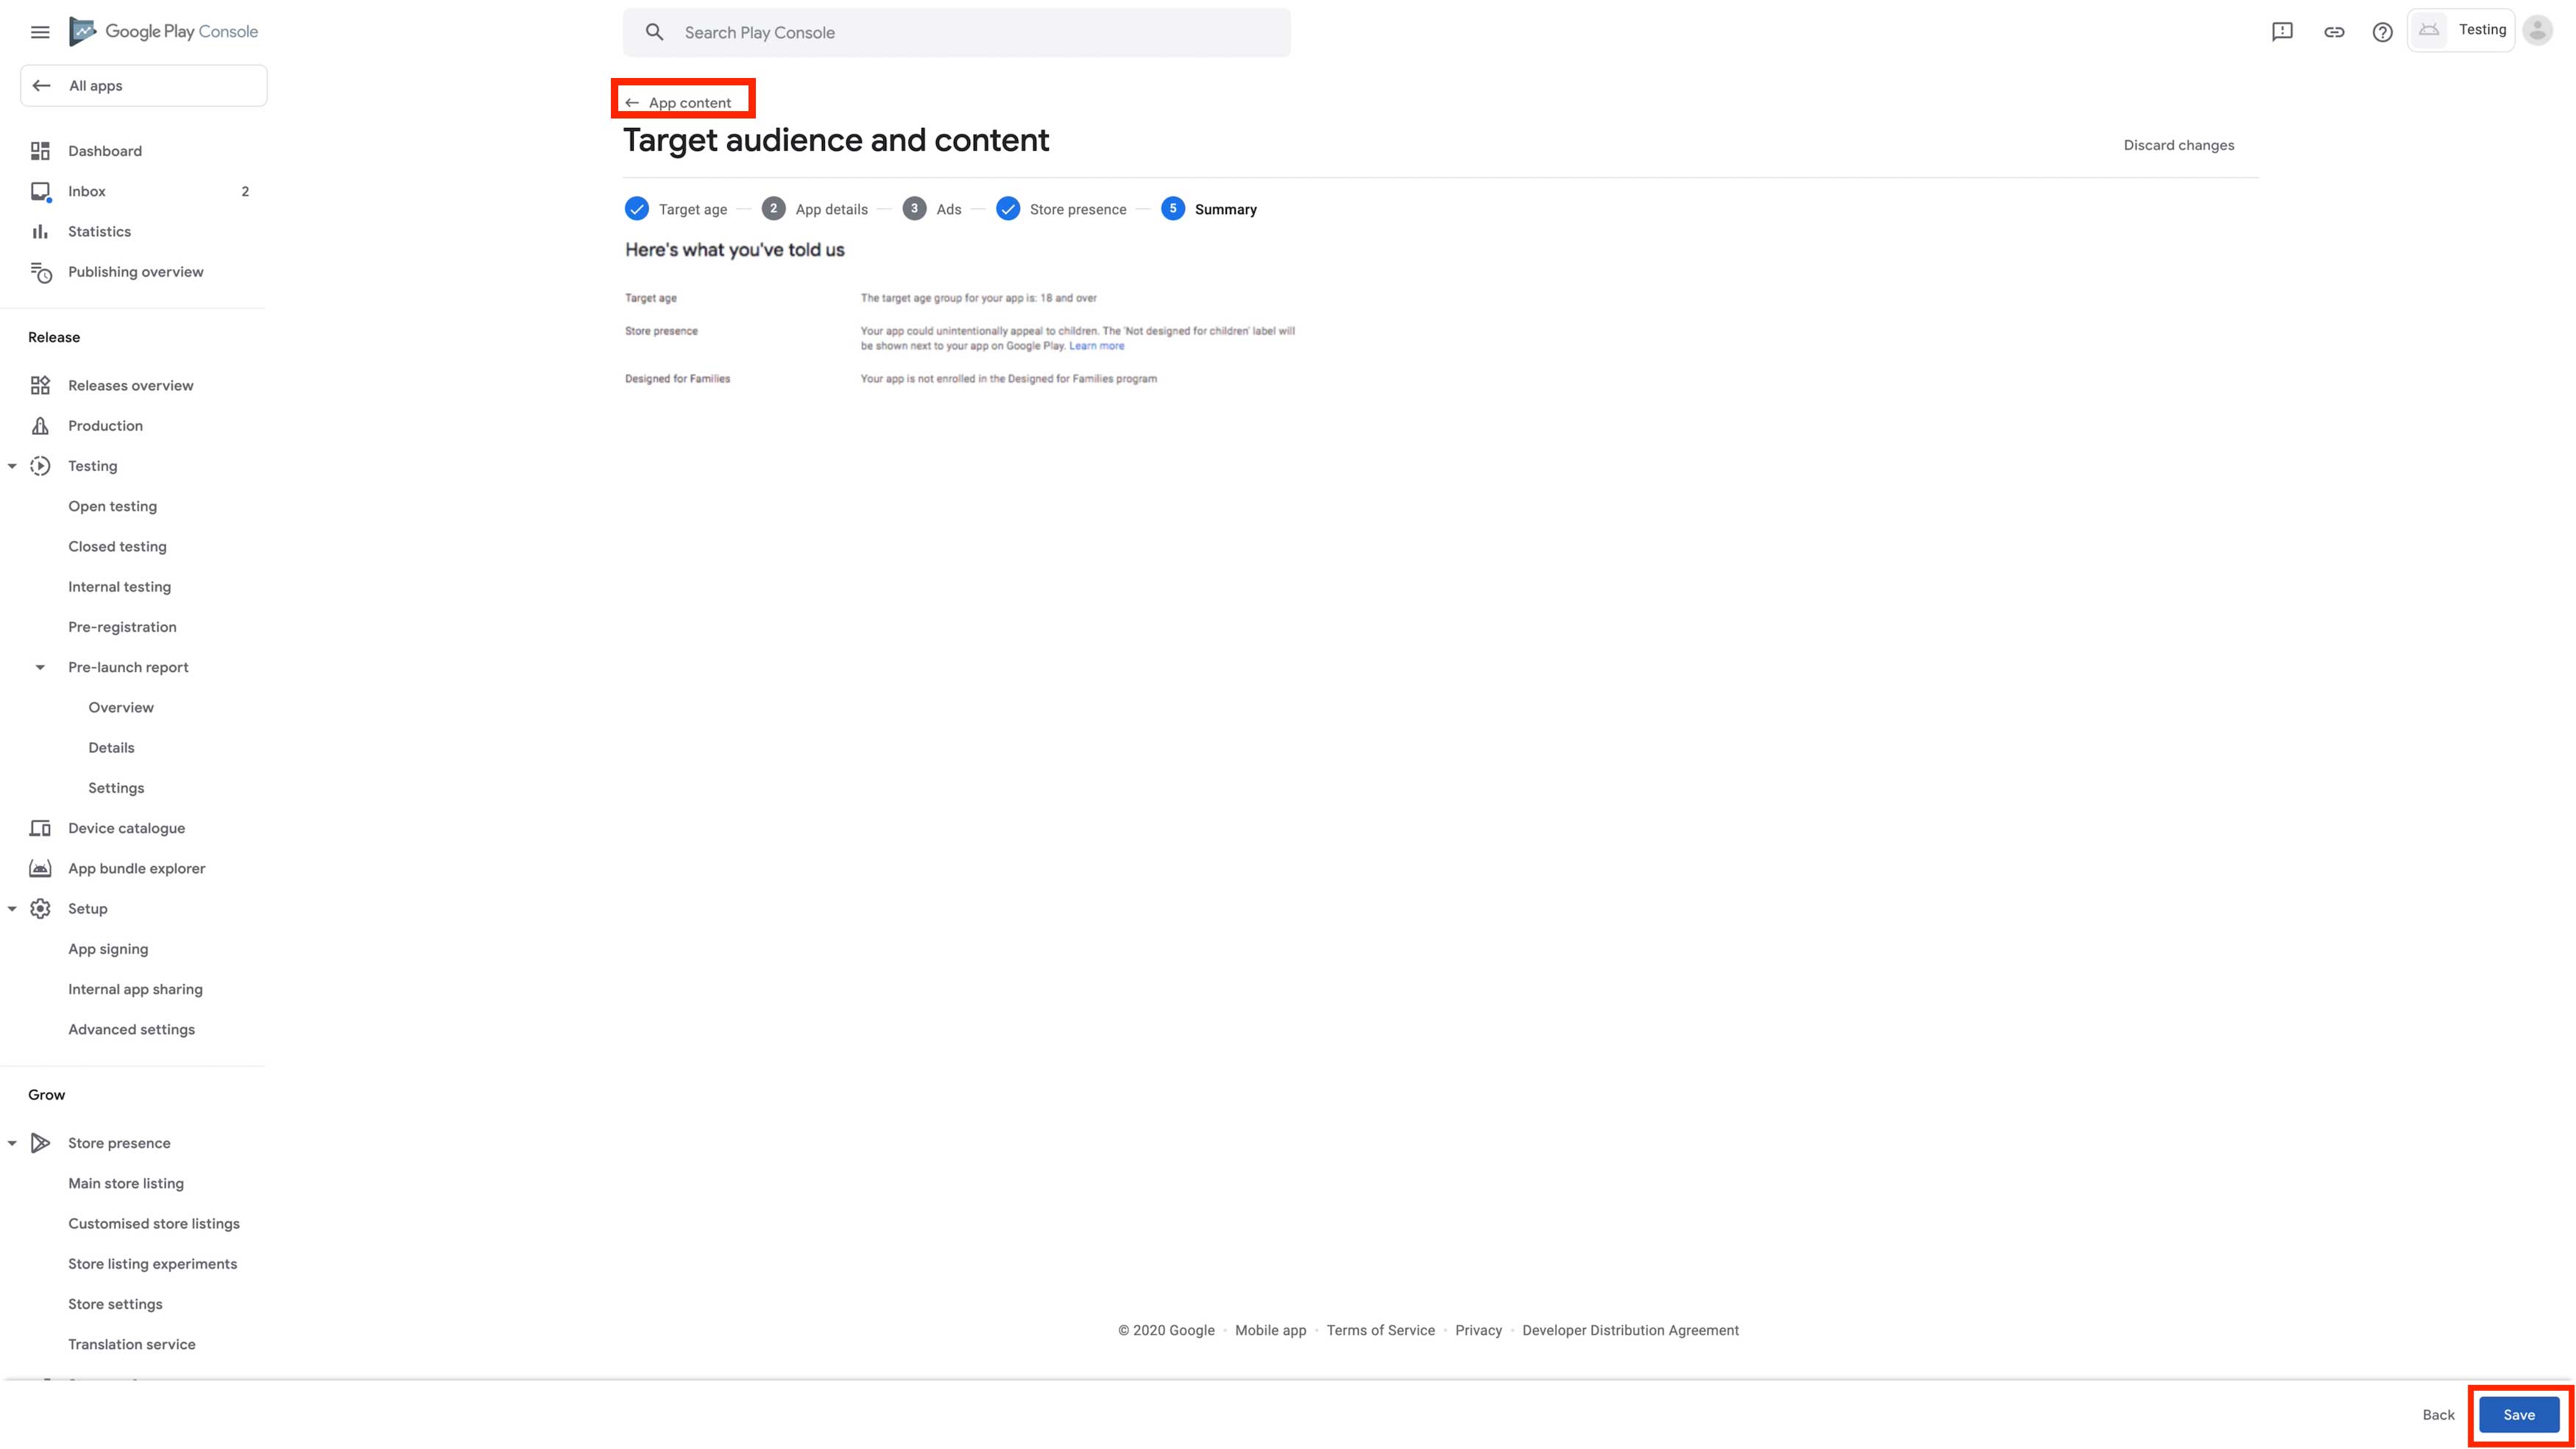
Step 31 : Click on Dashboard 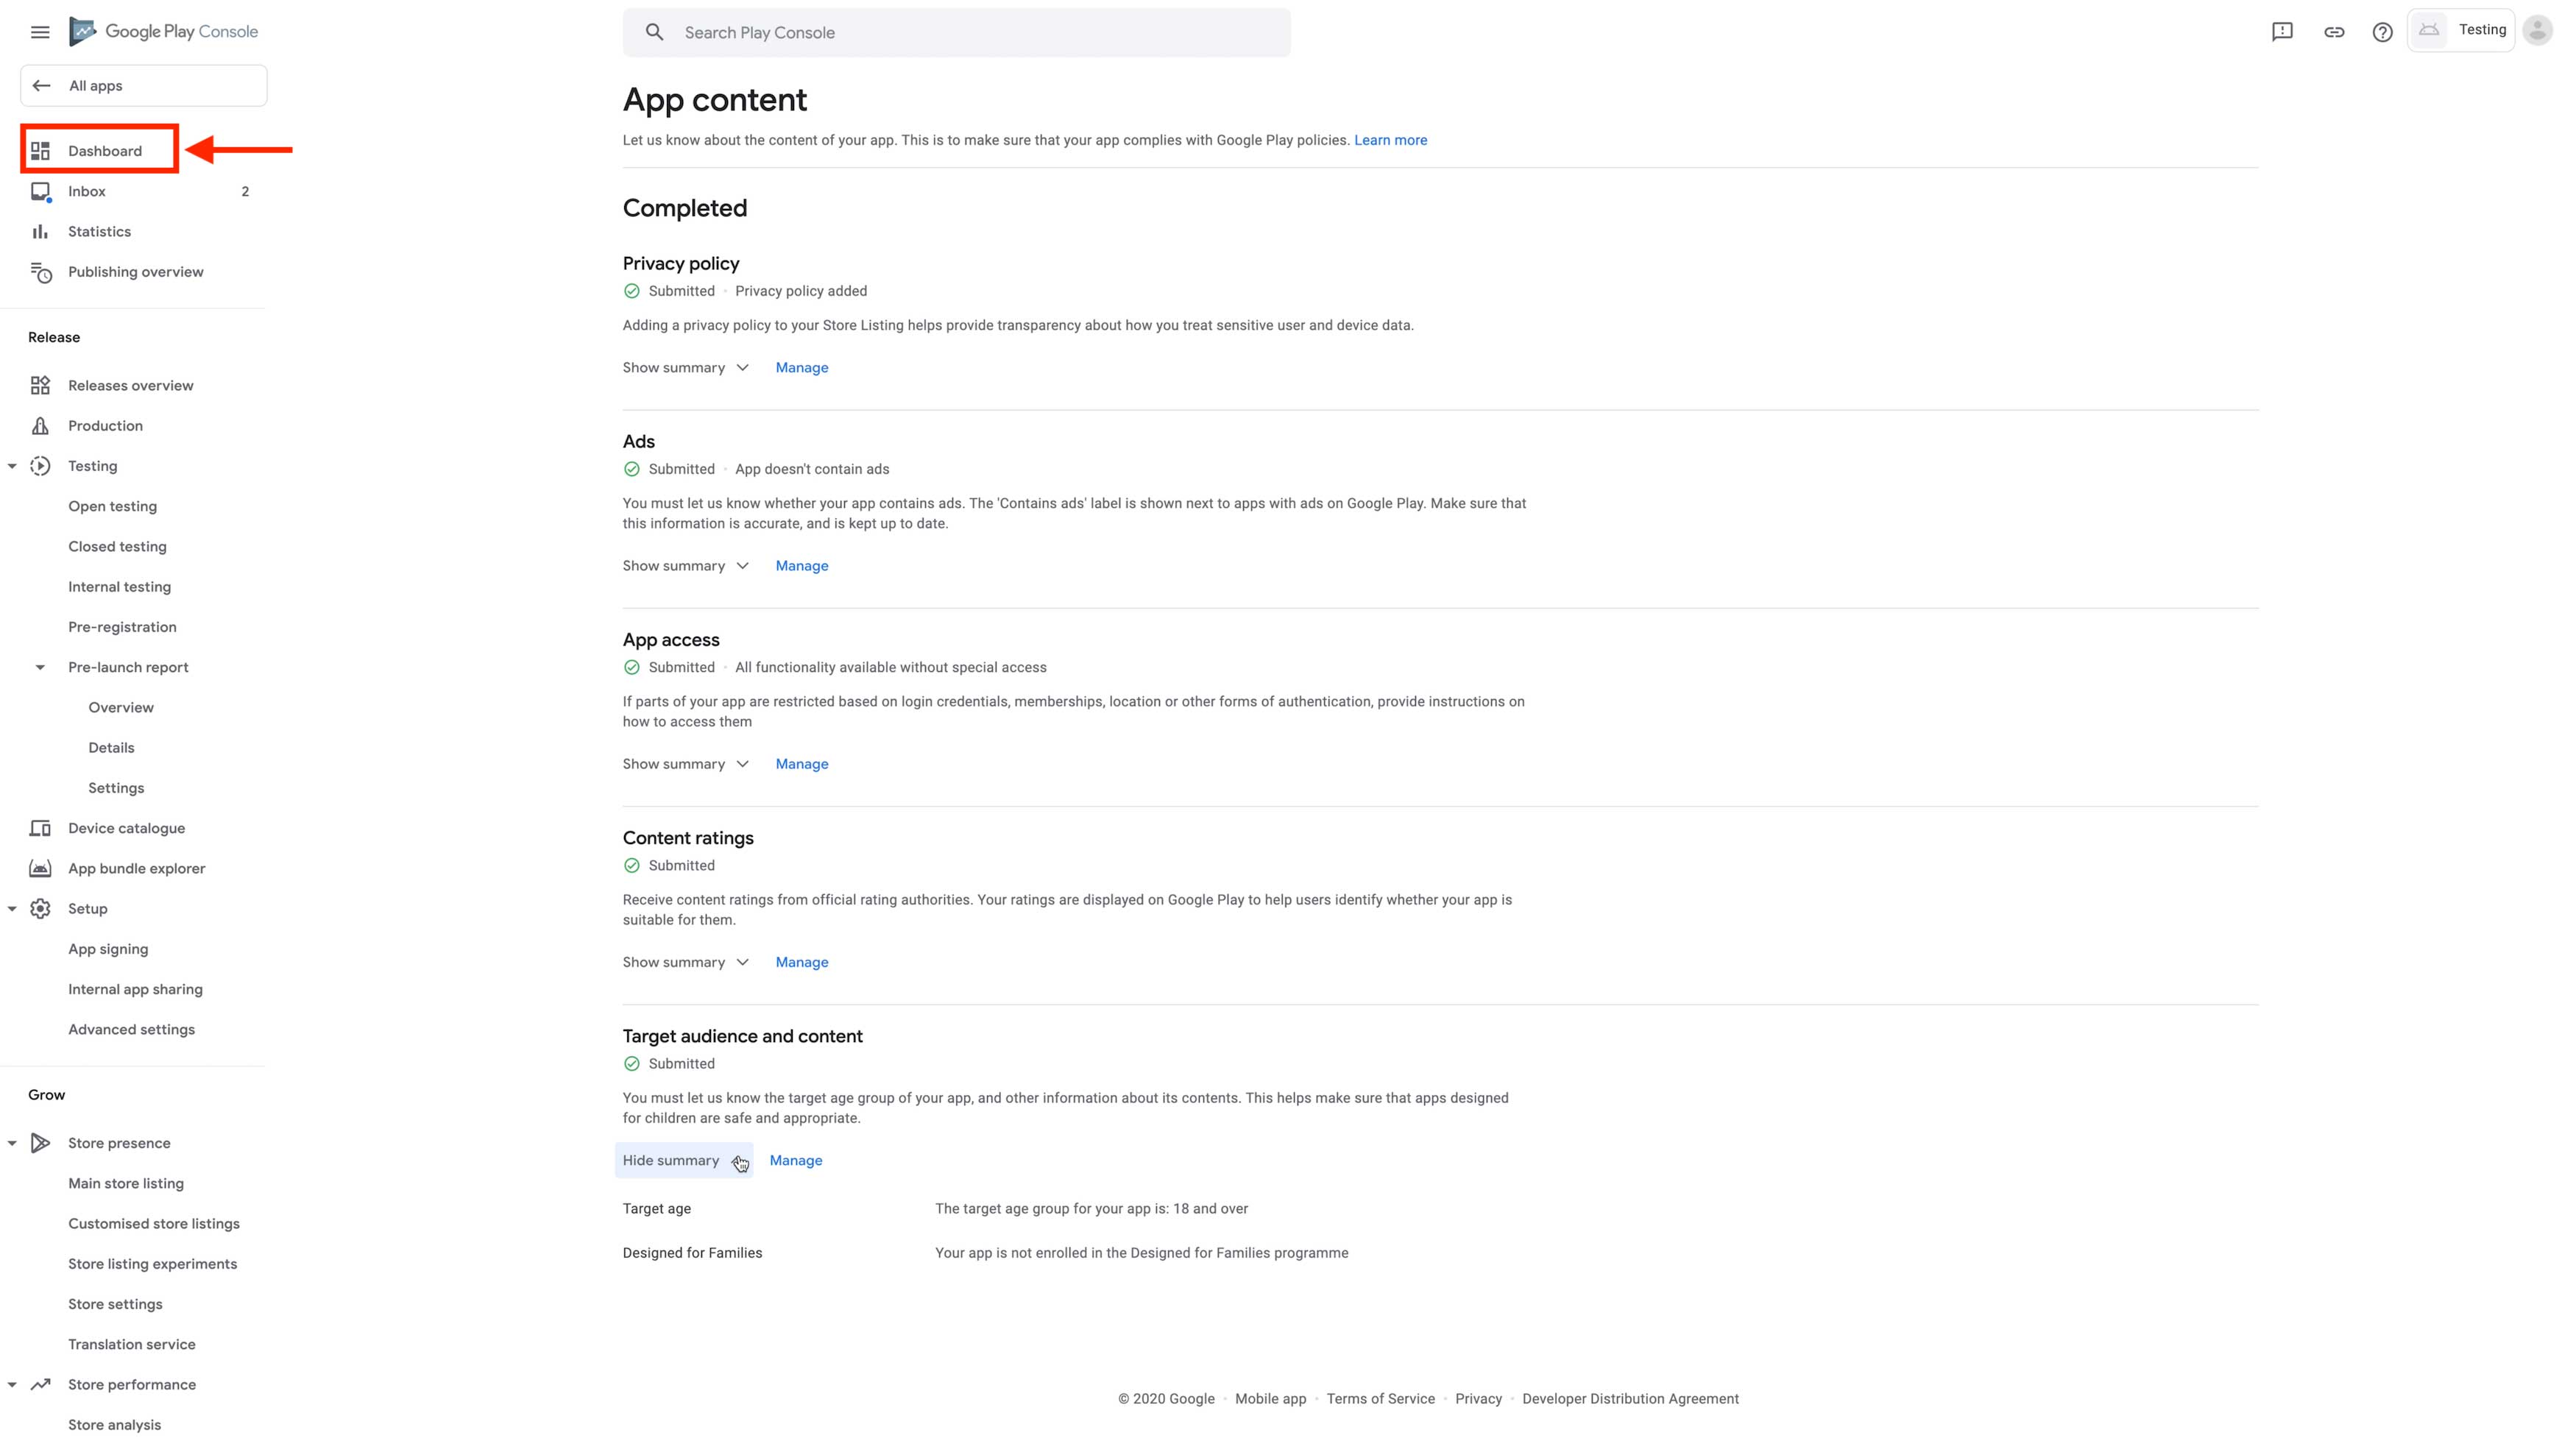
Step 32 : : Click on Select App Category and Provide Contact Details.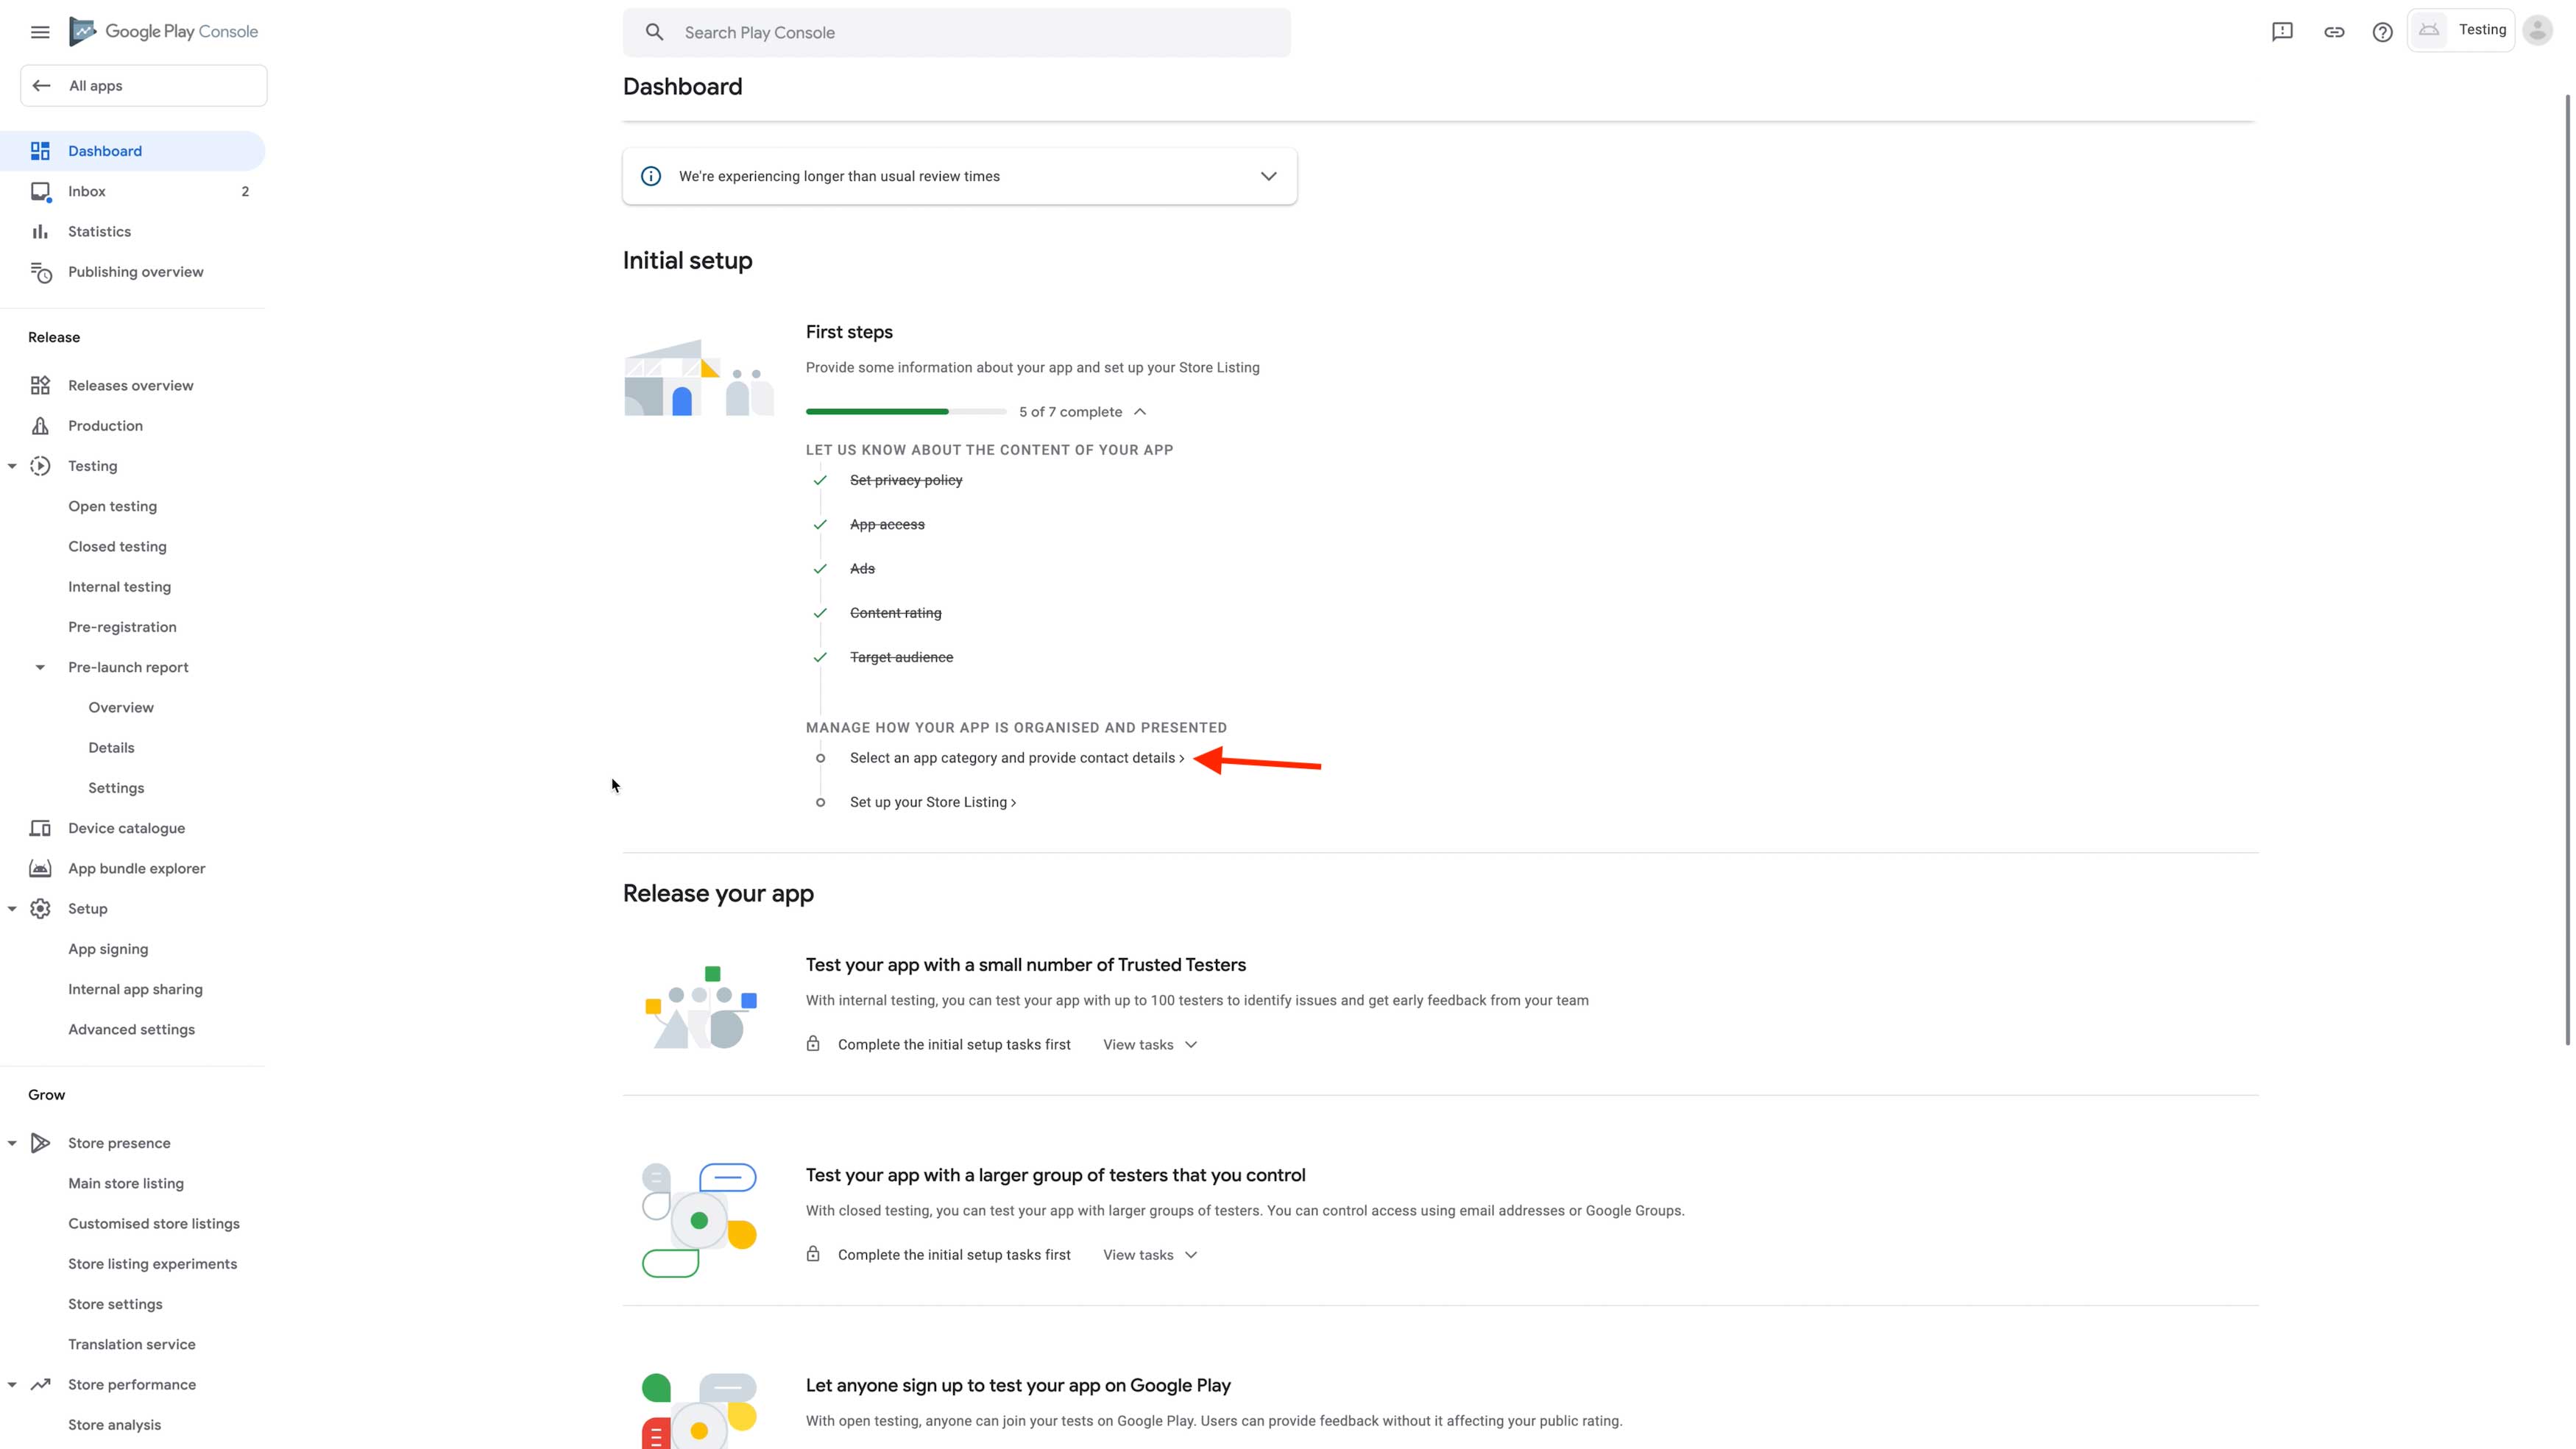
Step 33: Select the Application Type , app category from the dropdown menu and Click on Manage Tags and a new pop-up to add tags will open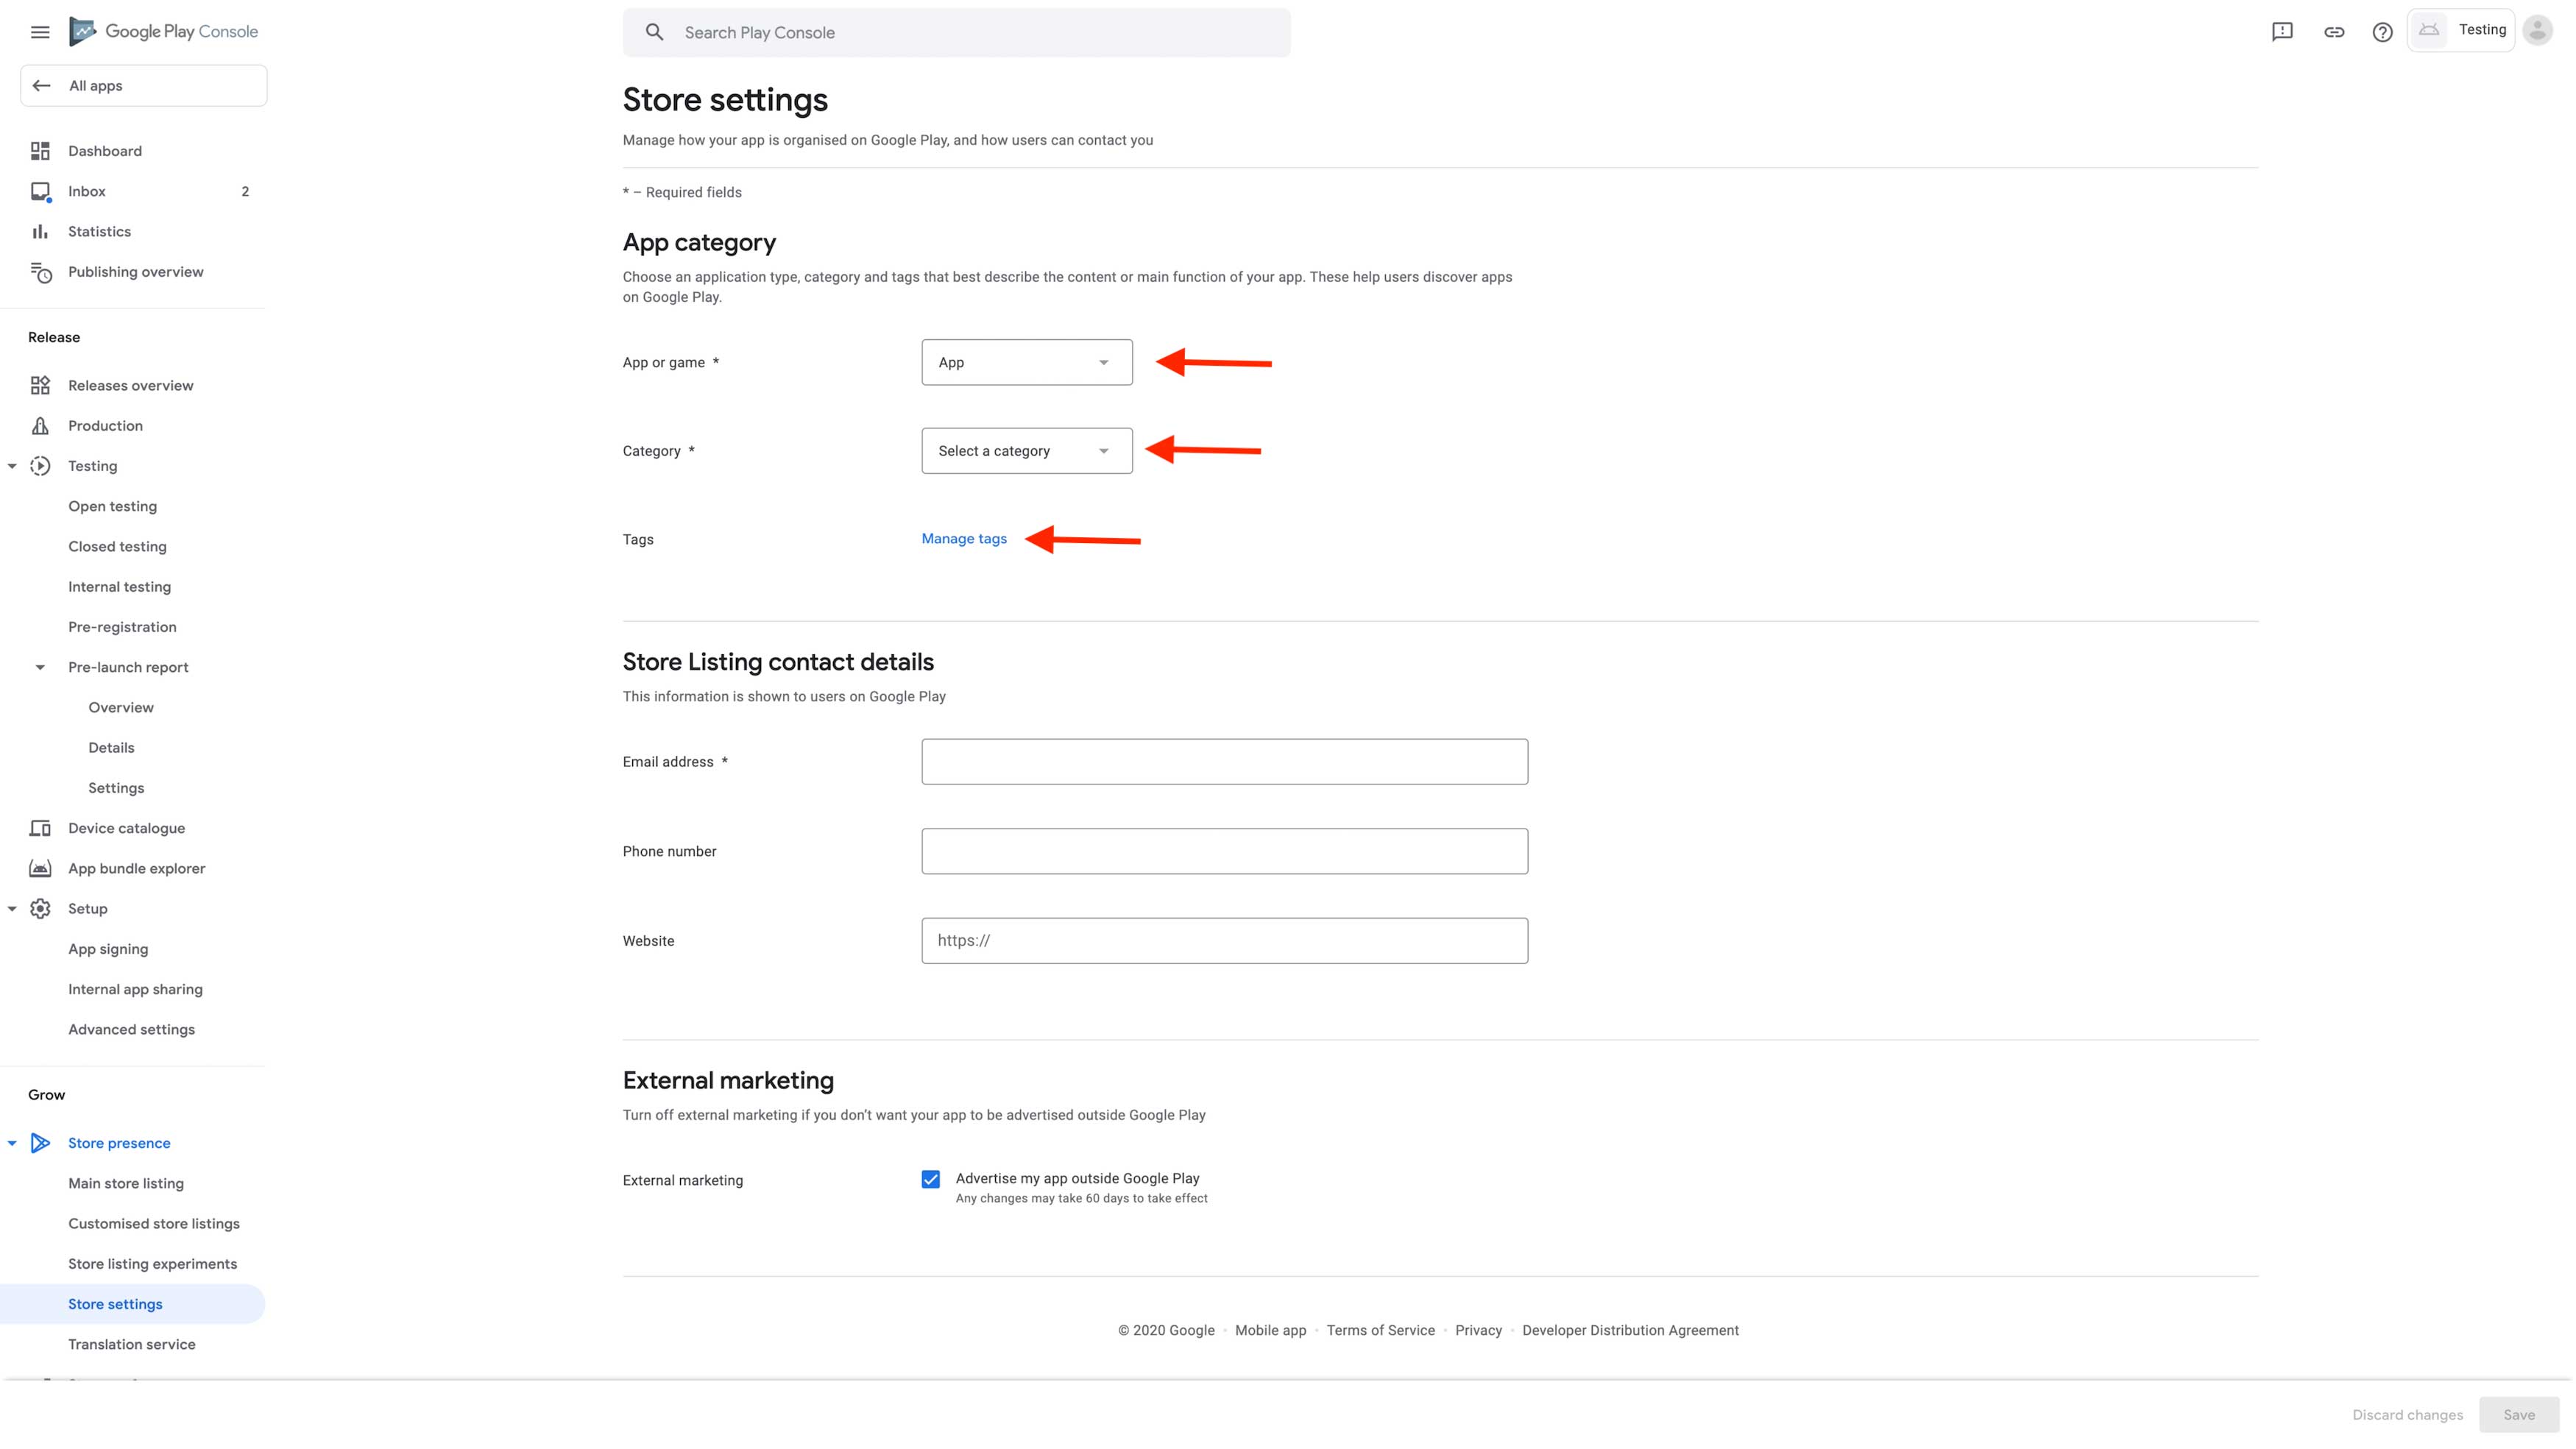 Step 34: Select the tags
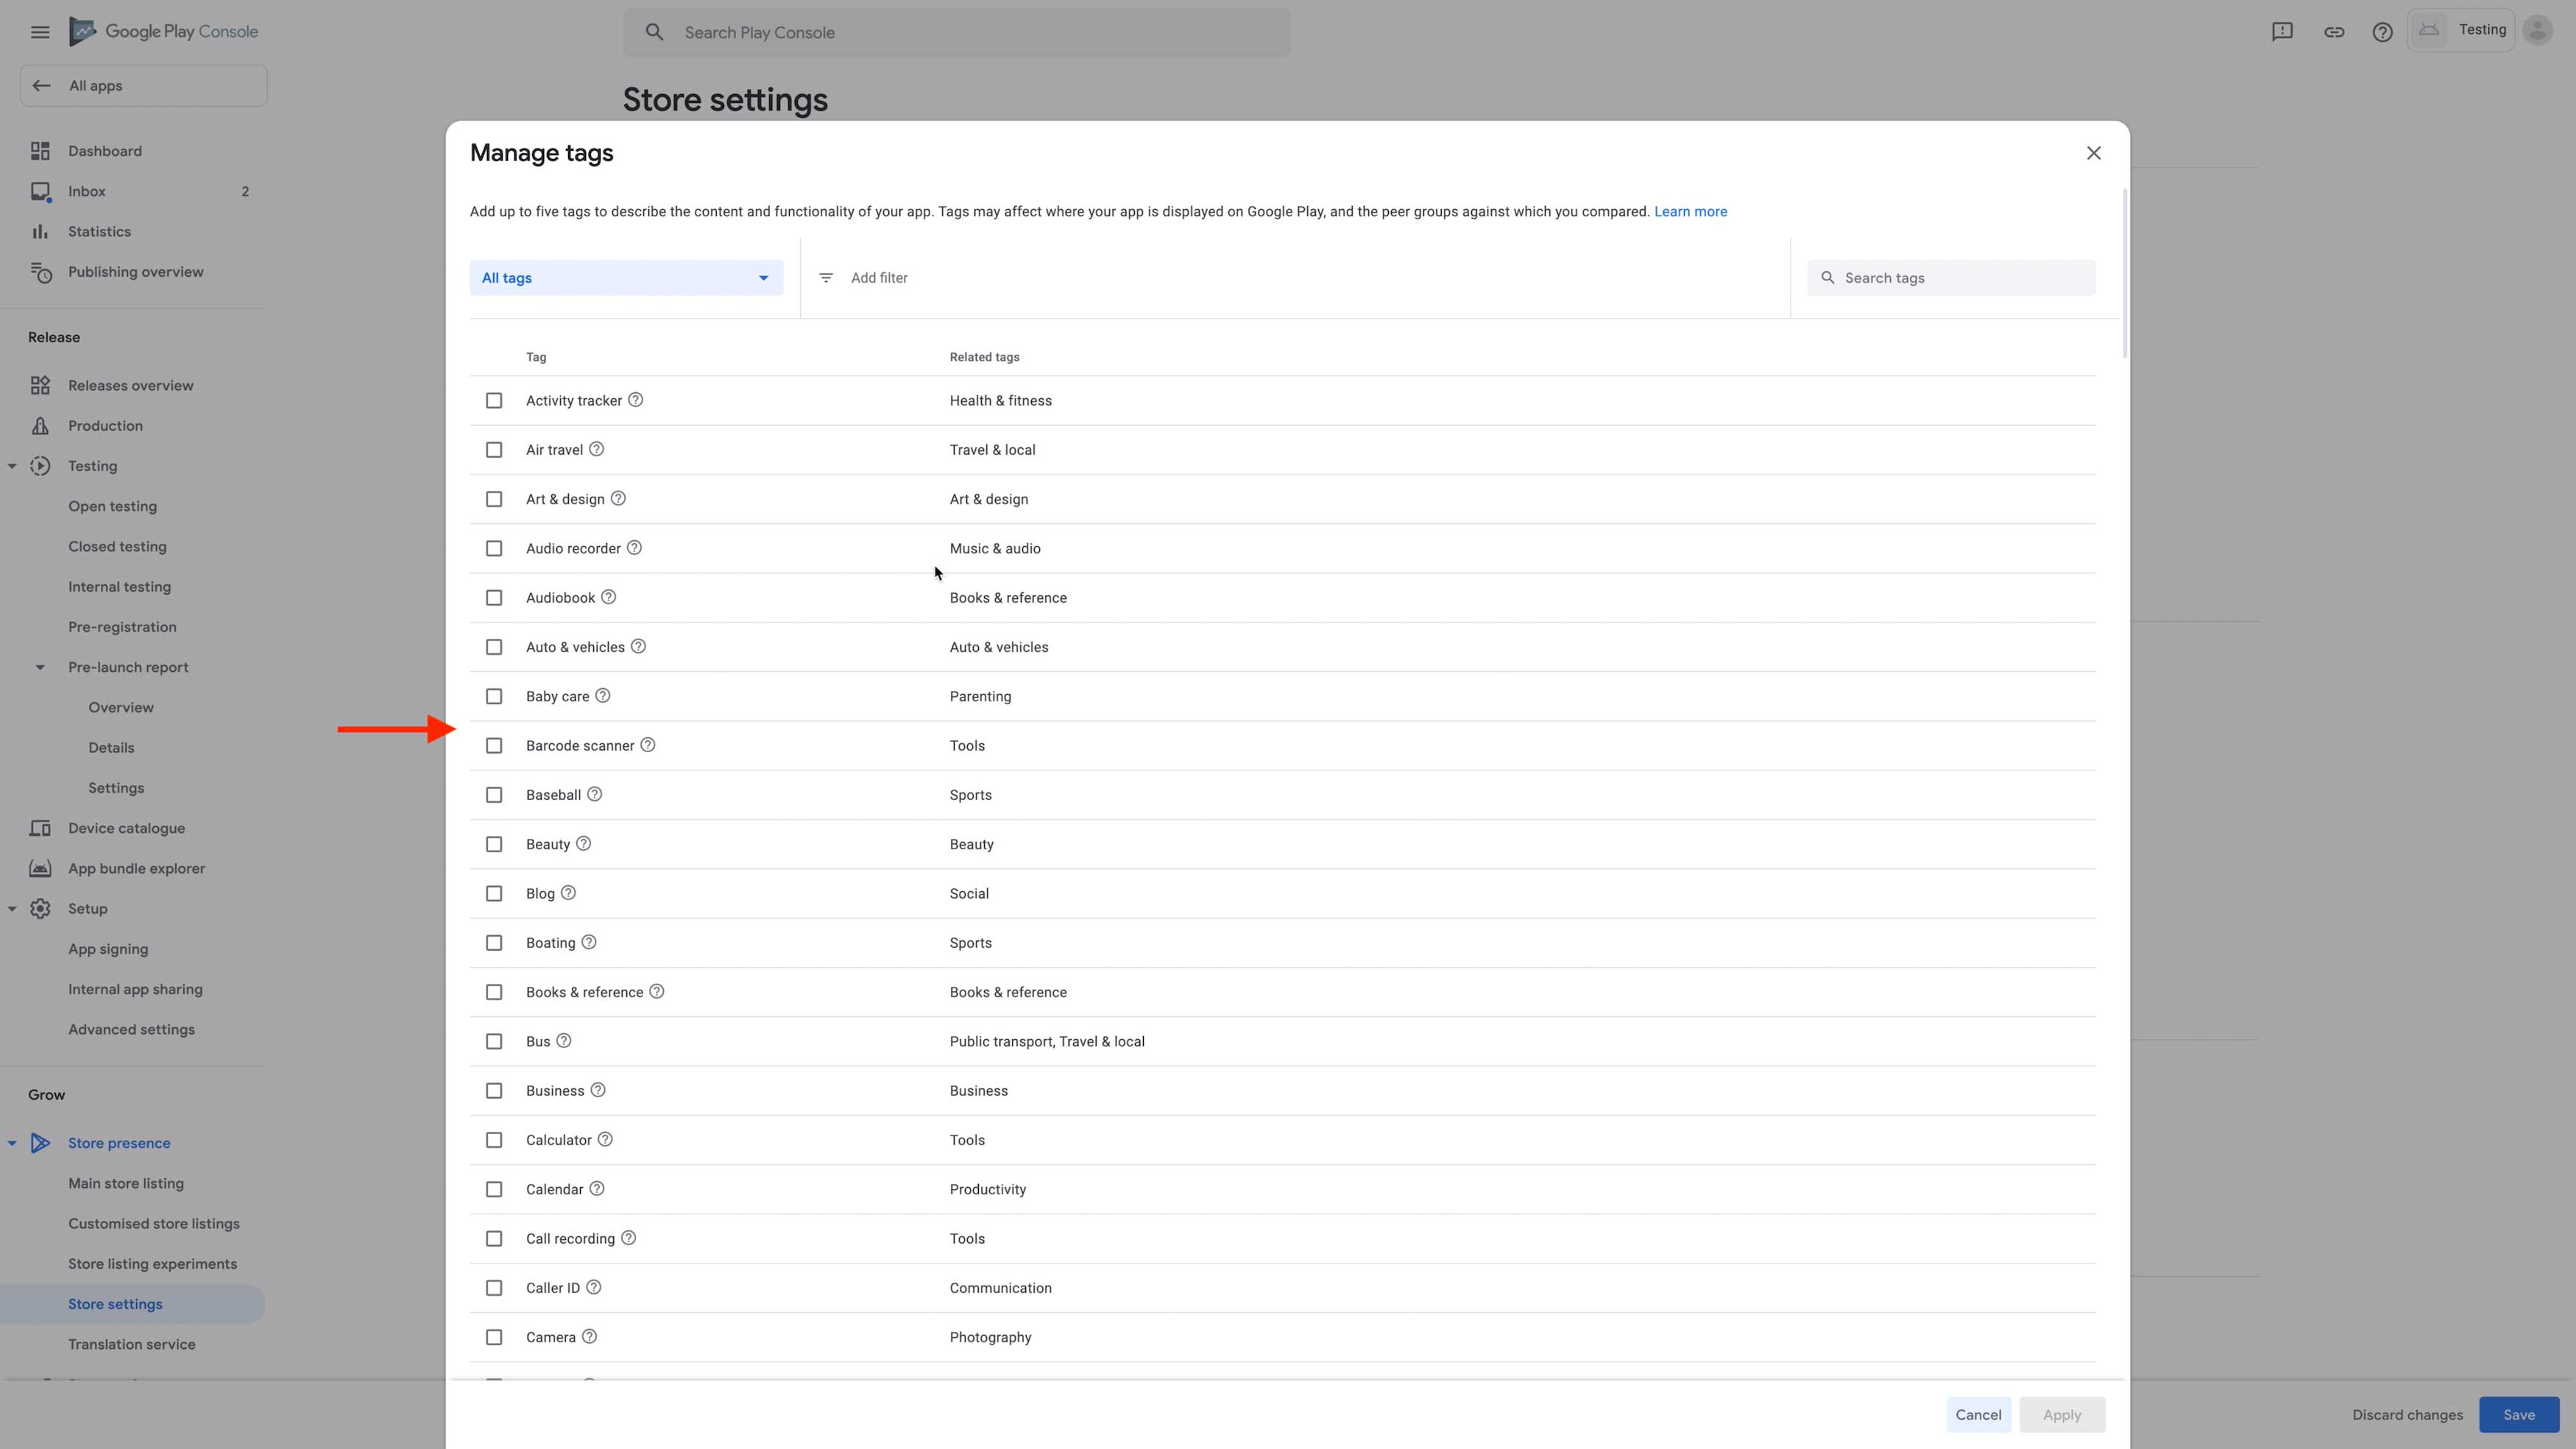
Step 35: Click on Apply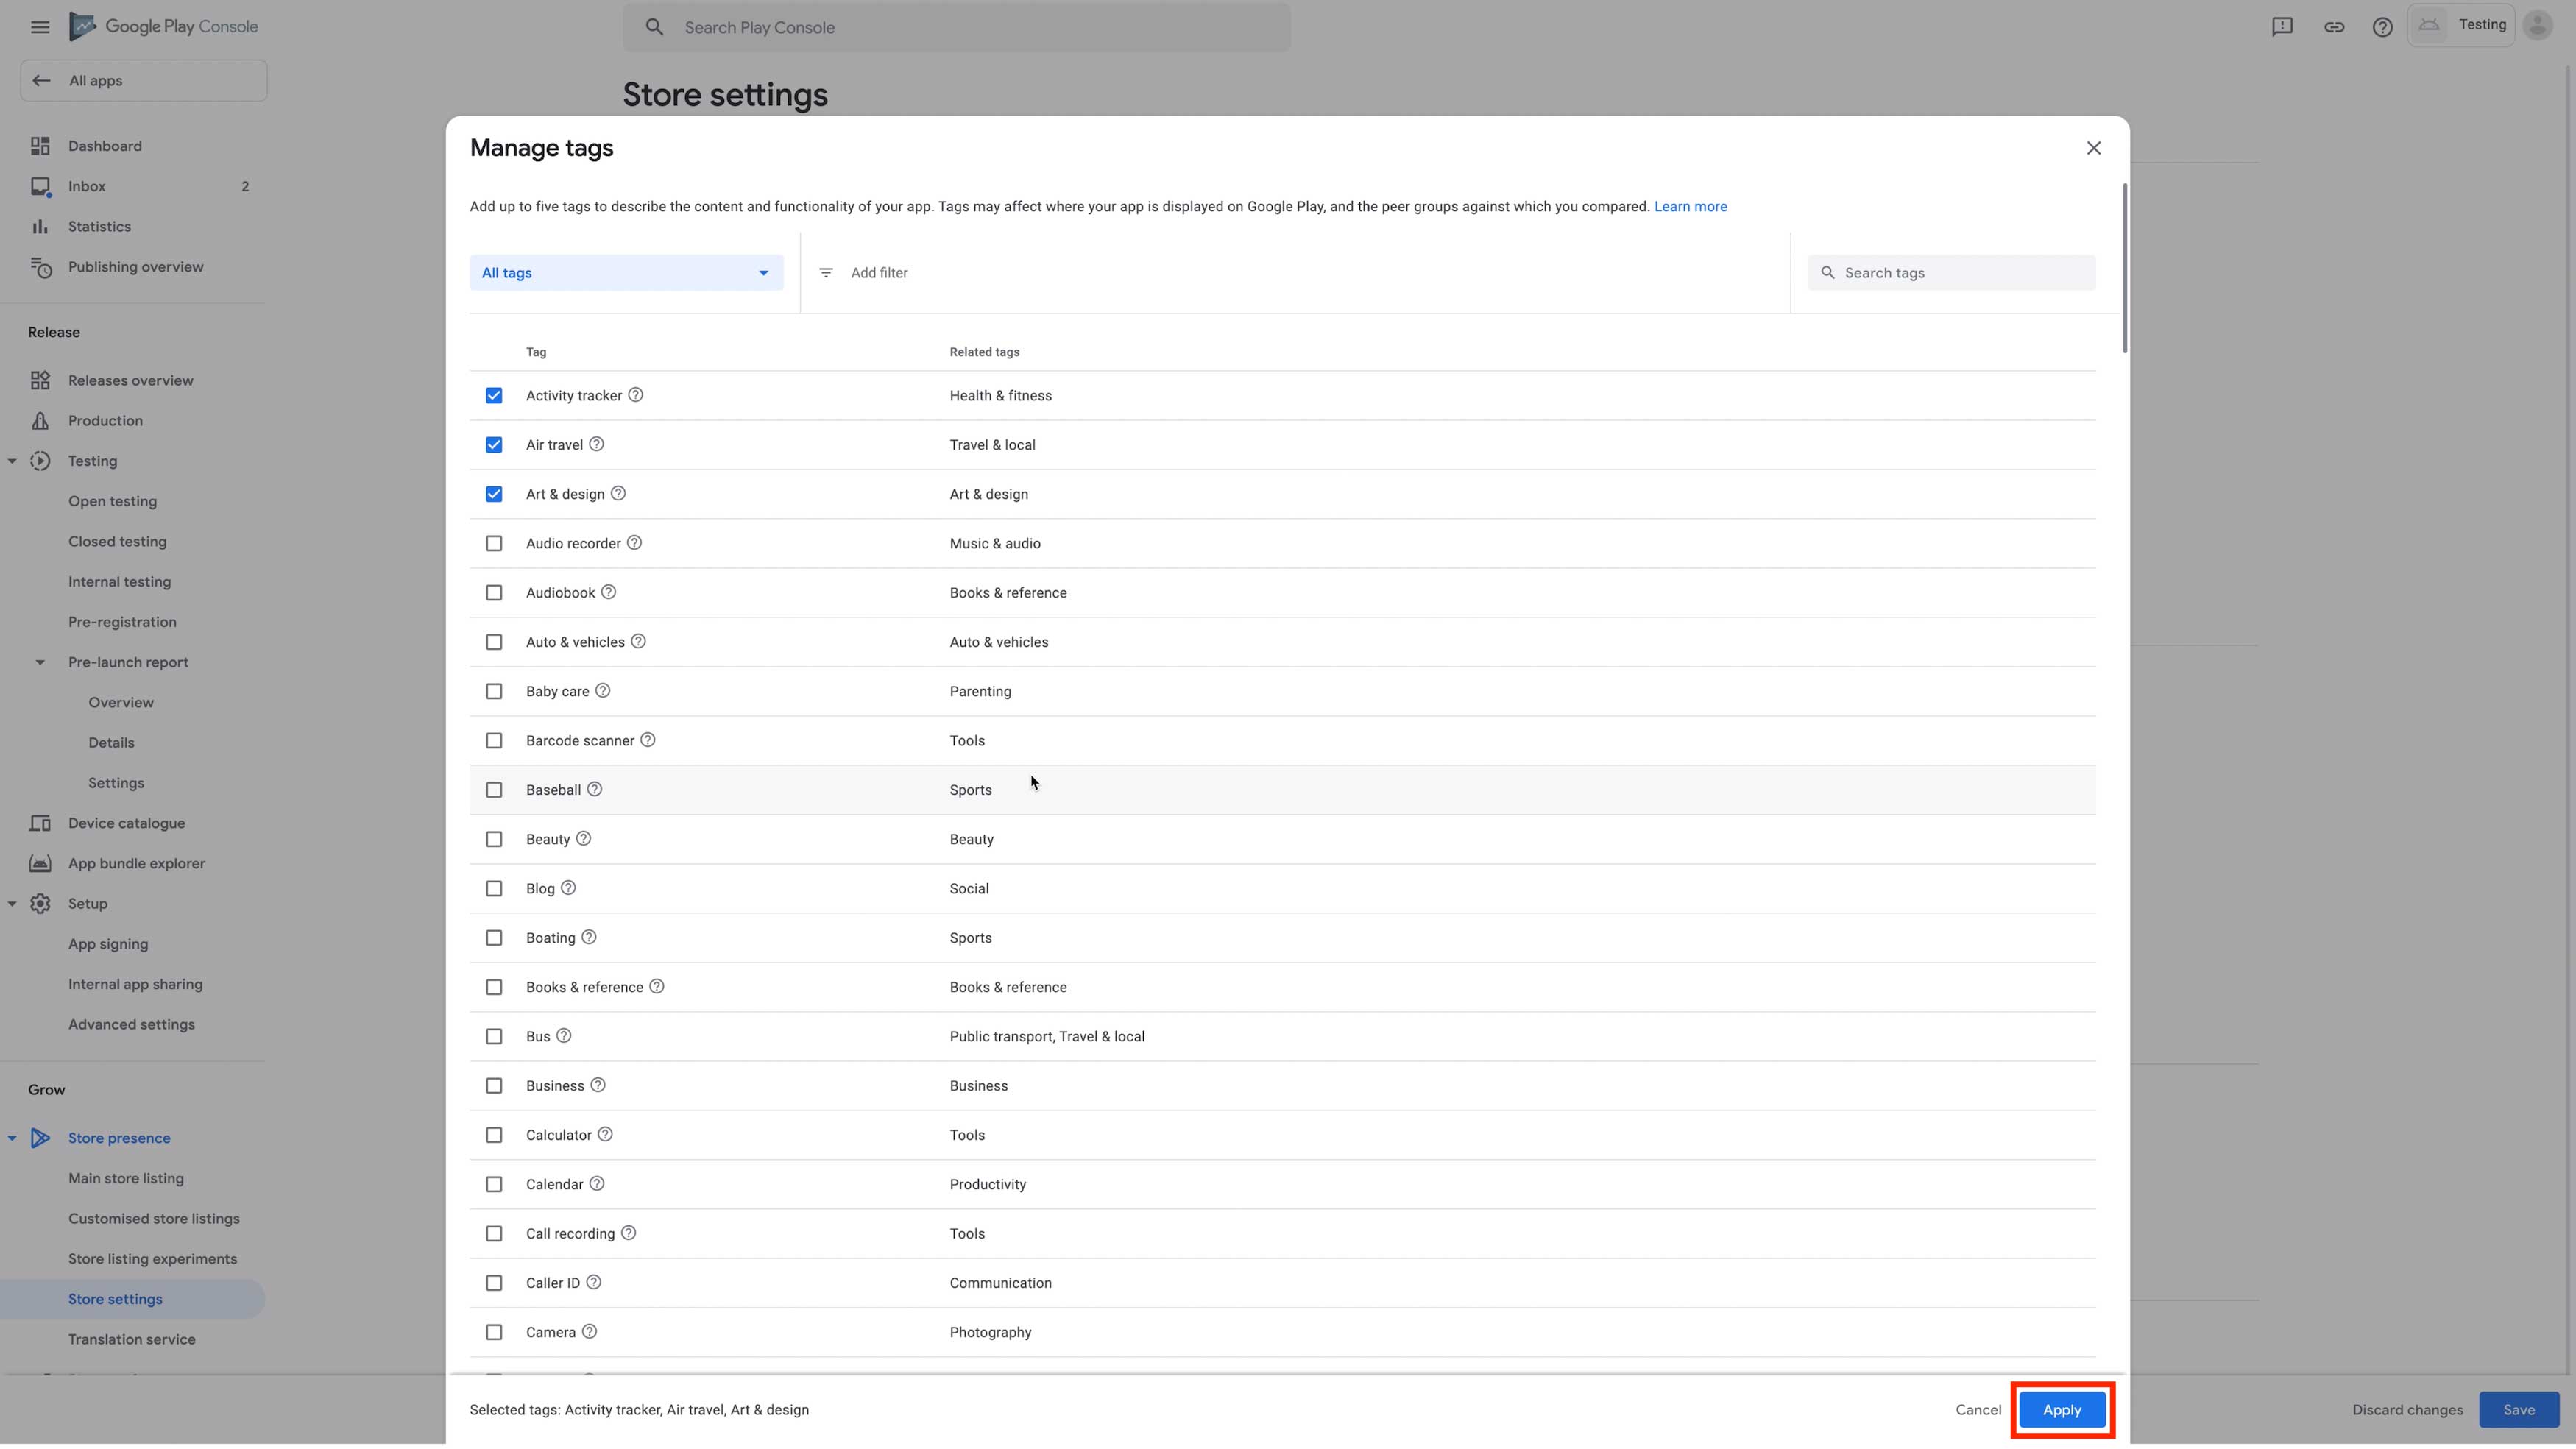
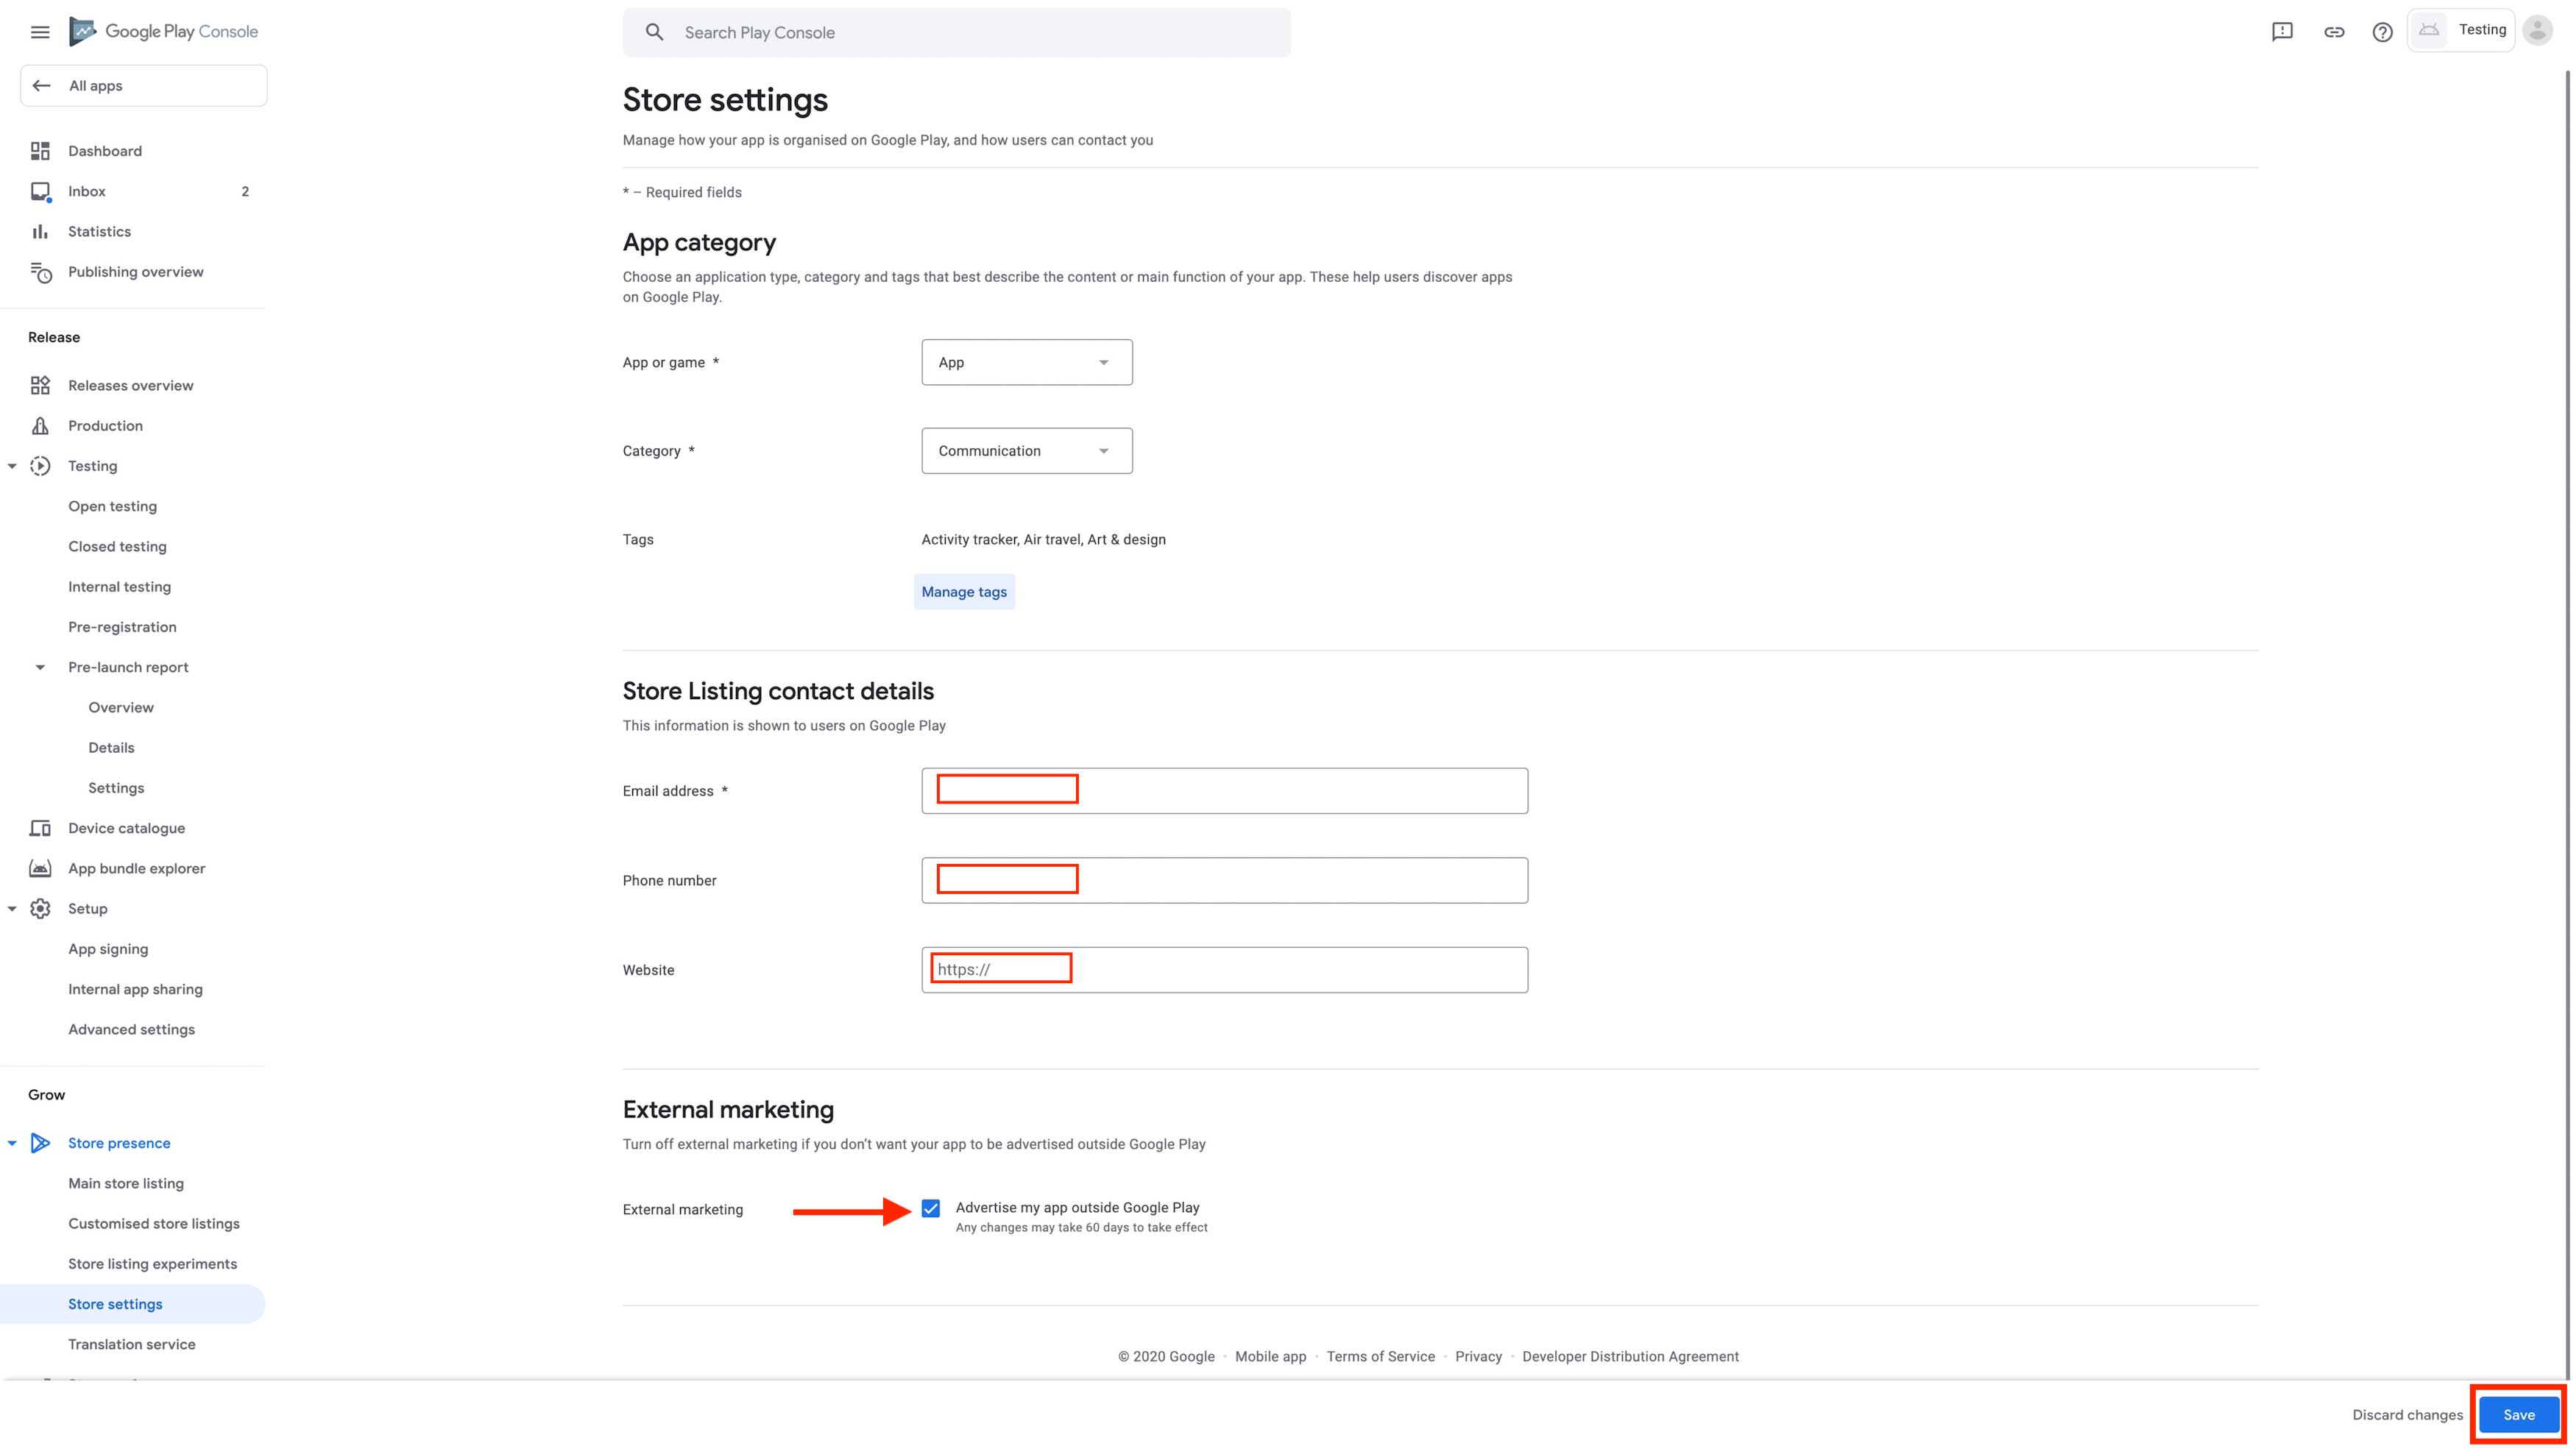
Step 36: Enter an email address, phone number, and website in the Contact Details section.Tick mark the External Marketing checkbox if you want to advertise your app outside Google Play, else uncheck this checkbox click on Save.
Step 37: Go back to the dashboard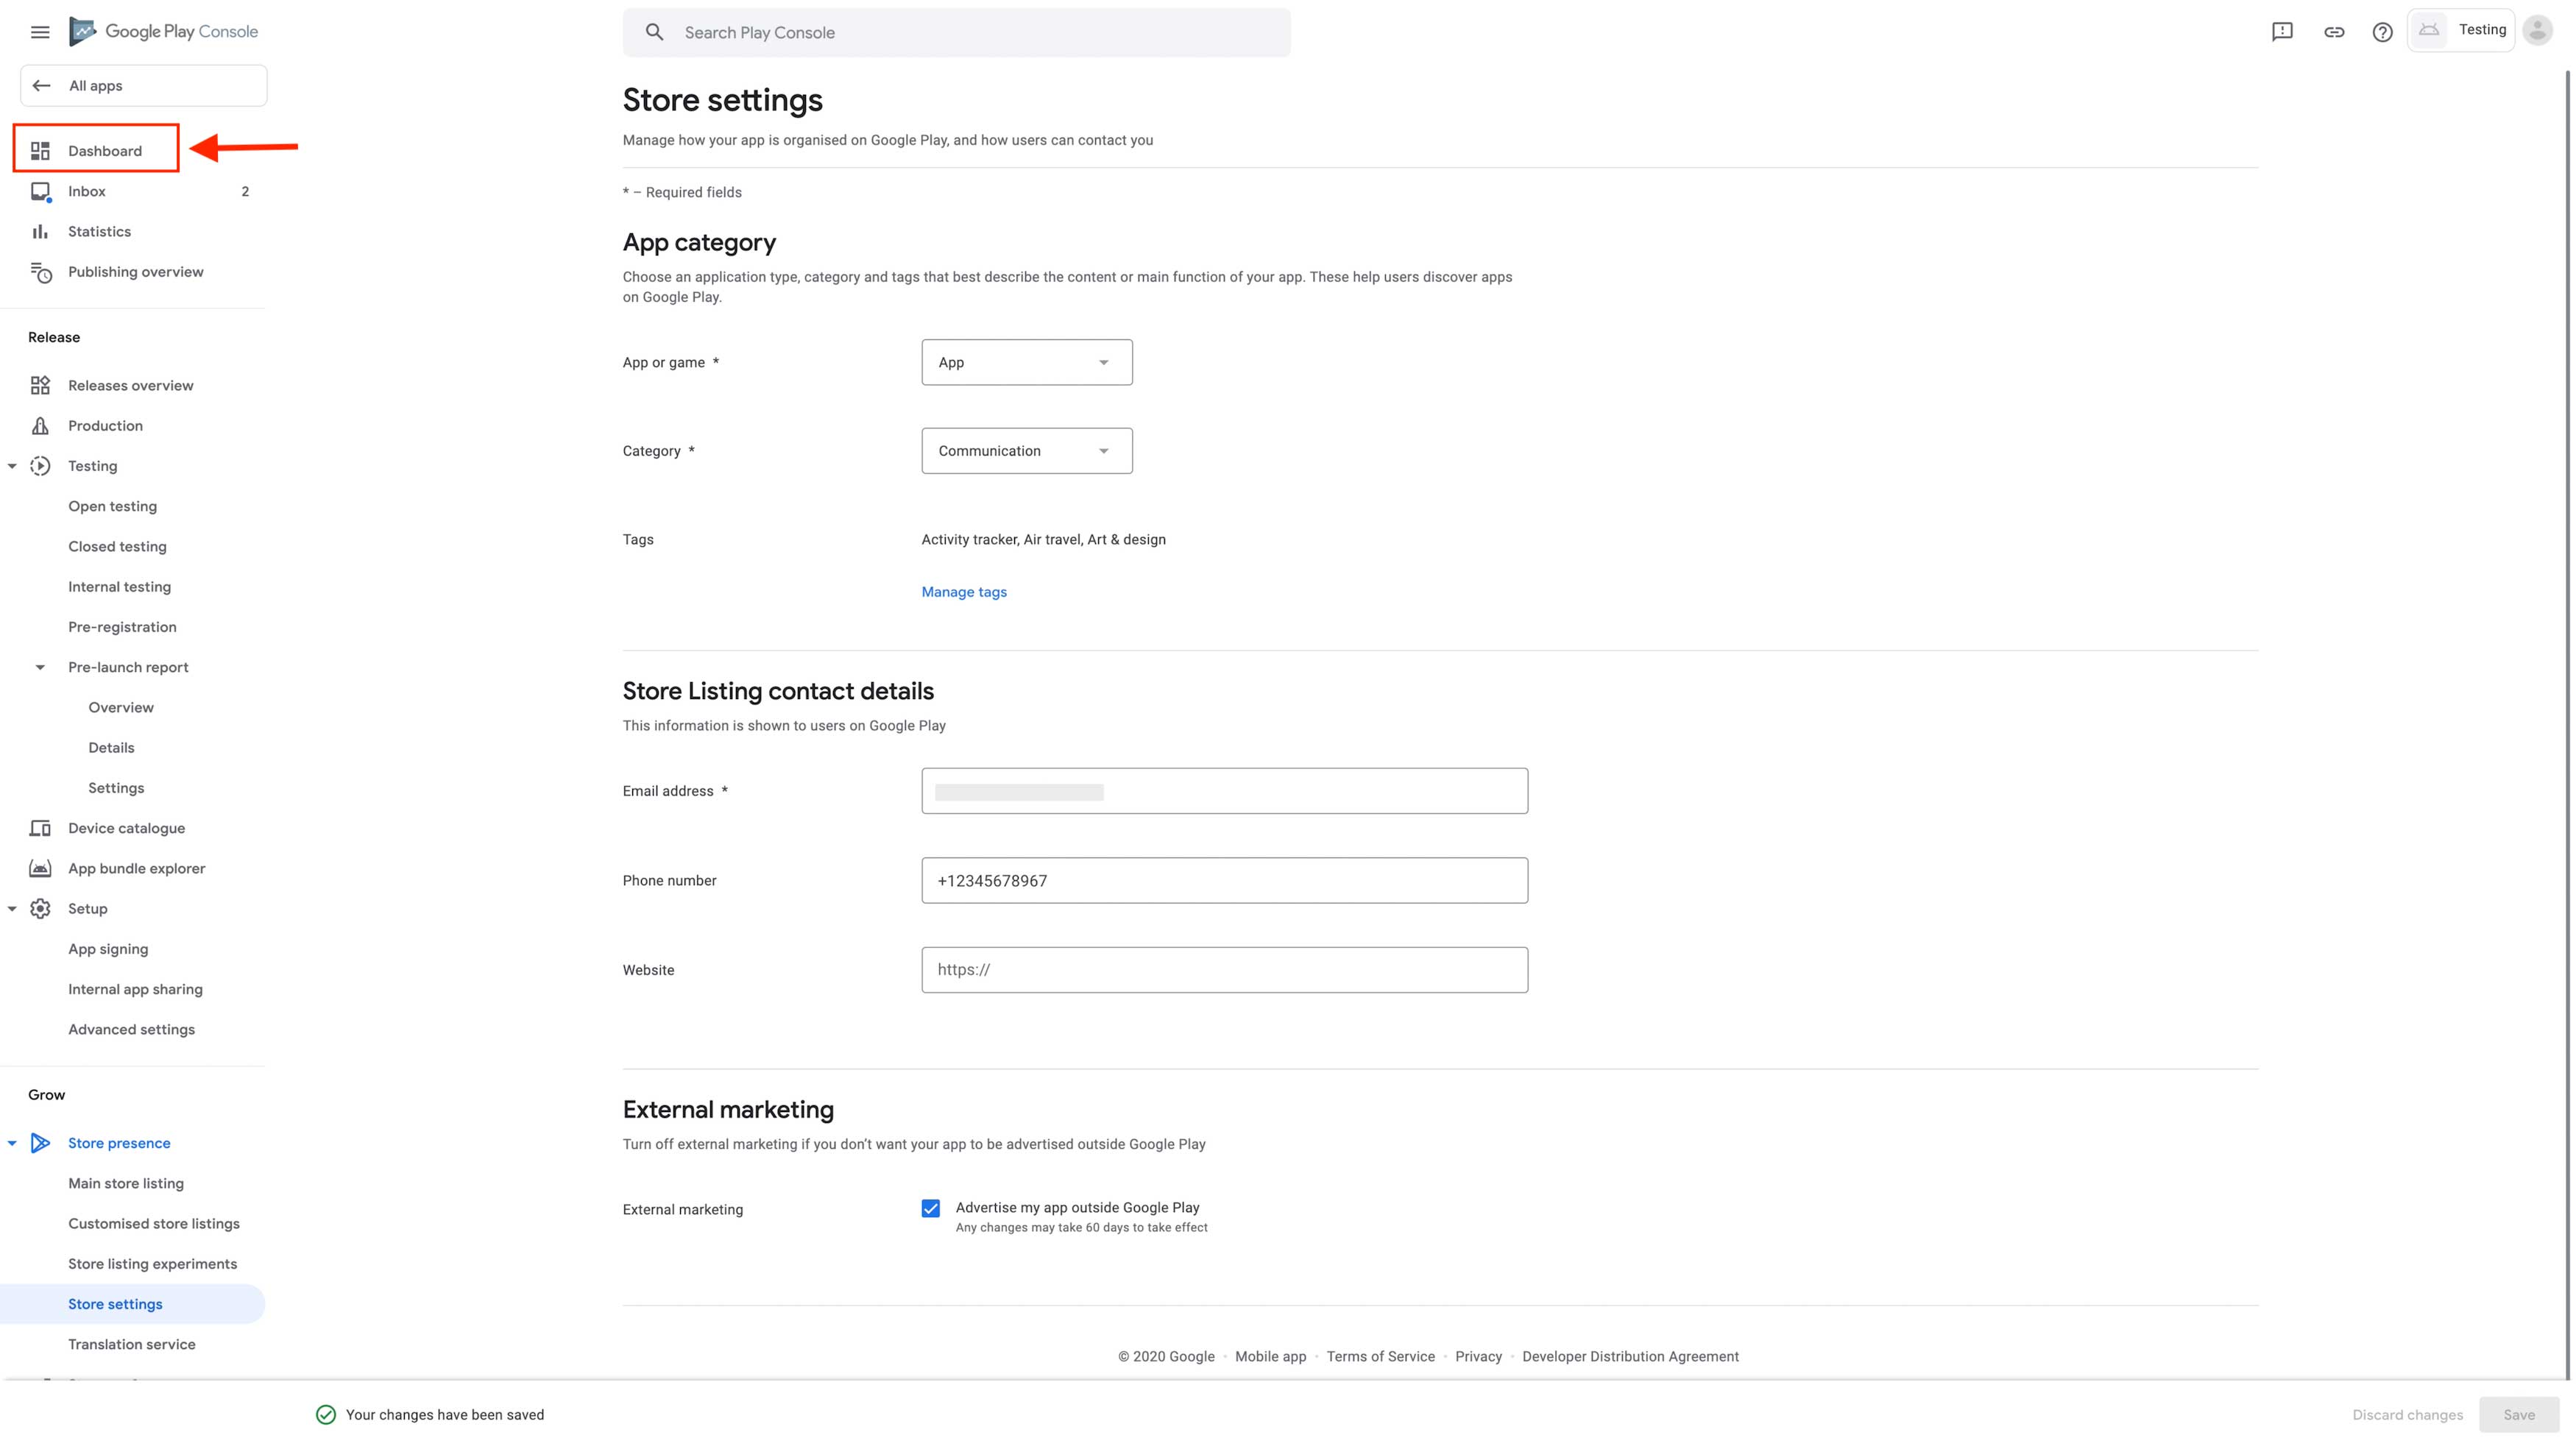
Step 38: Click on Set up your Store Listing 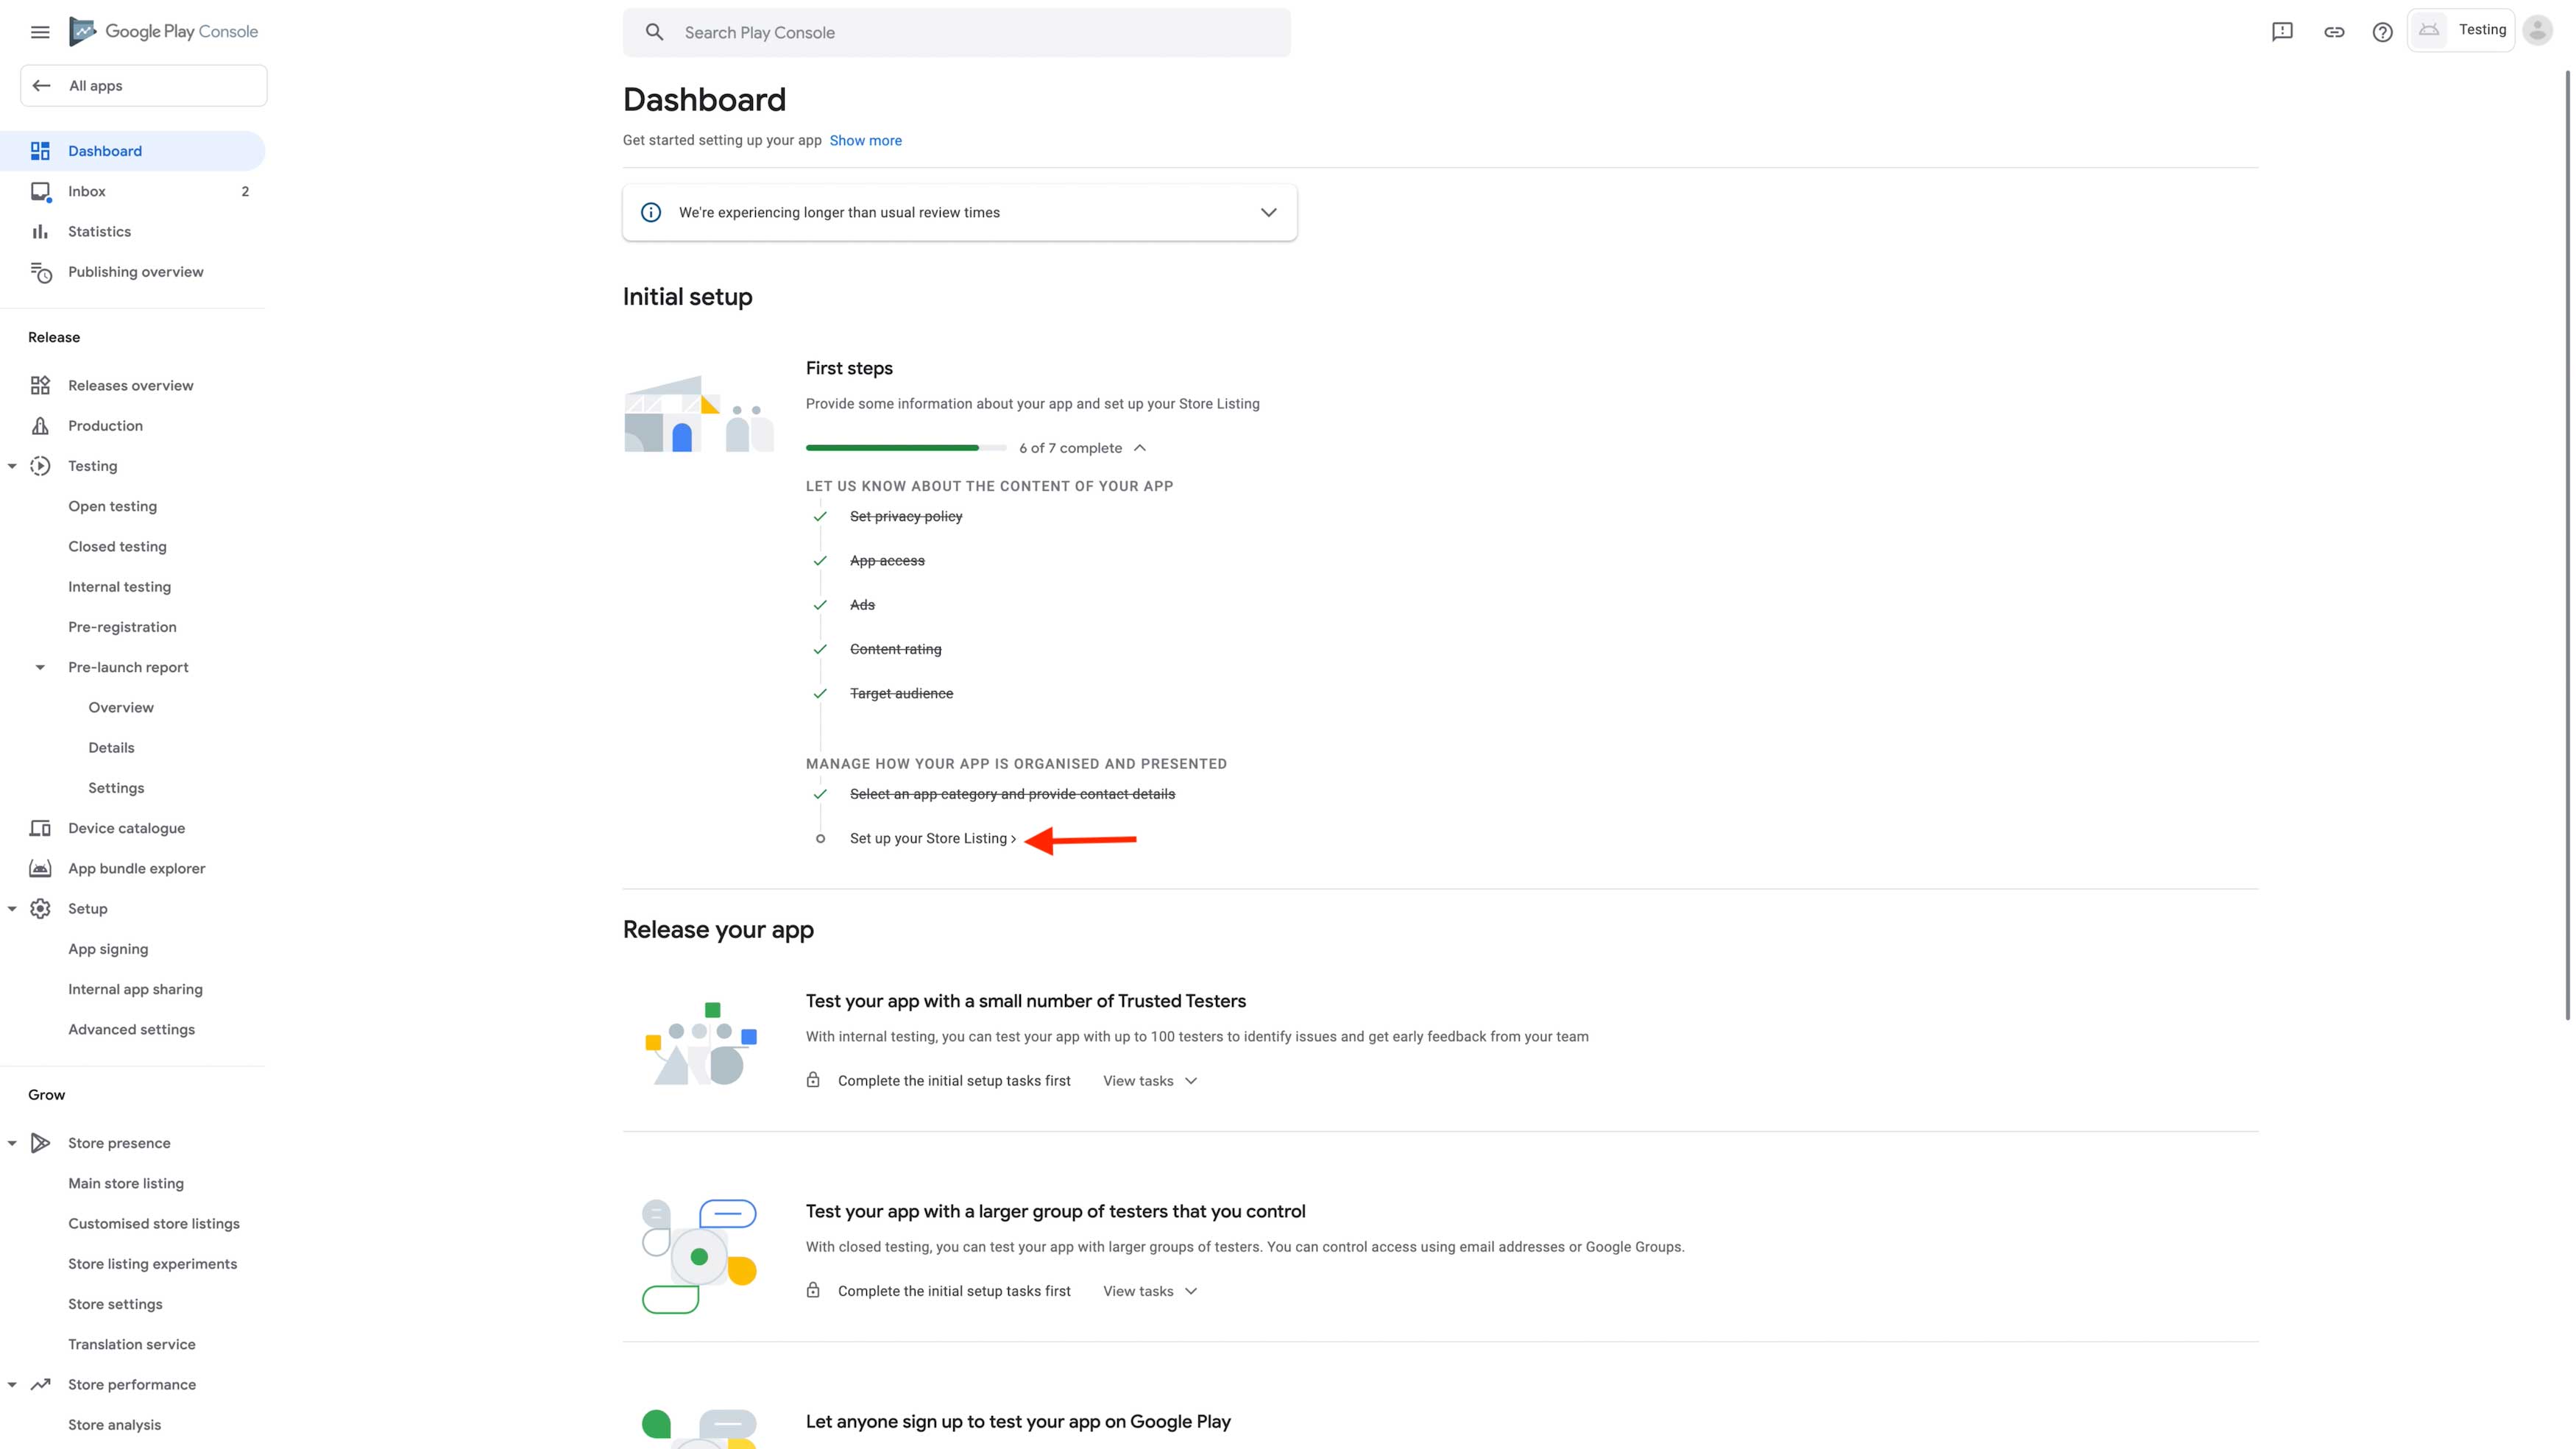
Step 39: Enter a Short Description and Full Description for your app in the App Details section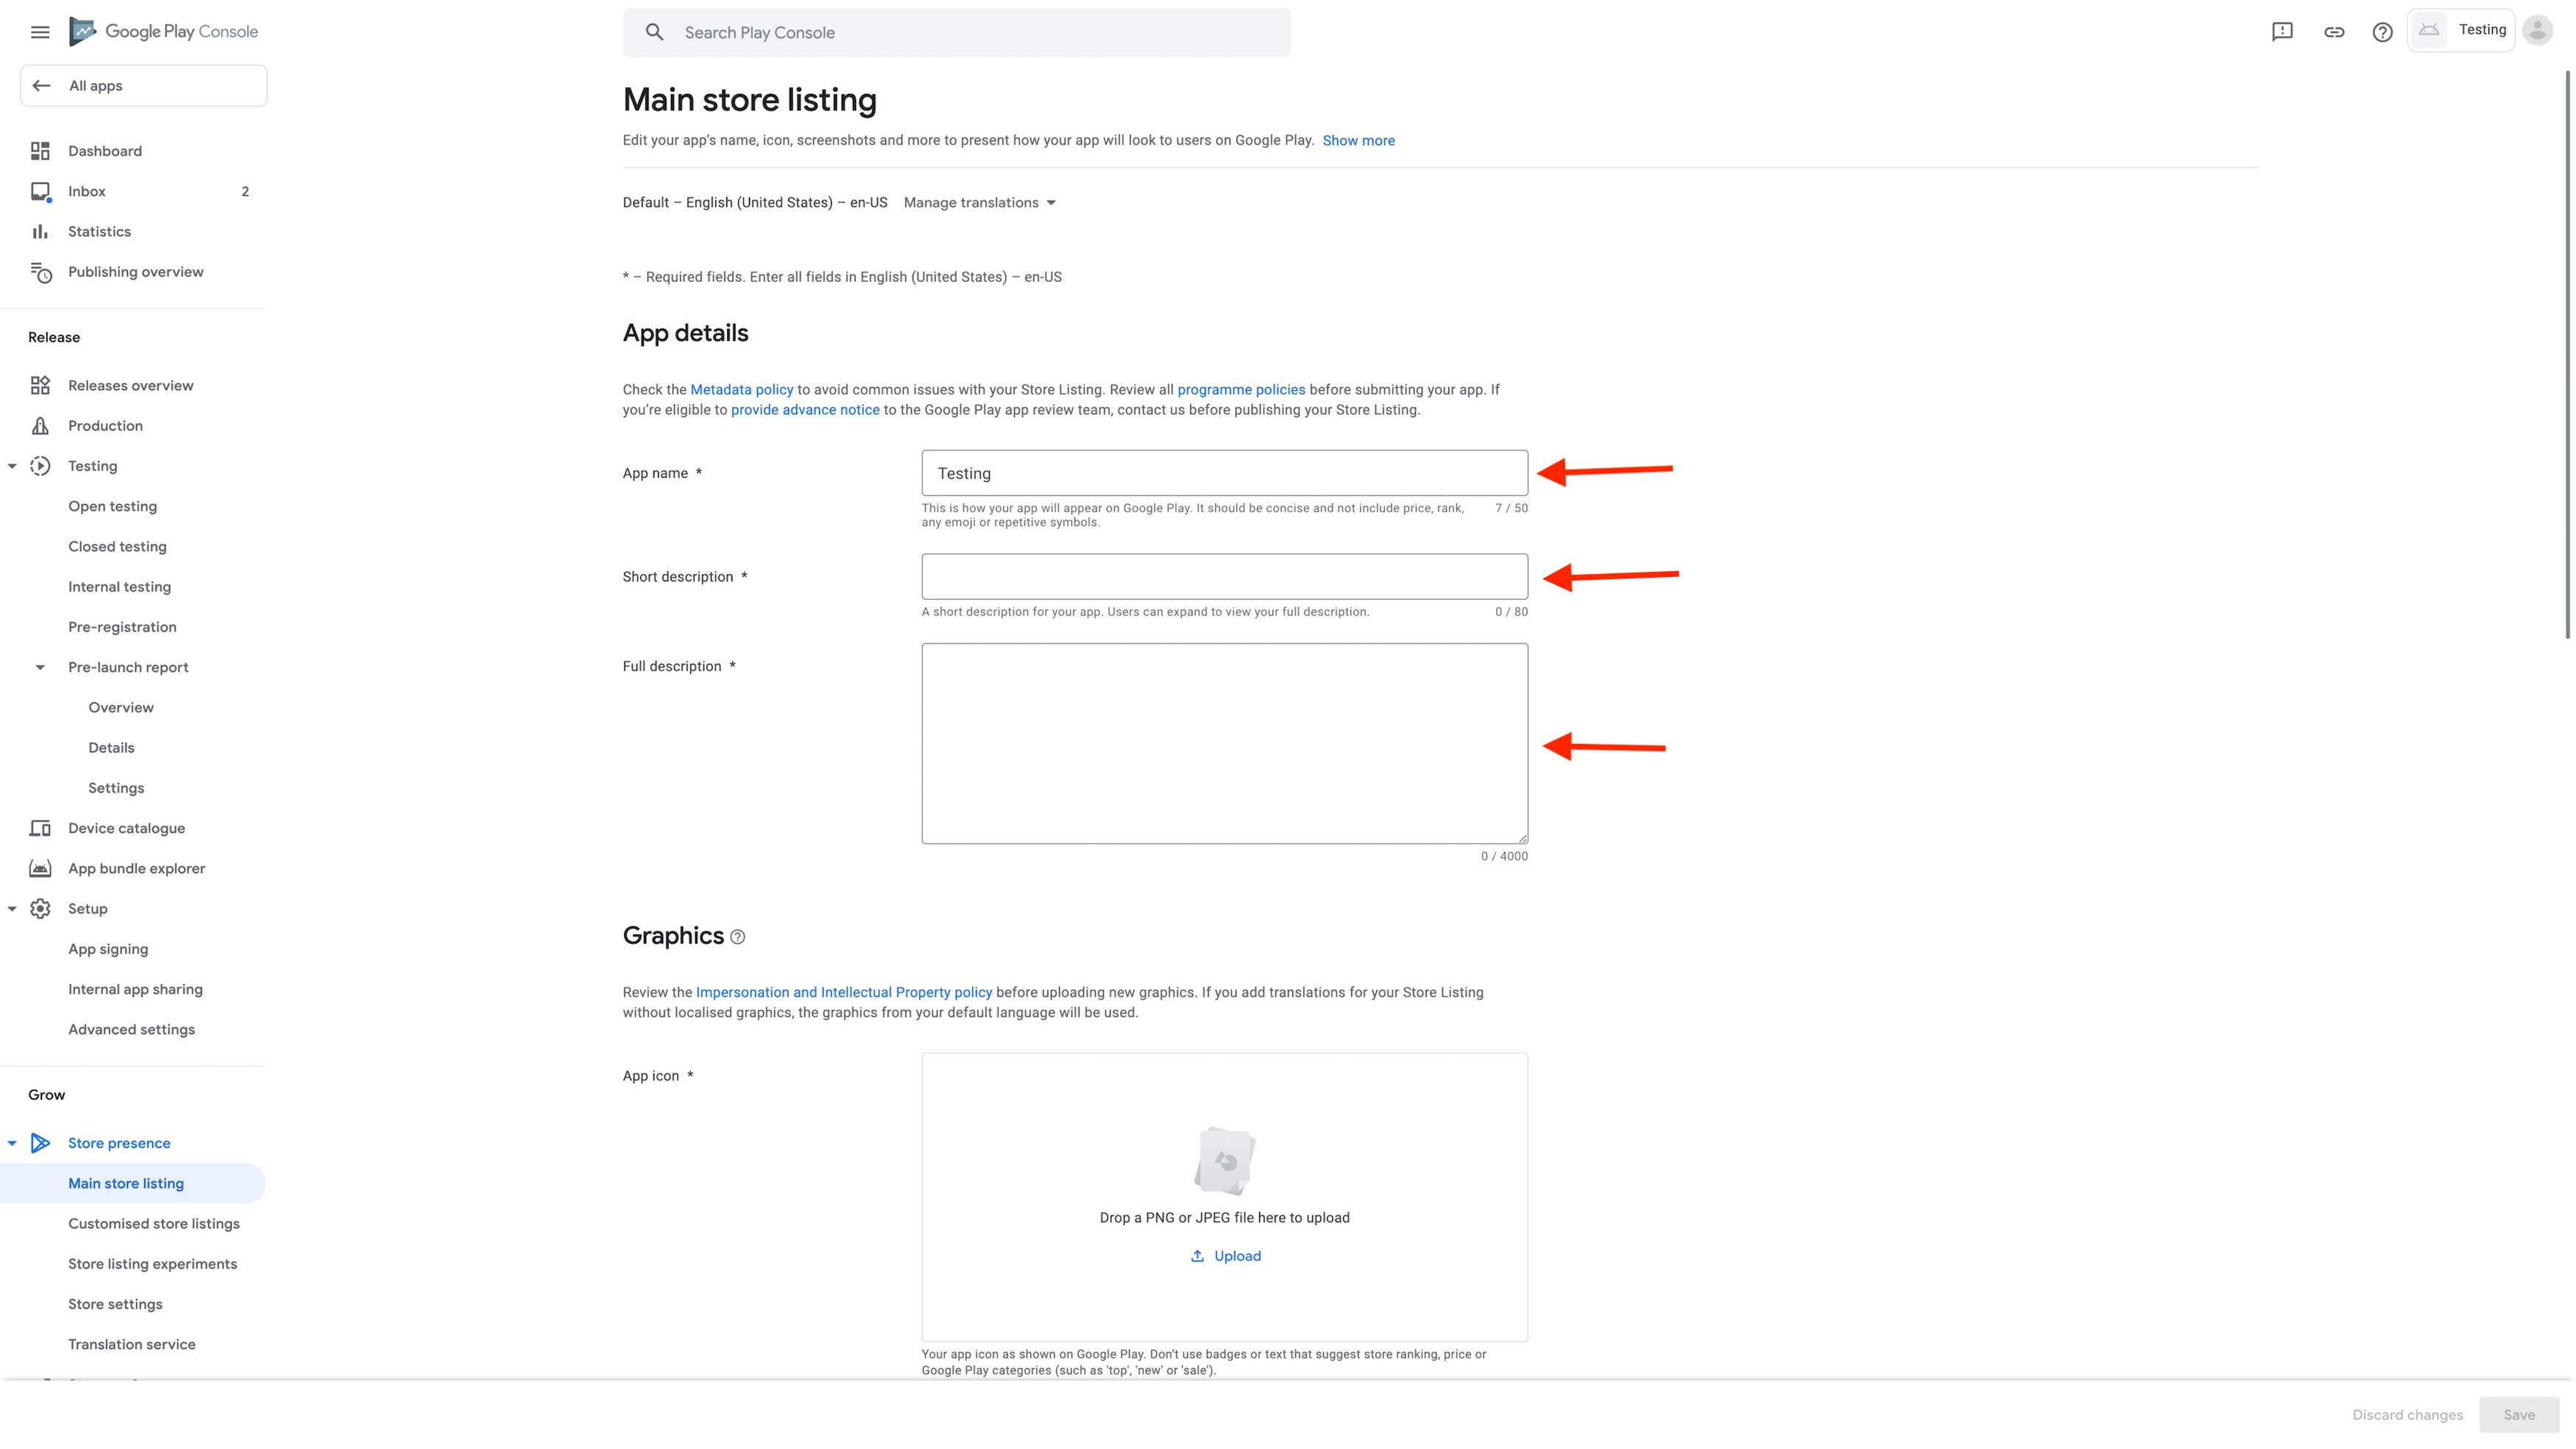 Step 40: Upload the App Icon, Feature Graphic, and screenshots in the App Graphics section.Add a YouTube video URL to your store listing
 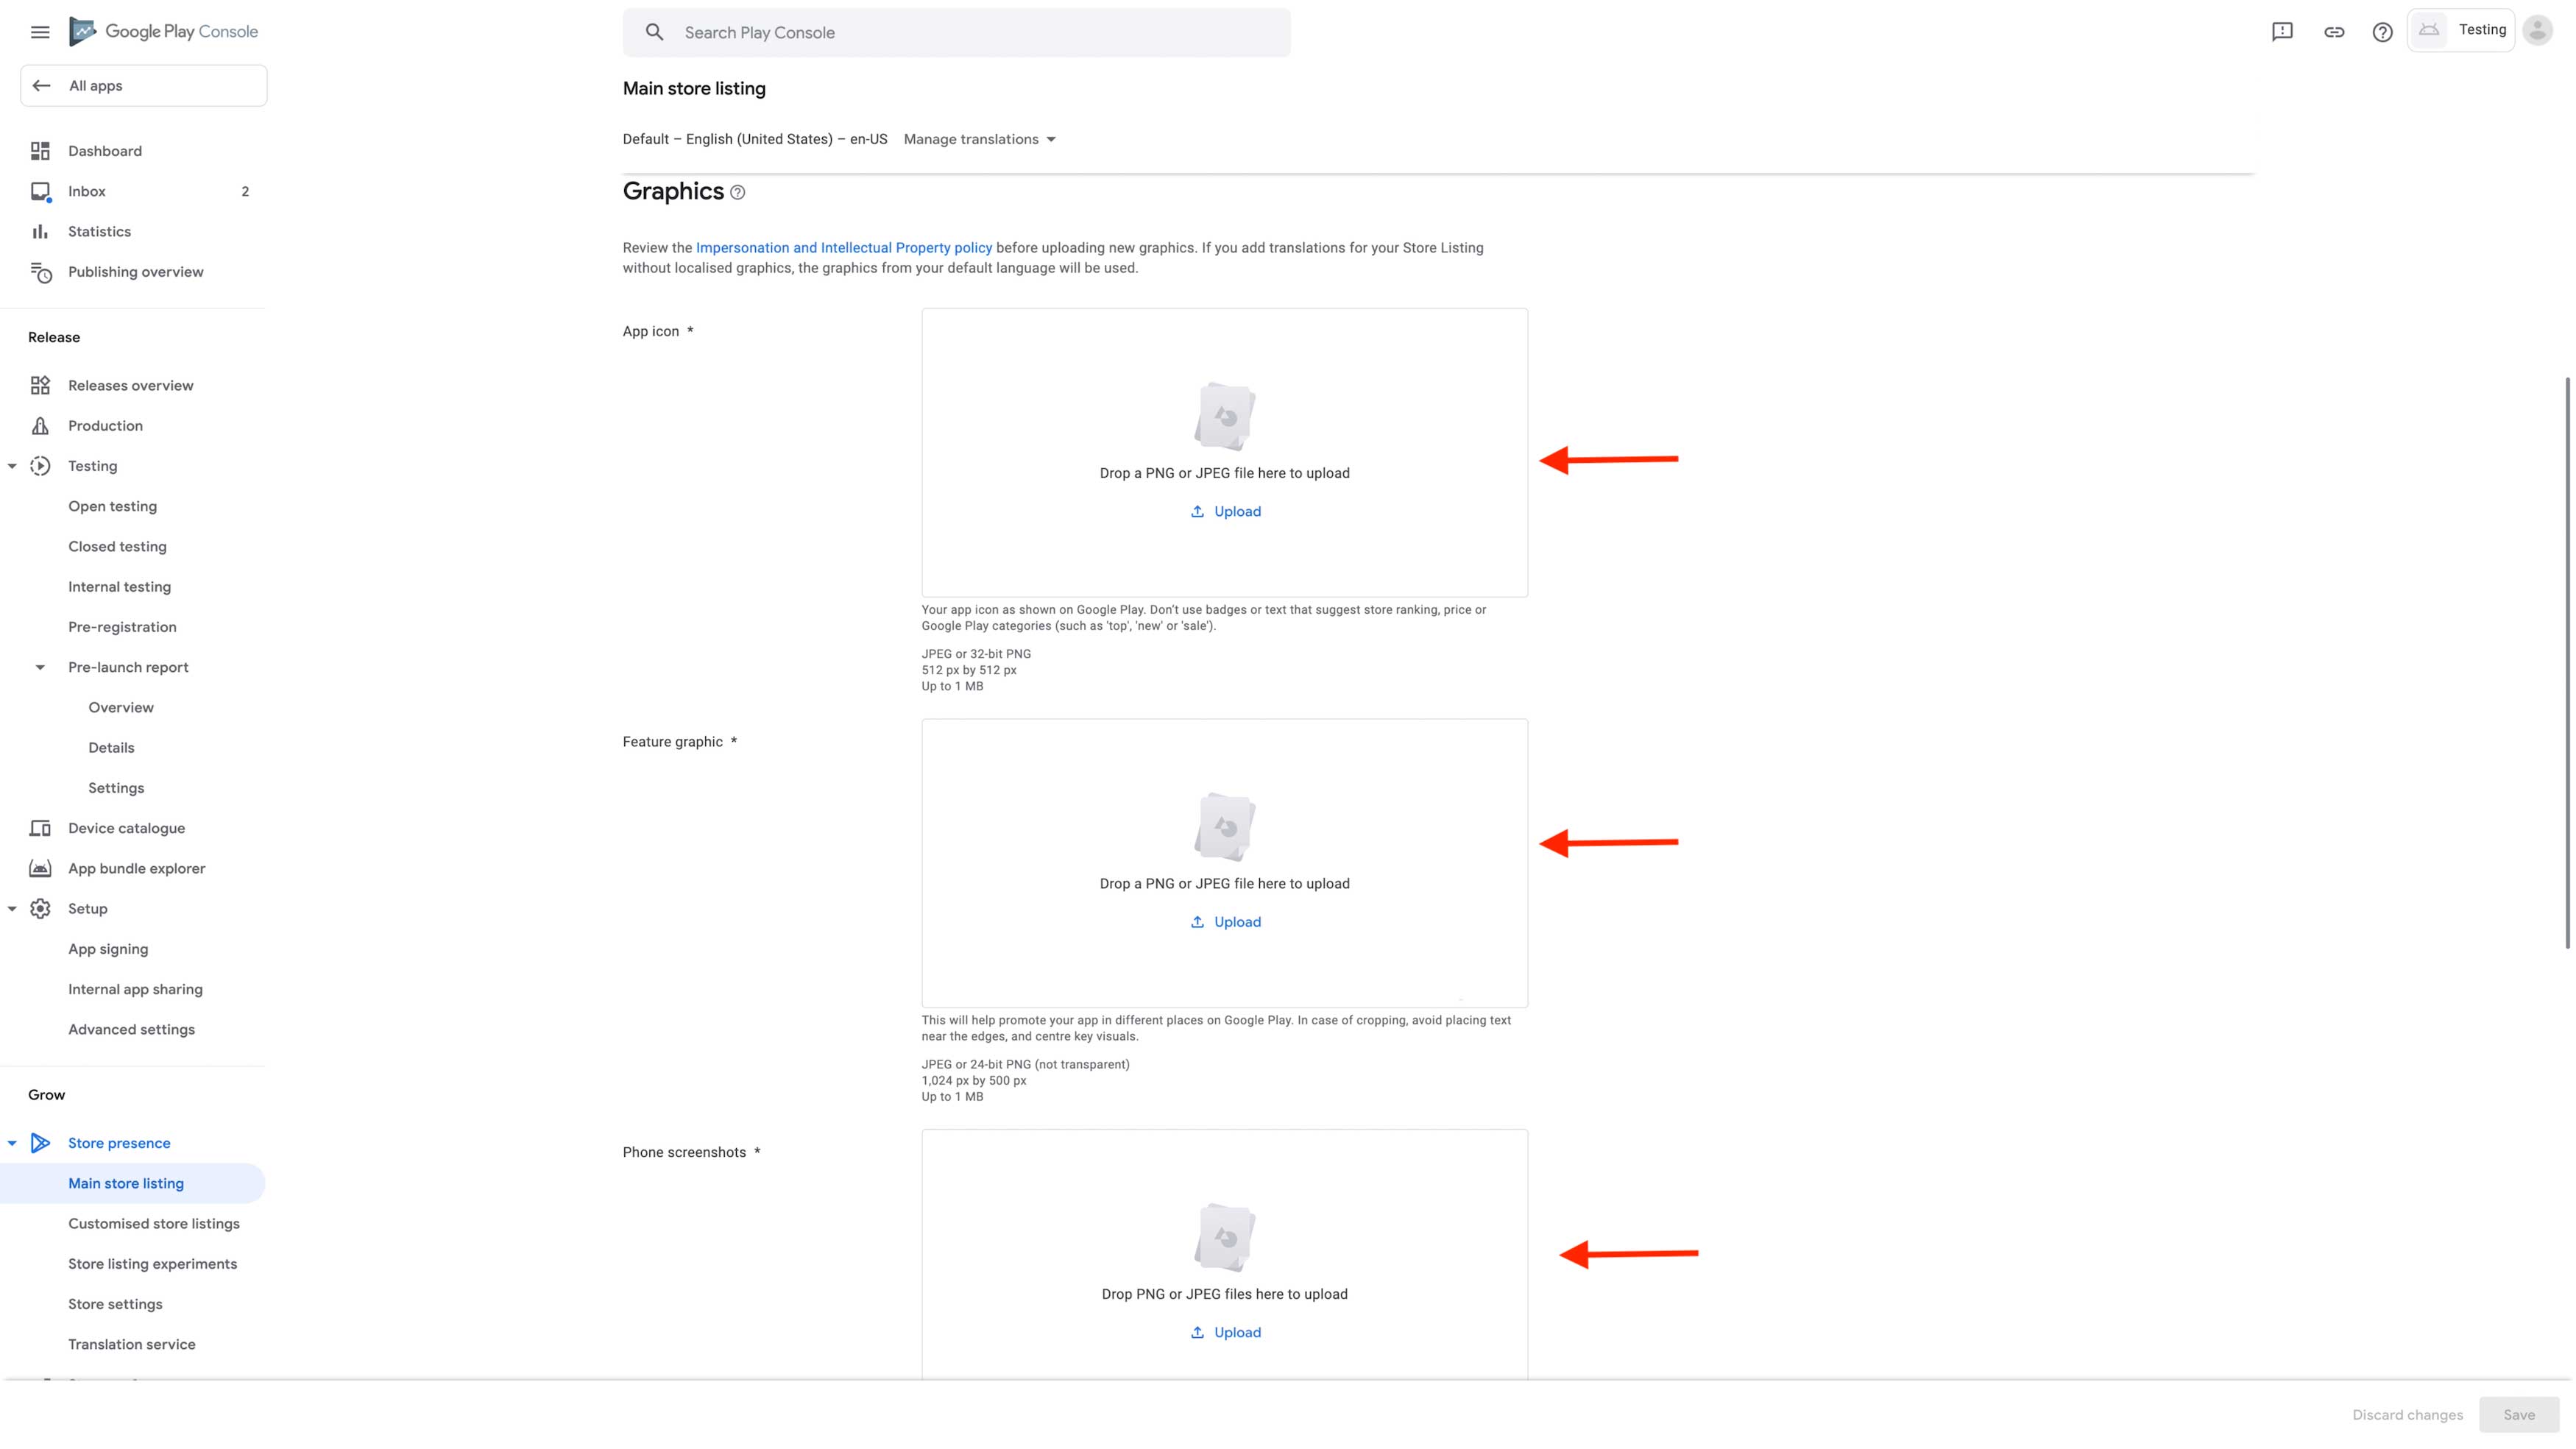 Step 41:Click on Save and Go to the dashboard
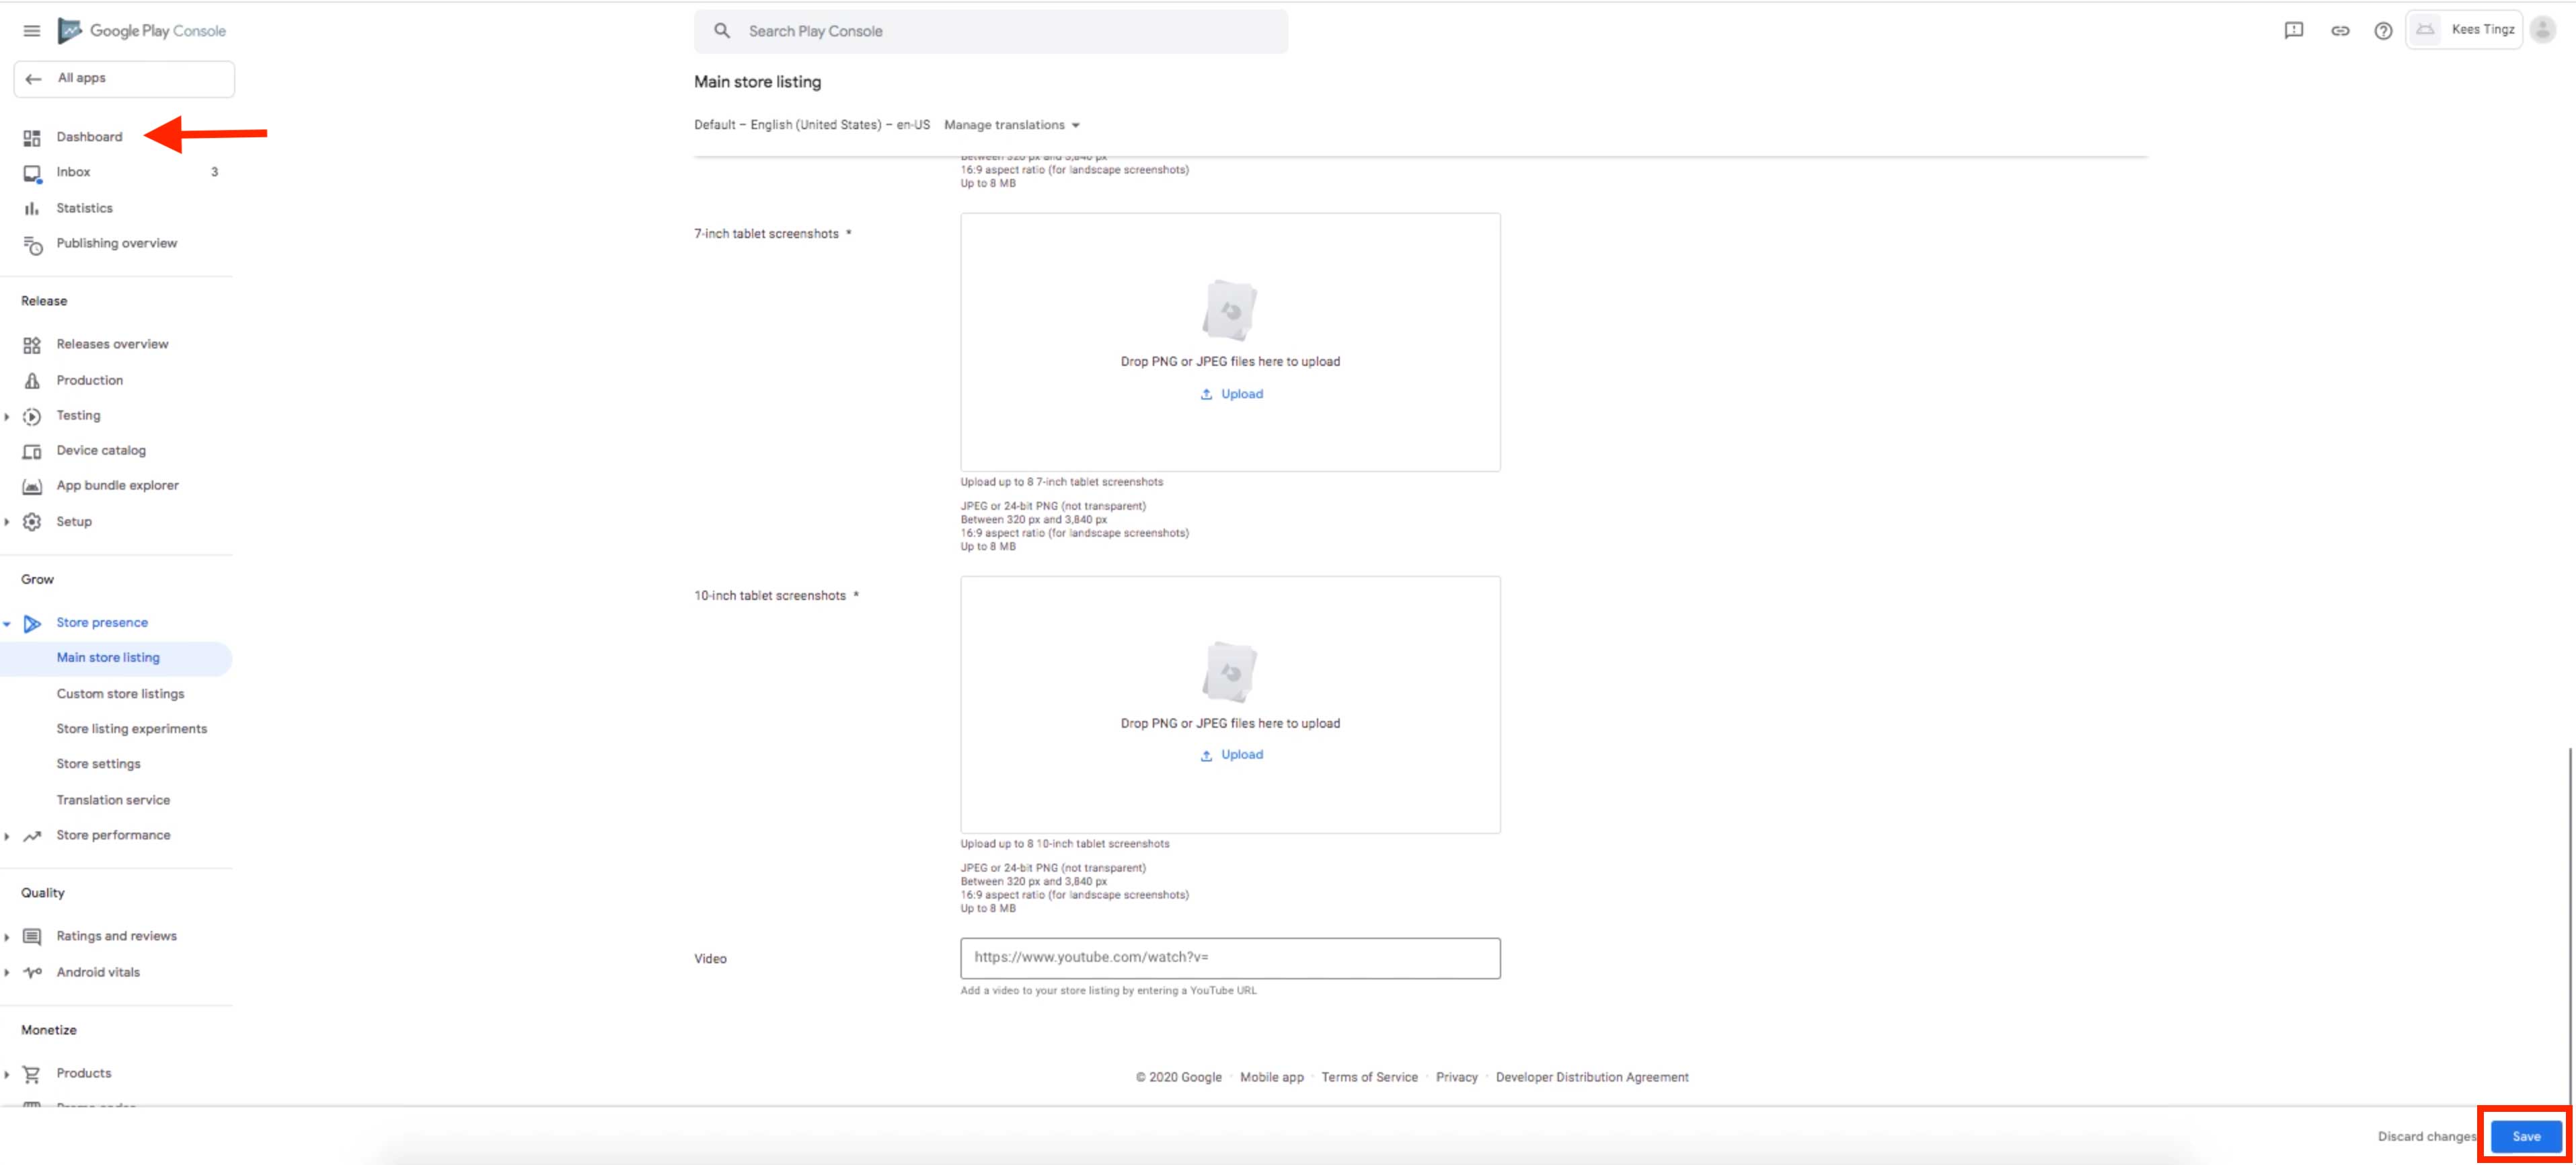
Step 42: Scroll down to the Publish Your App on Google Play section and click on dropdown menu 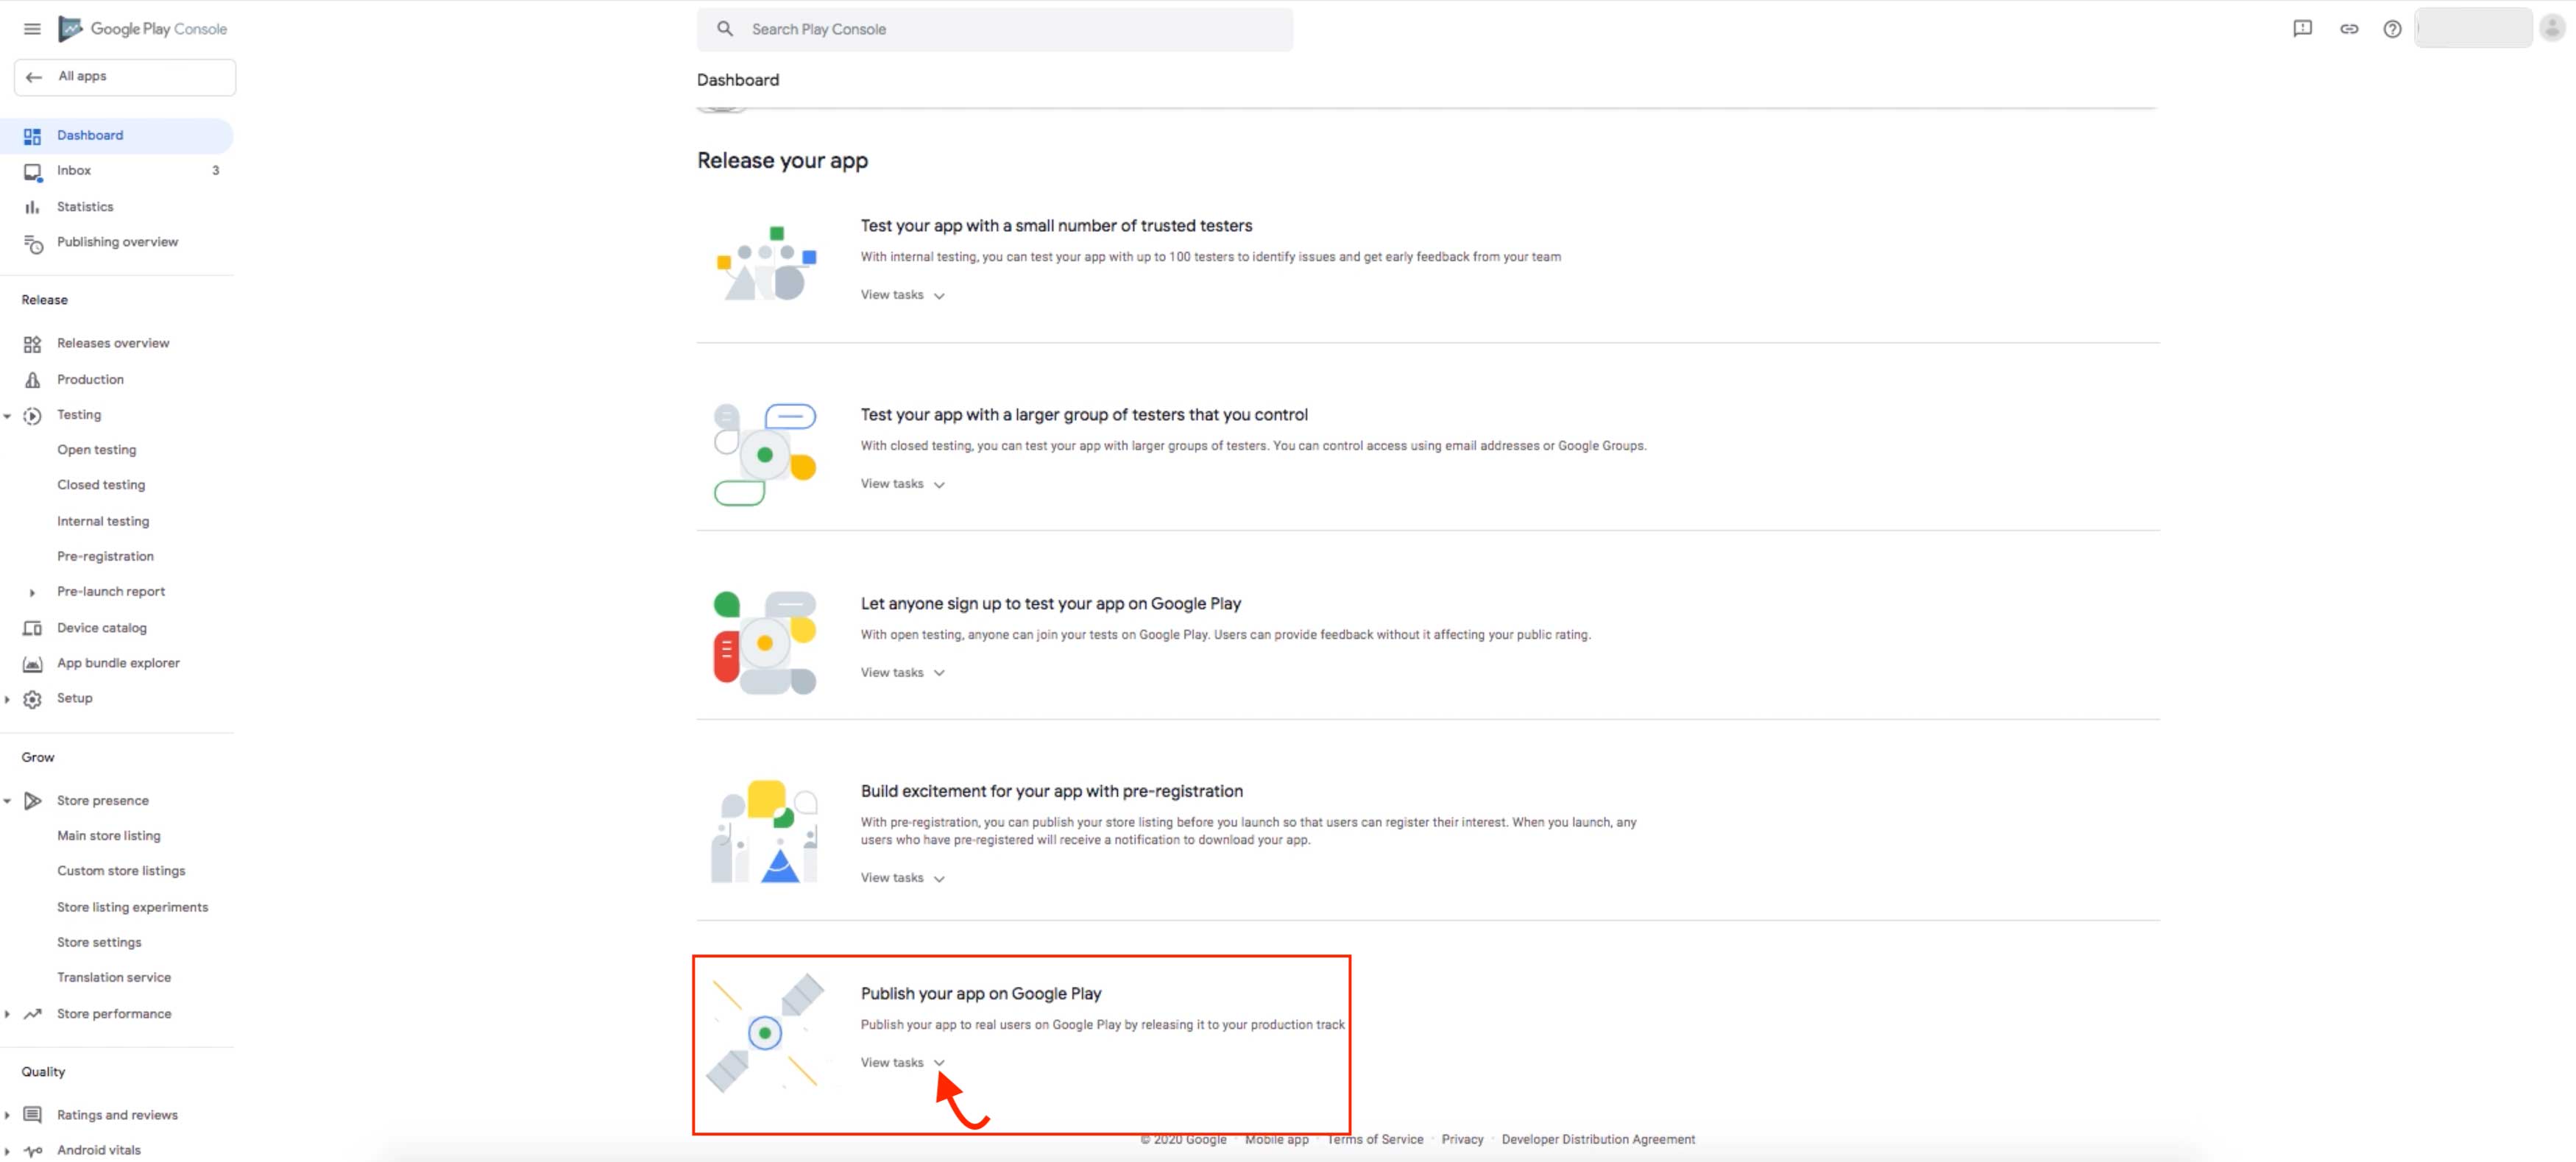
Step 43: Click on Select Countries and Region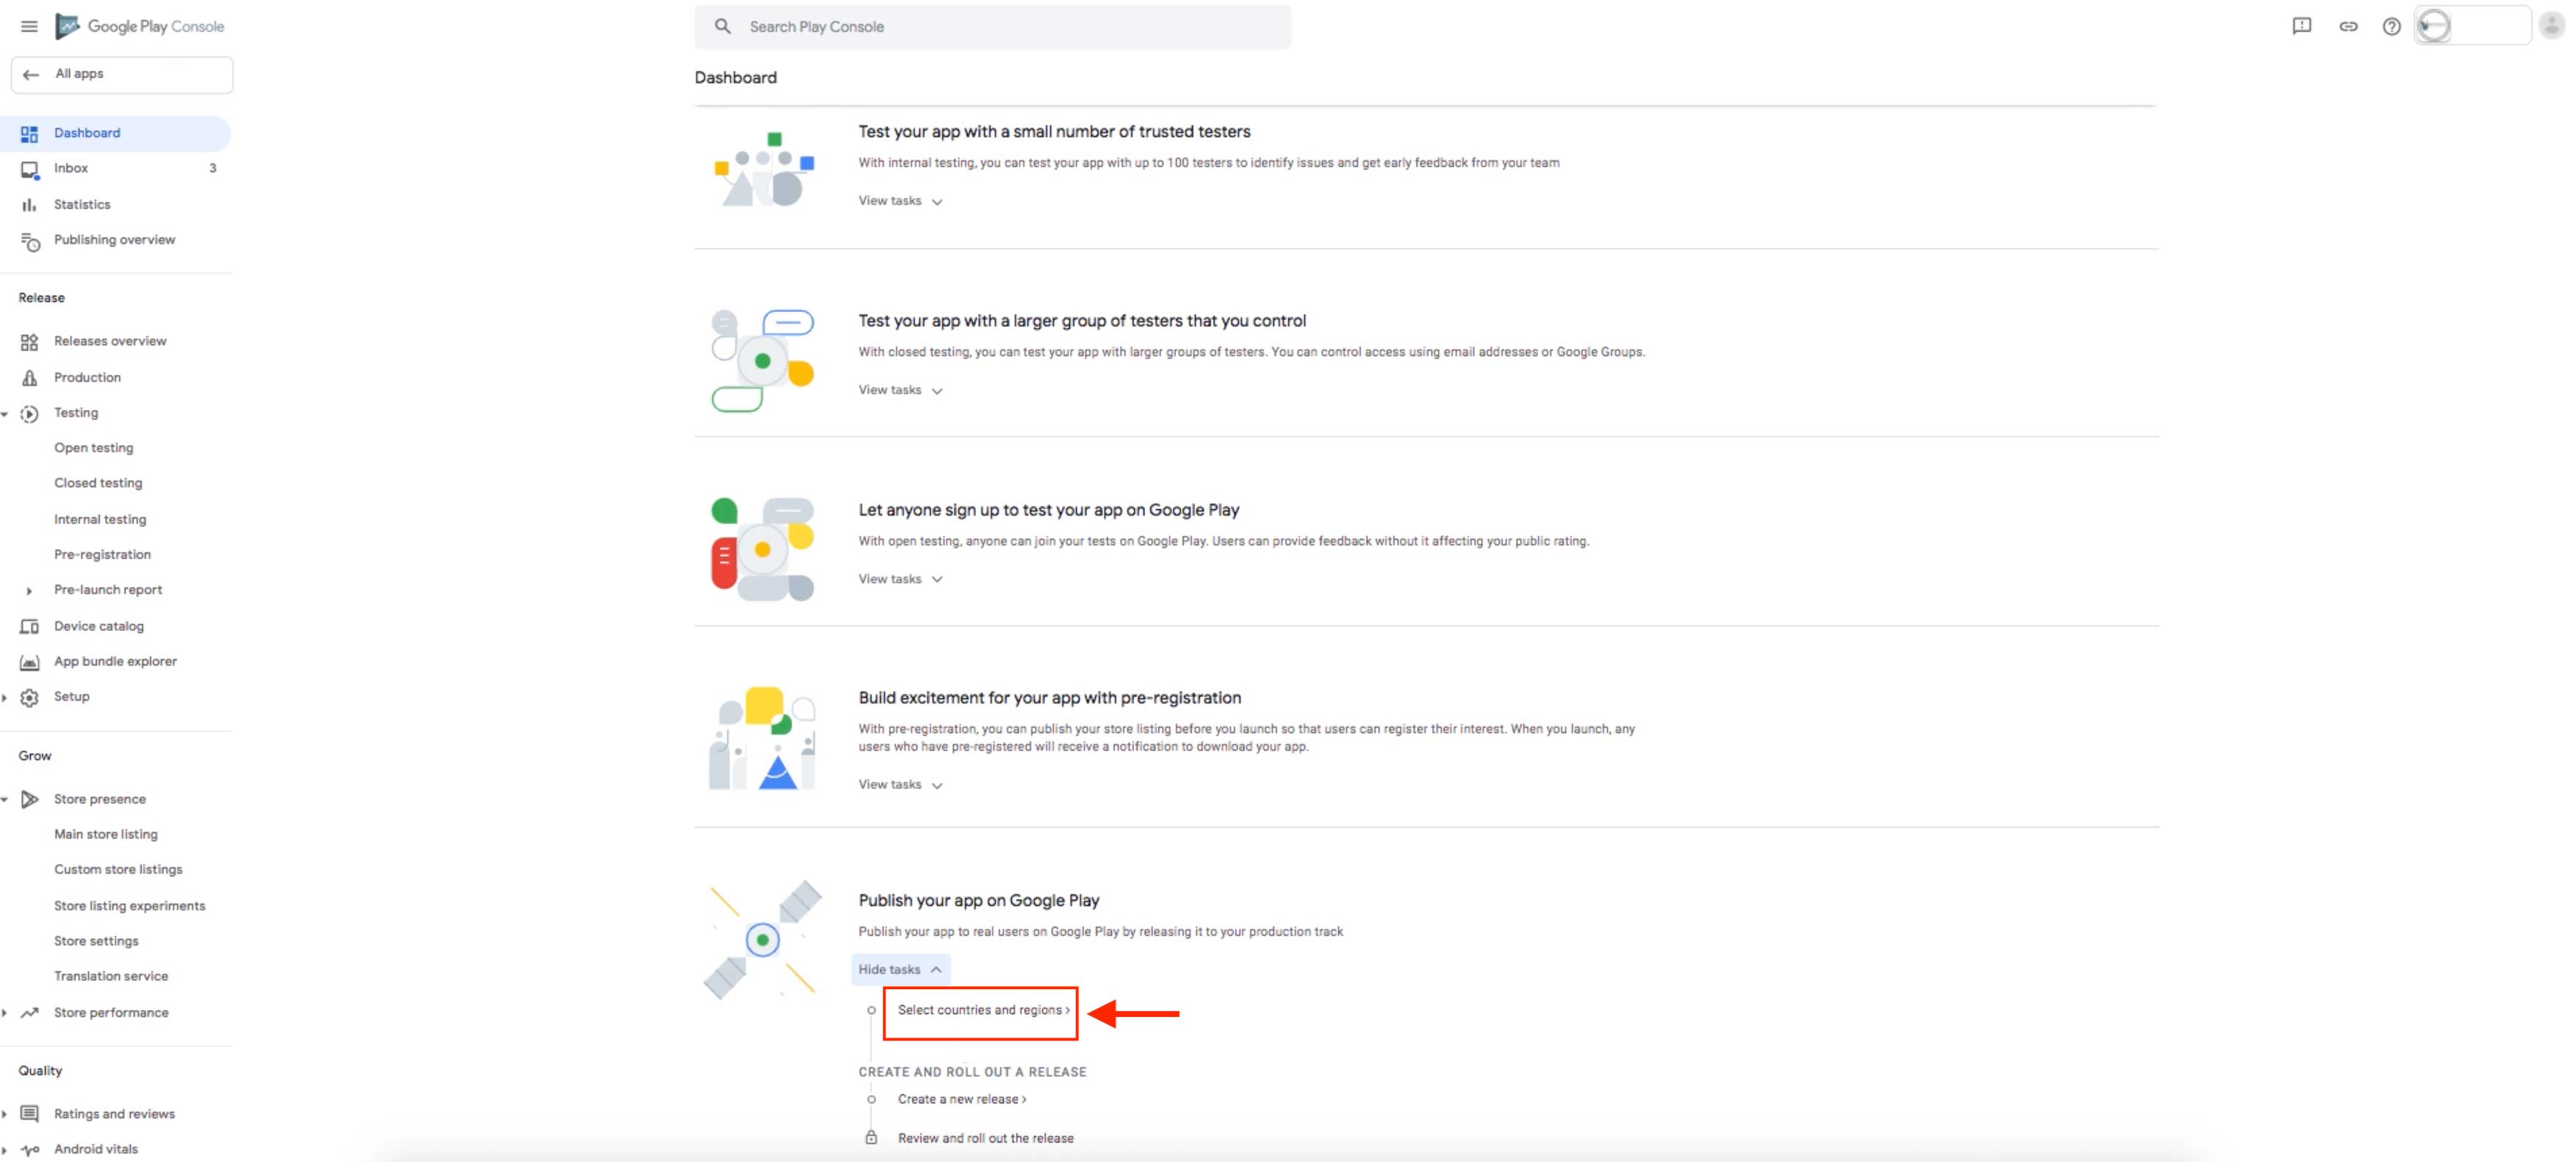
Step 44:Click on Add Countries/Regions
Step 45:Select the countries/regions where you want to make your app available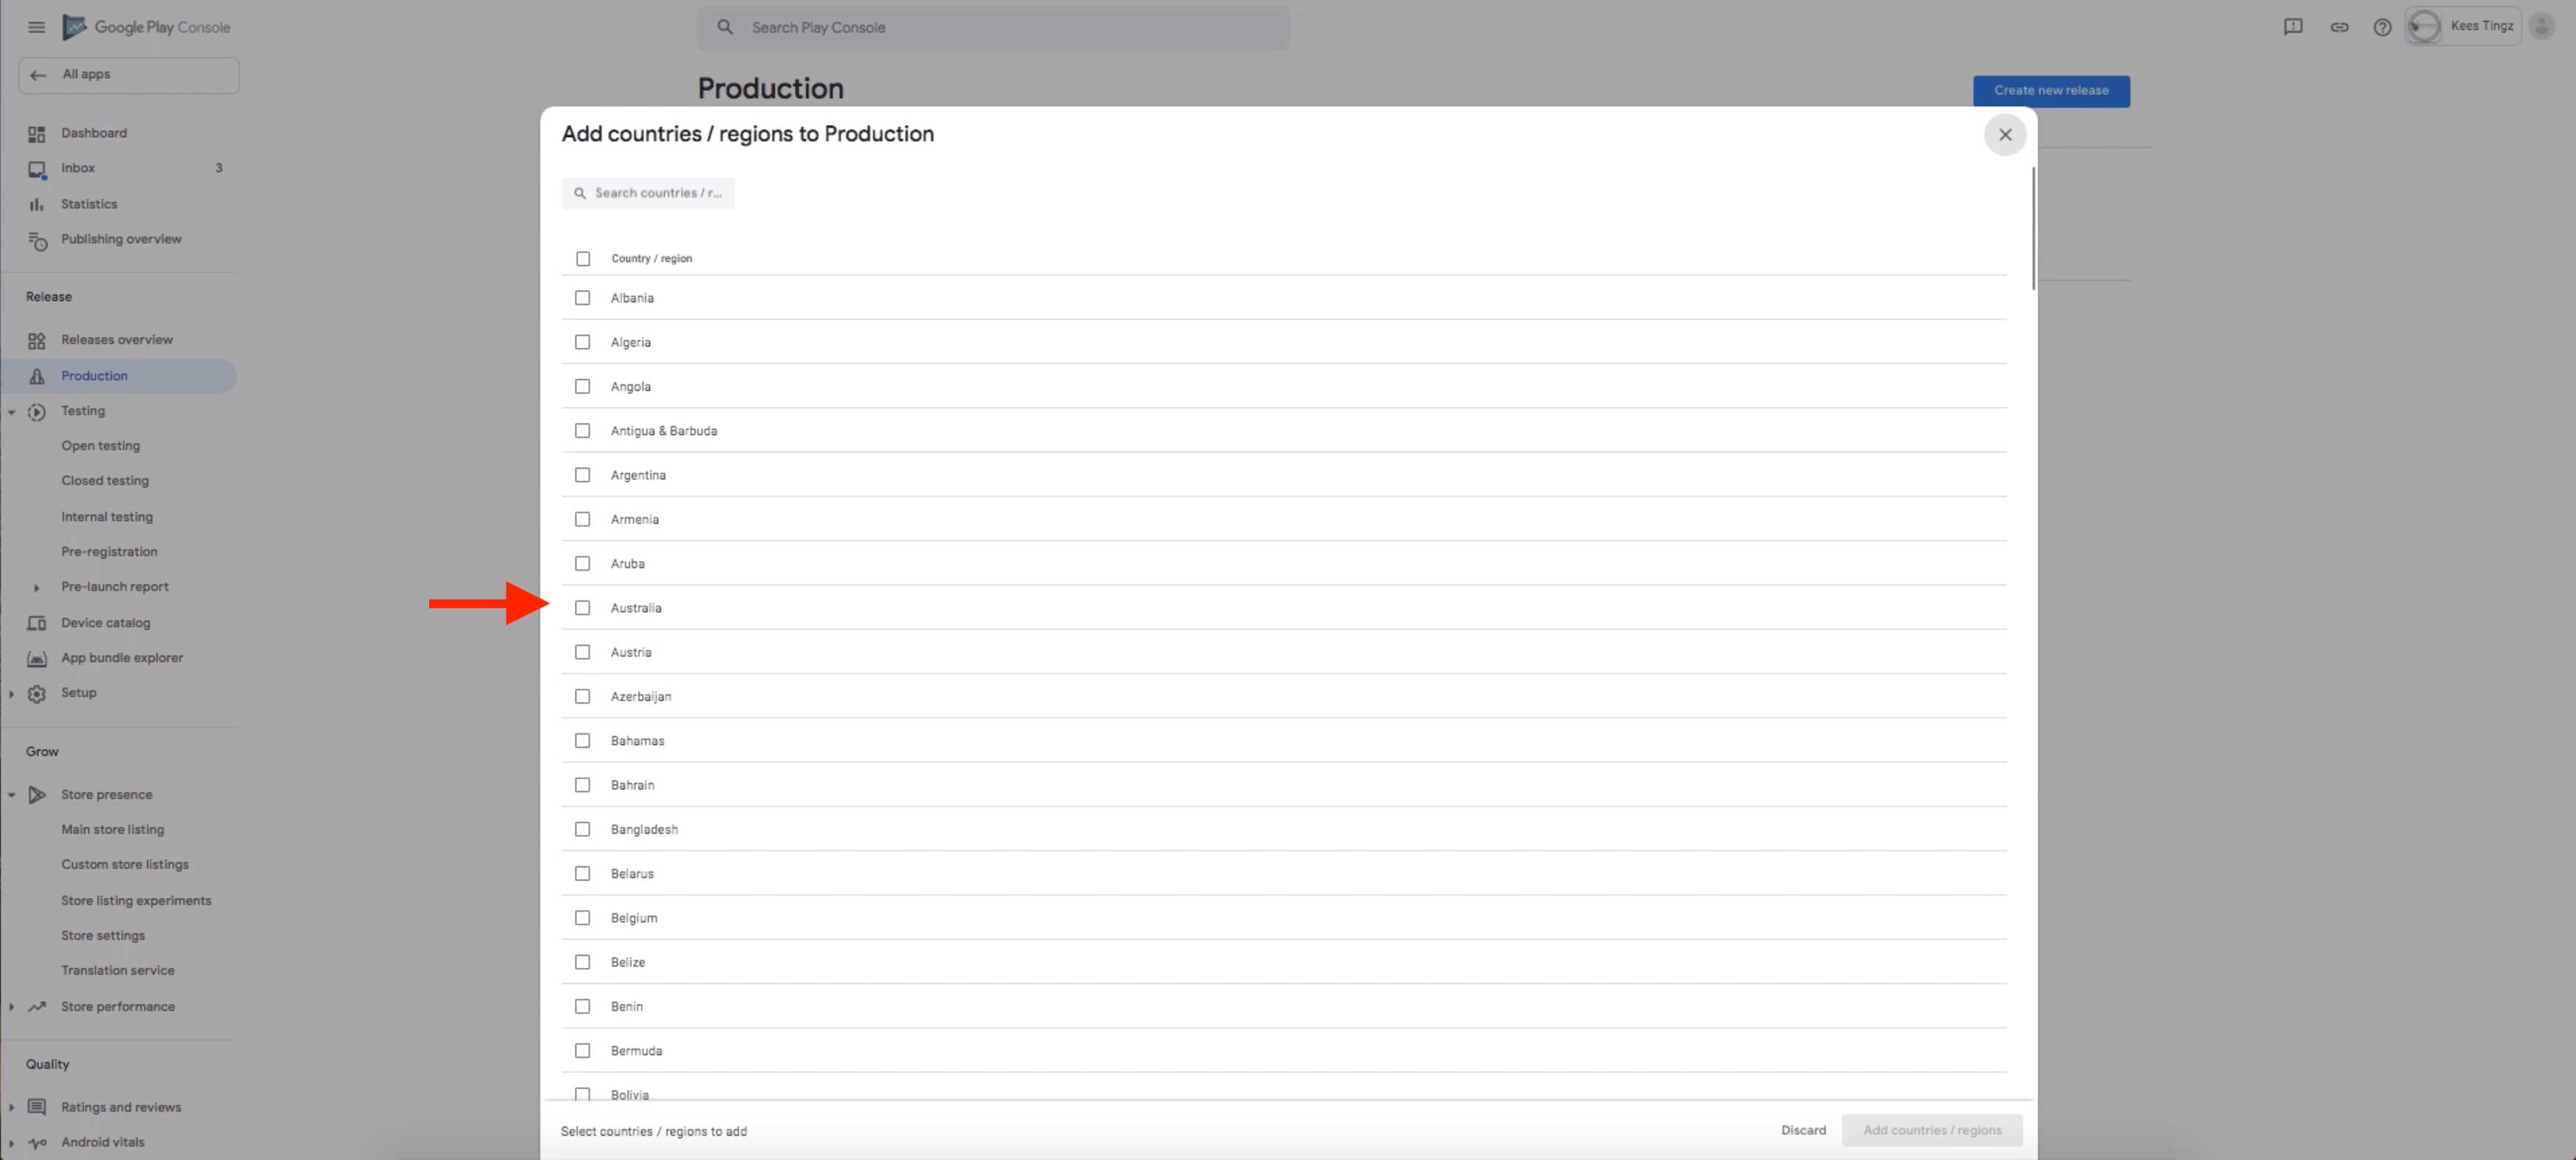
Step 46:Click on Add Countries/Regions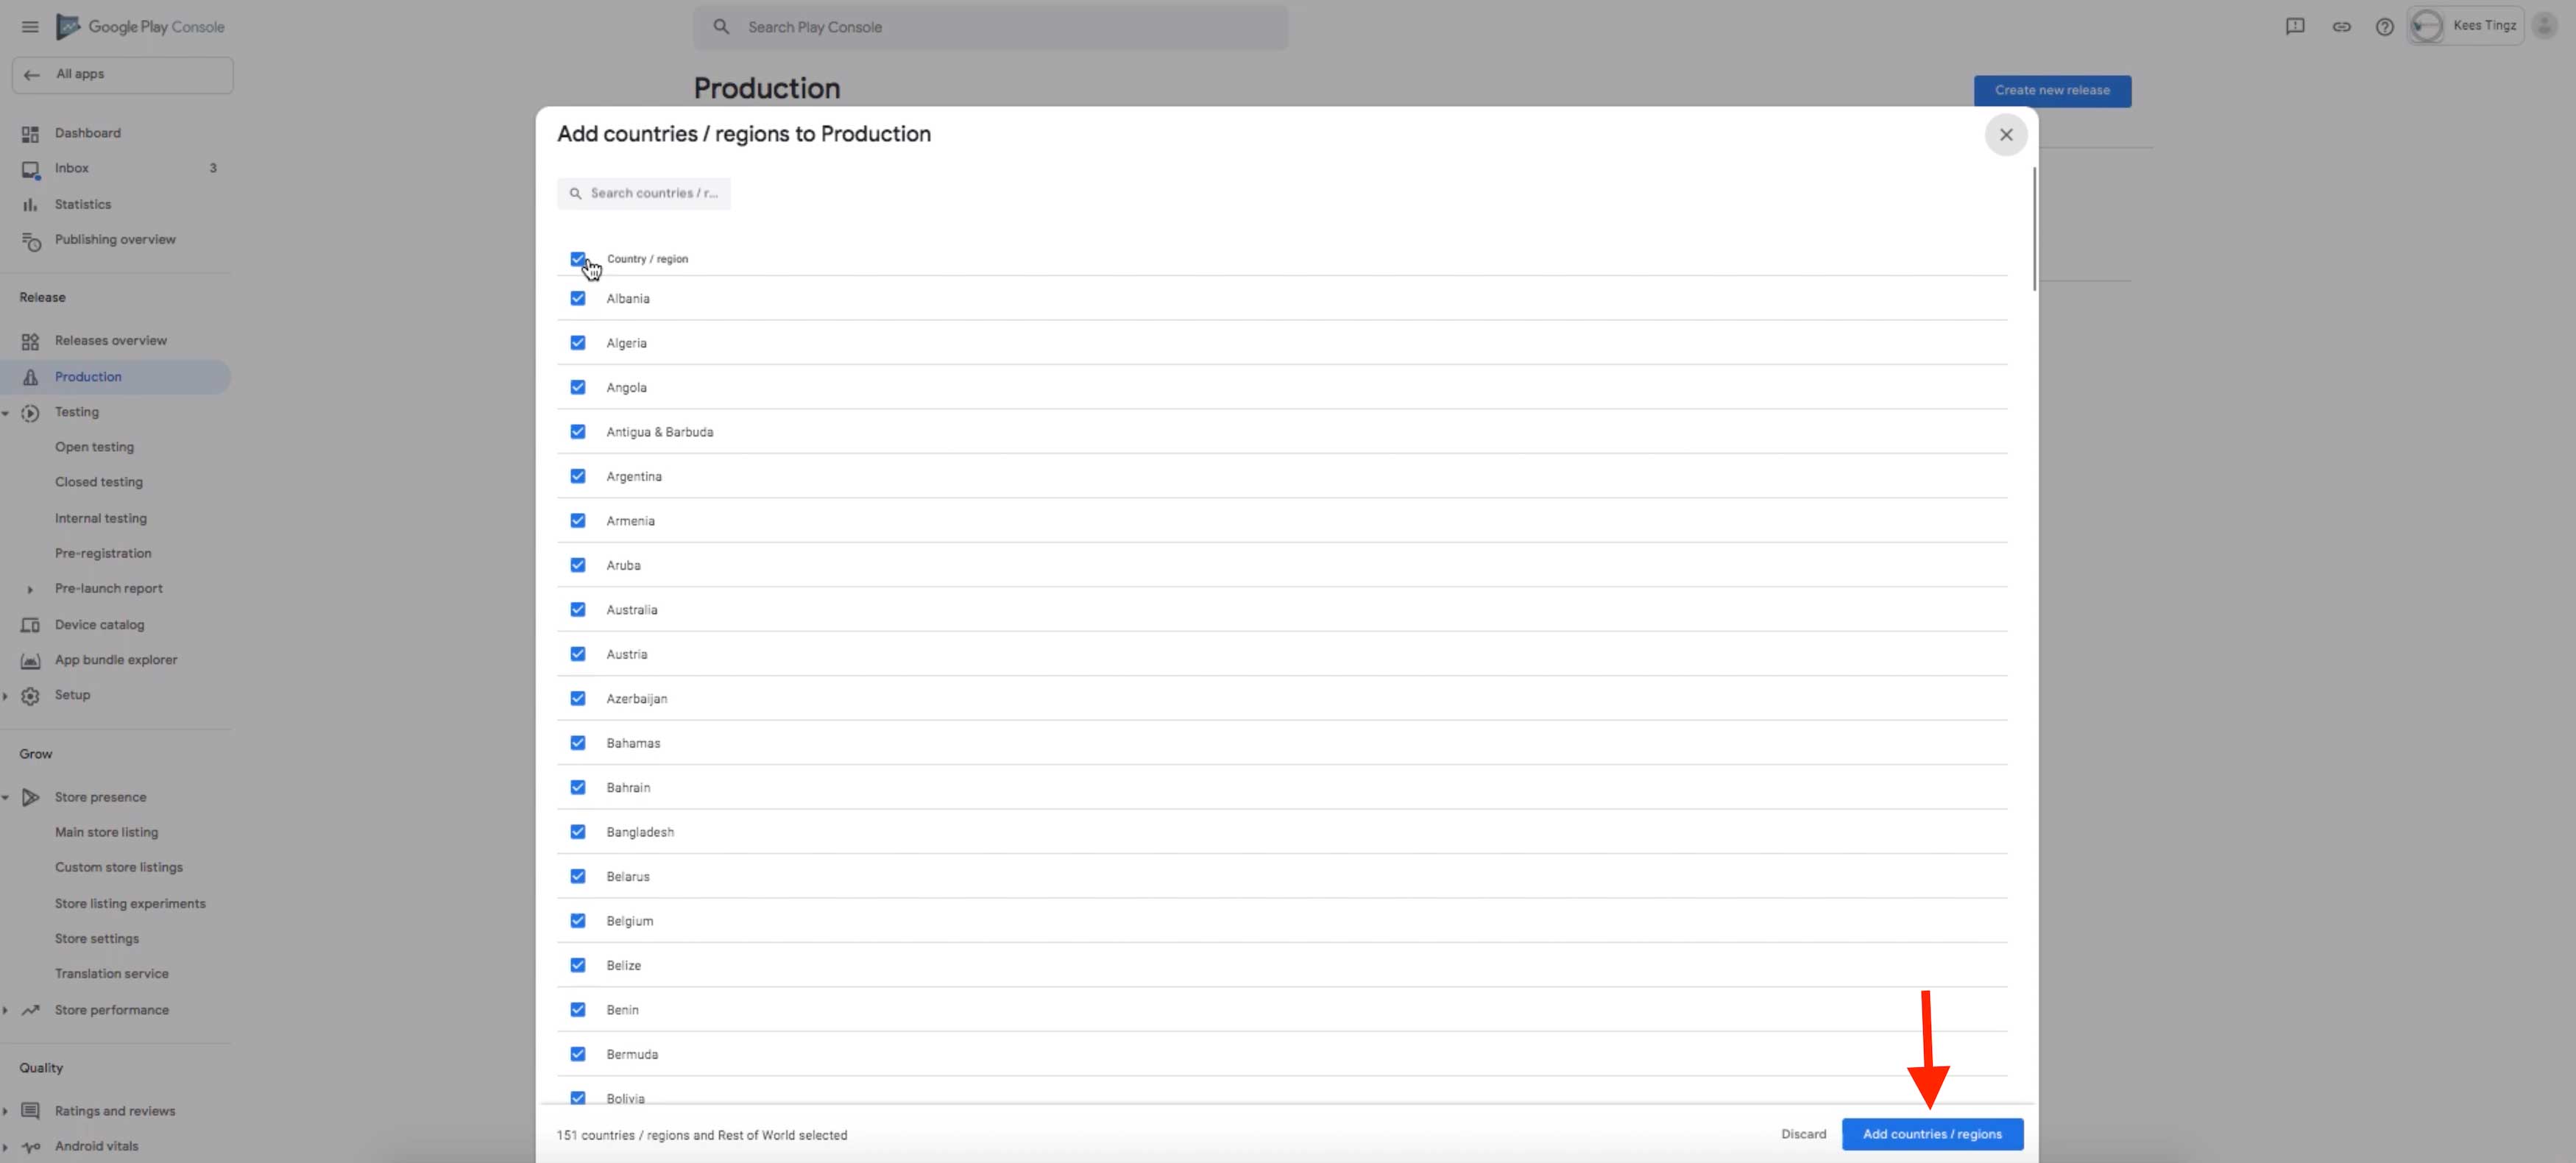
Step 47: Click on Add
Step 48: Go back to the dashboard to create a new release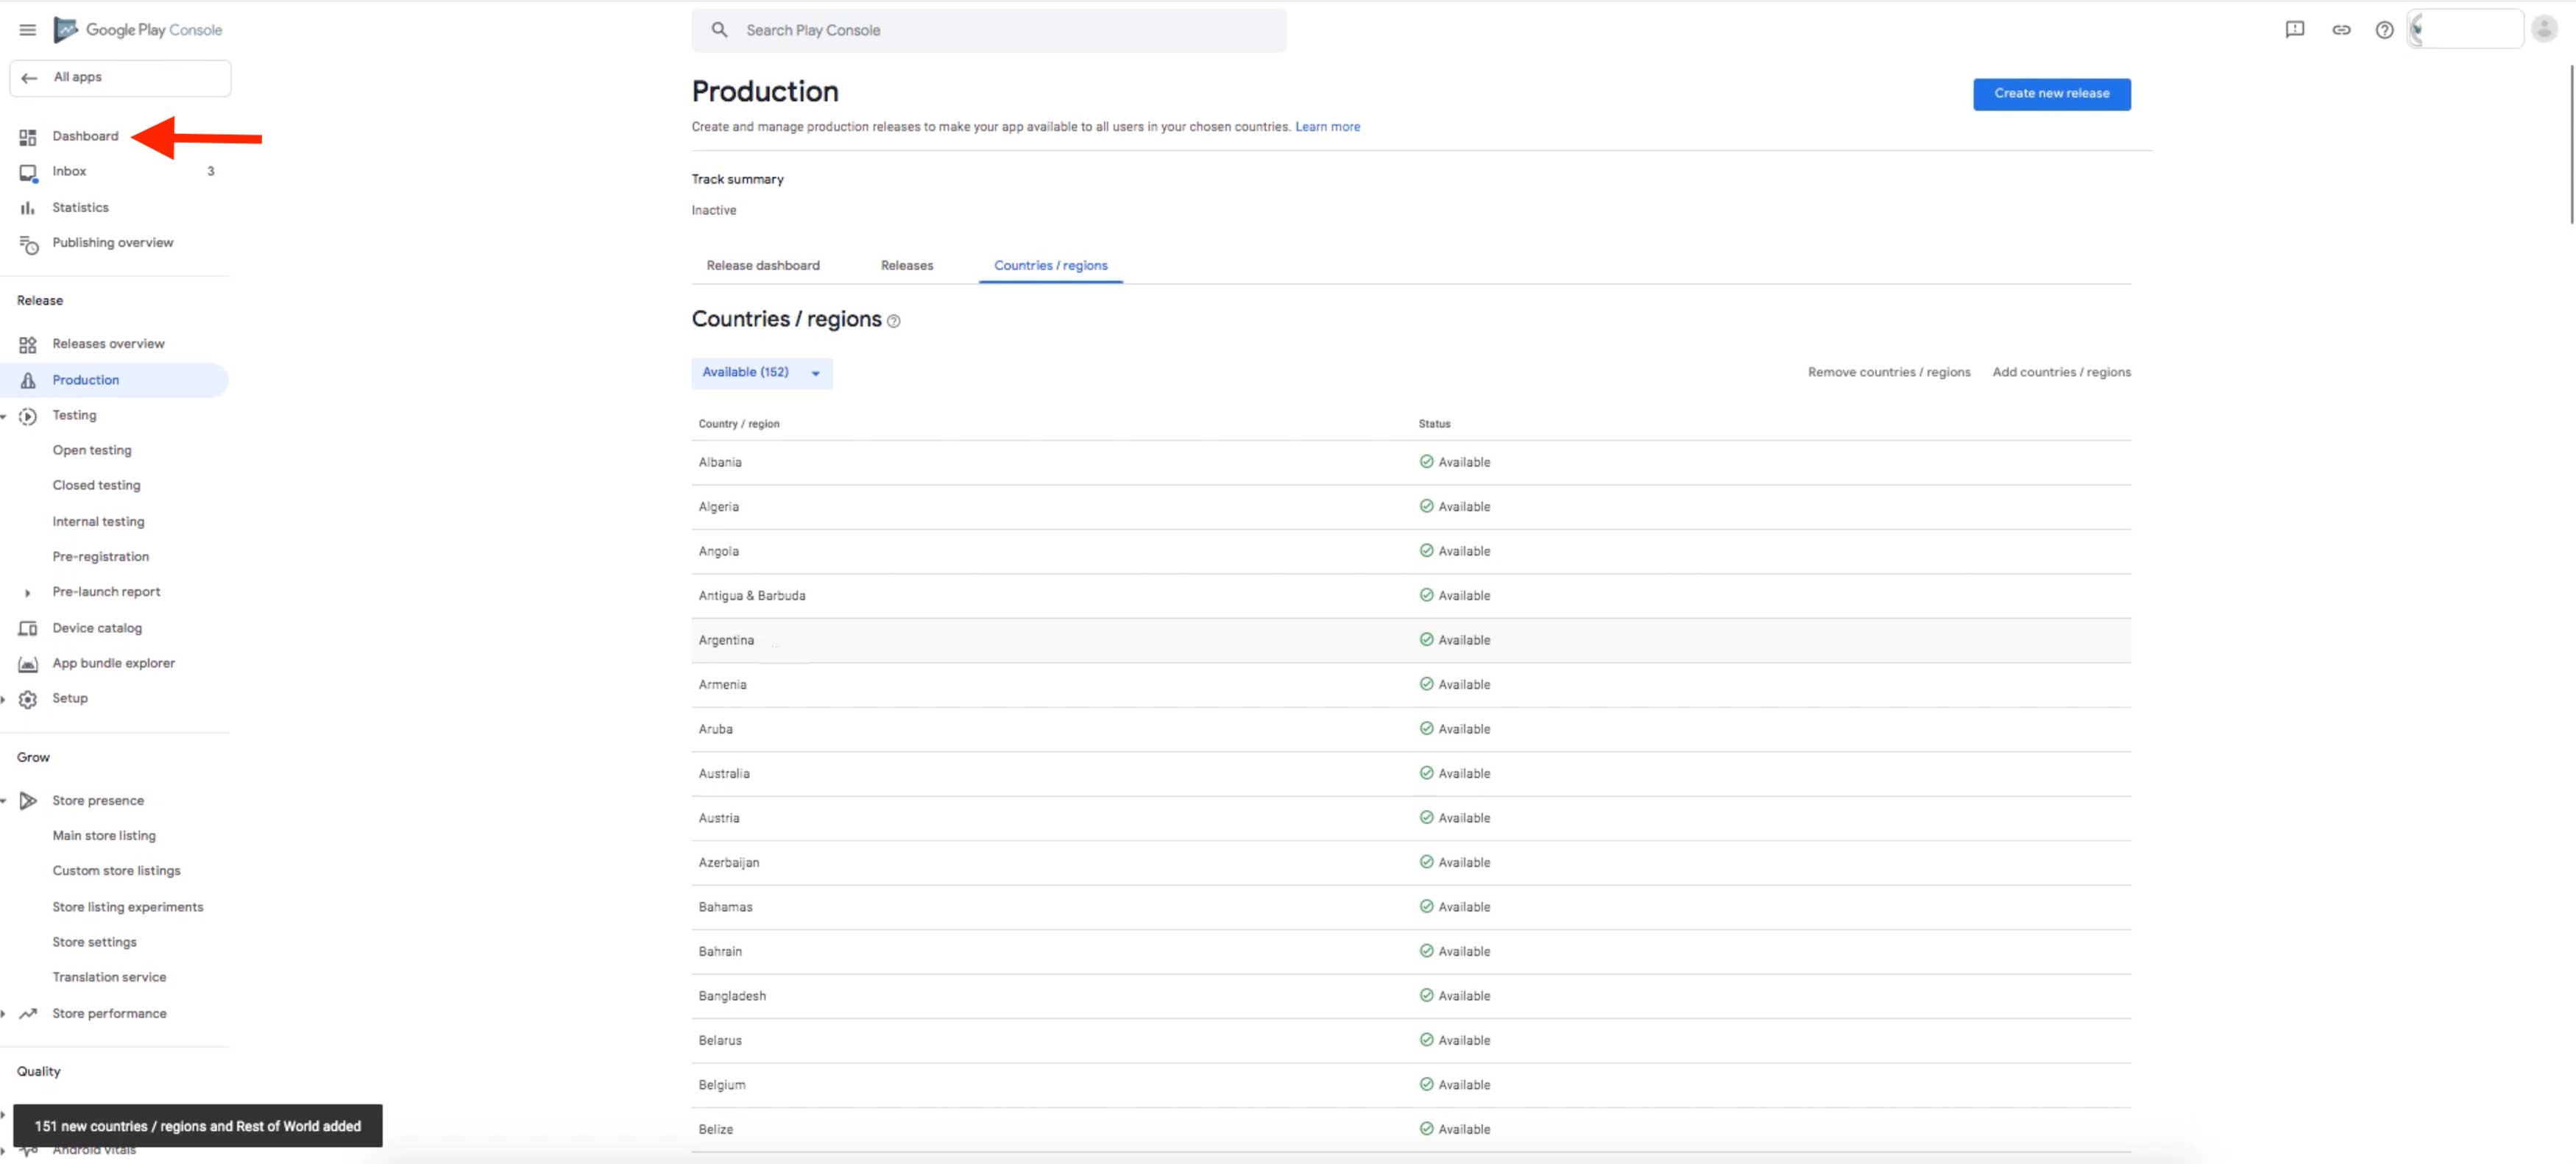
Step 49: Click on Create New Release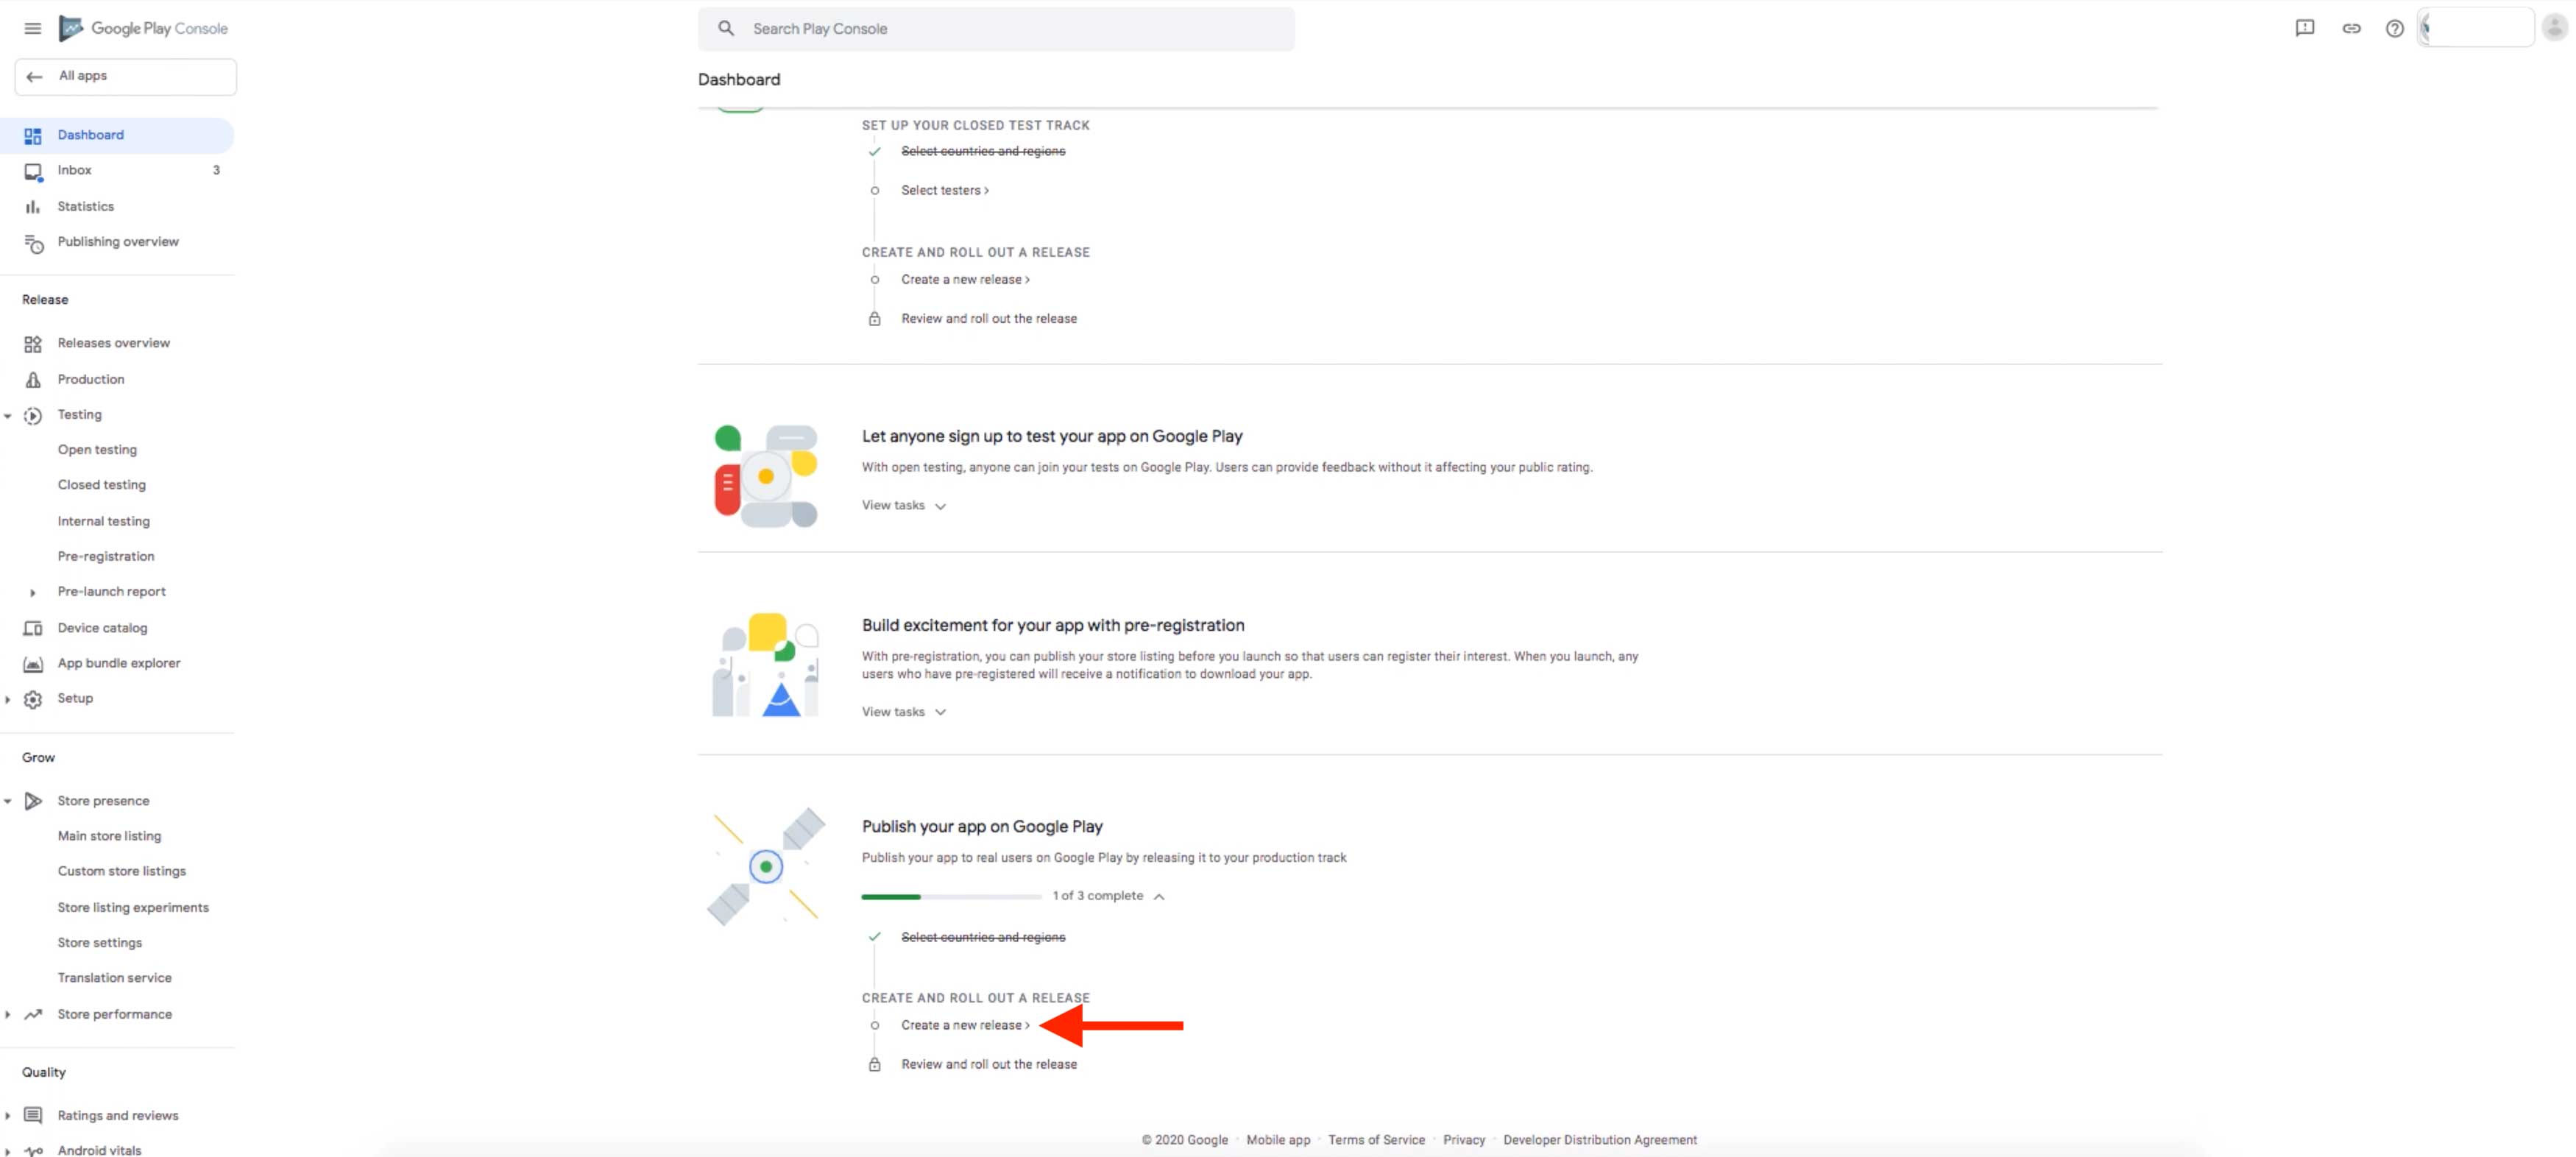
Step 50: Click on Manage Preferences 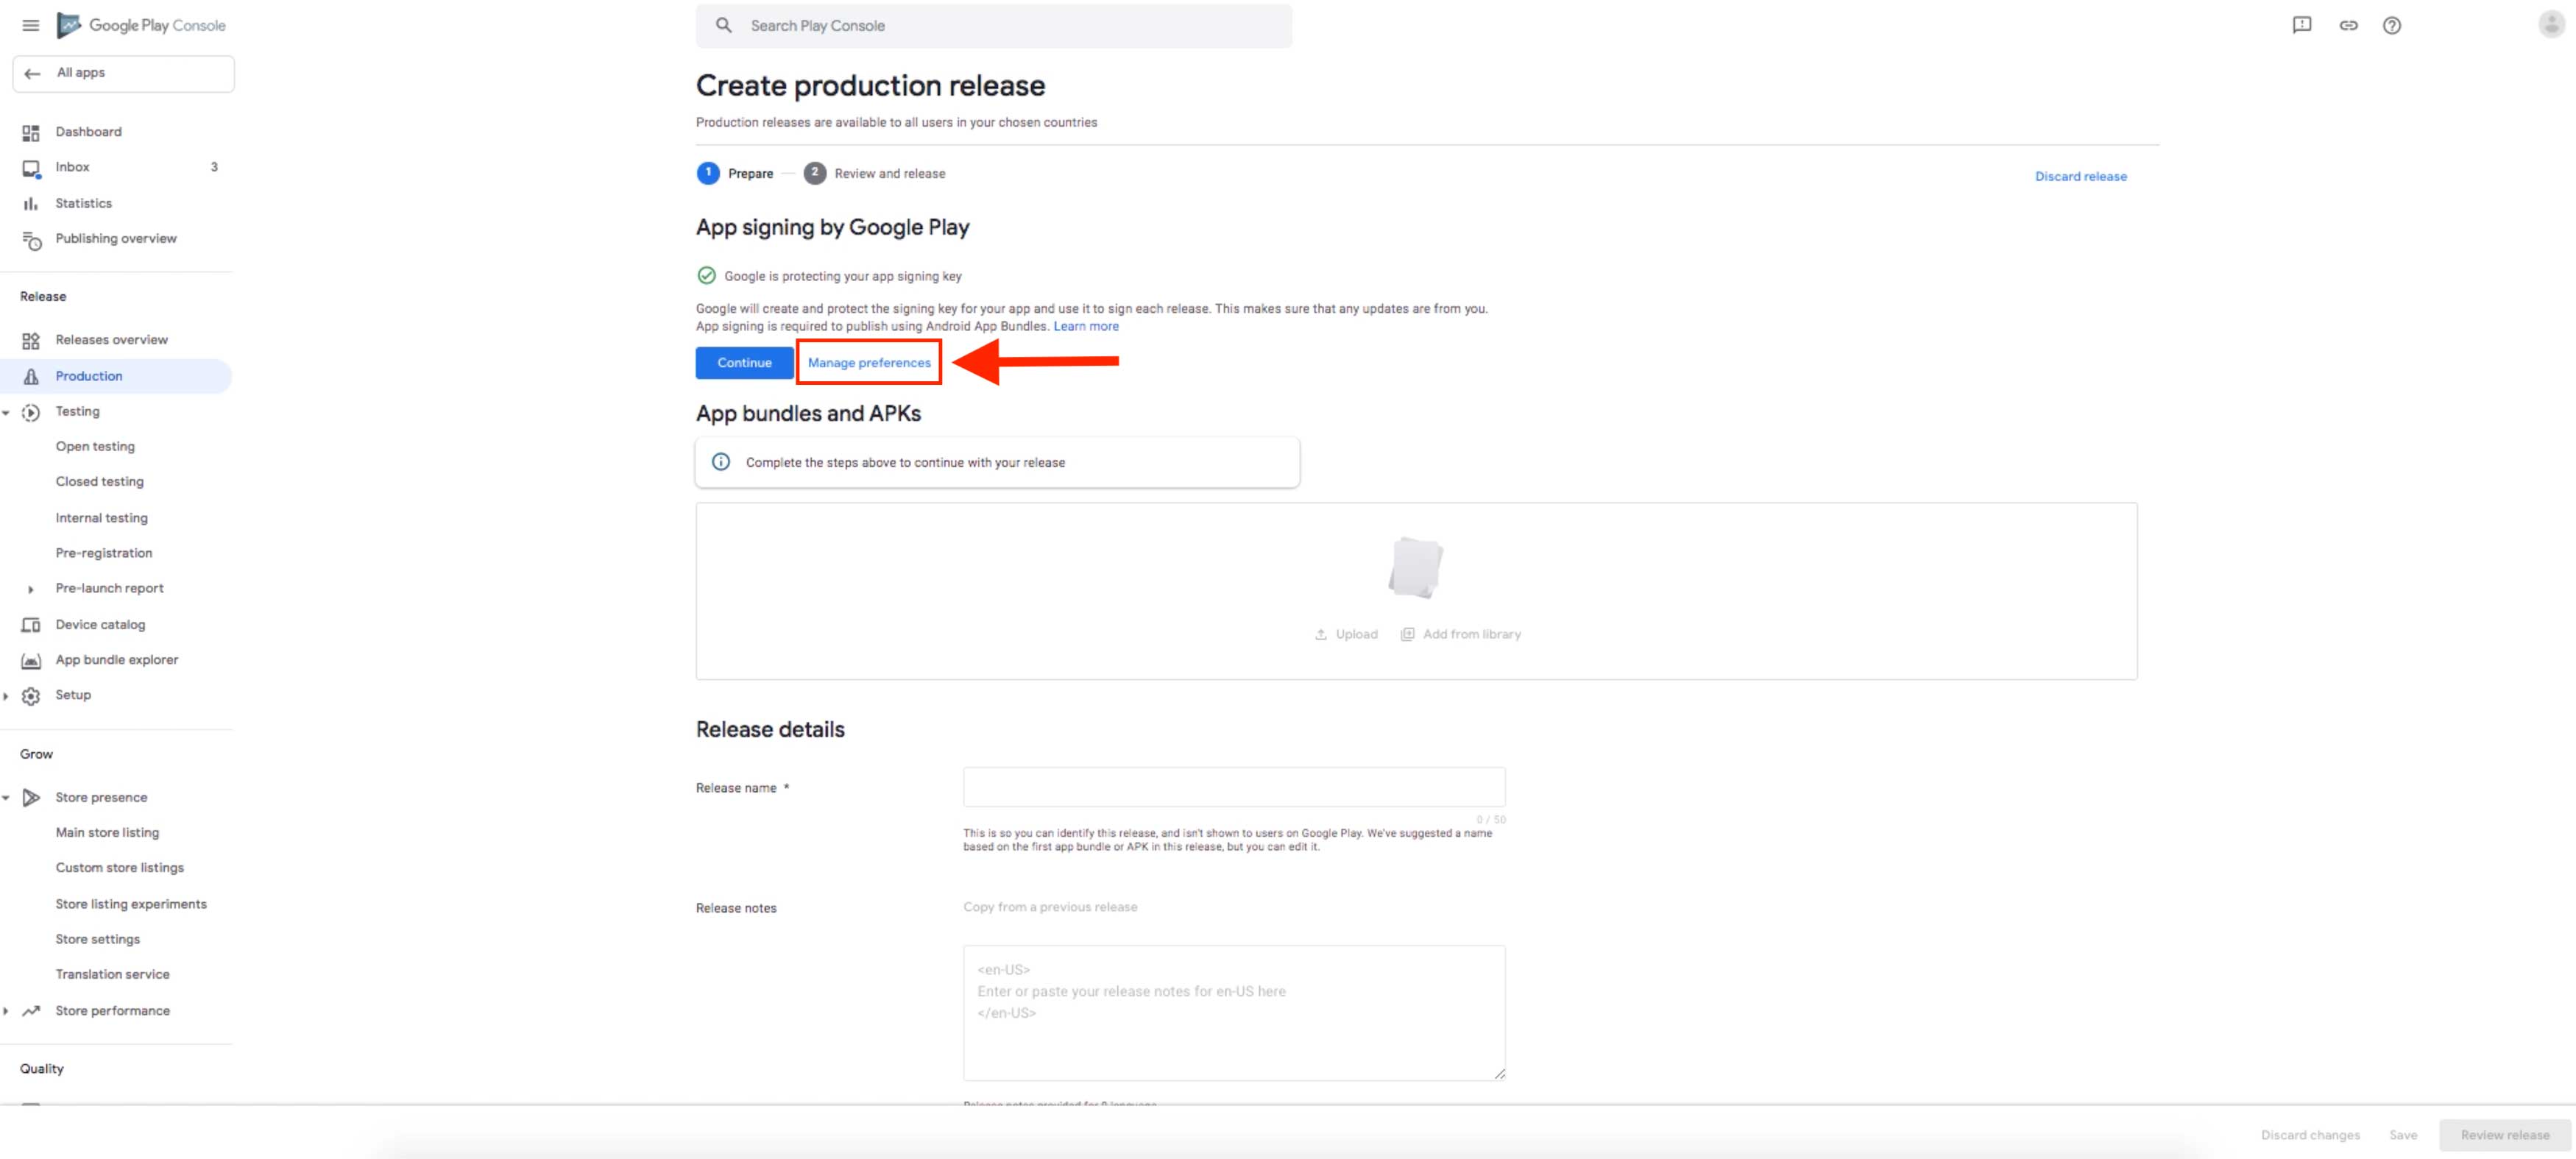
Step 51: Click on Export and upload a key from Java keystore Step 52: Upload the ZIP file
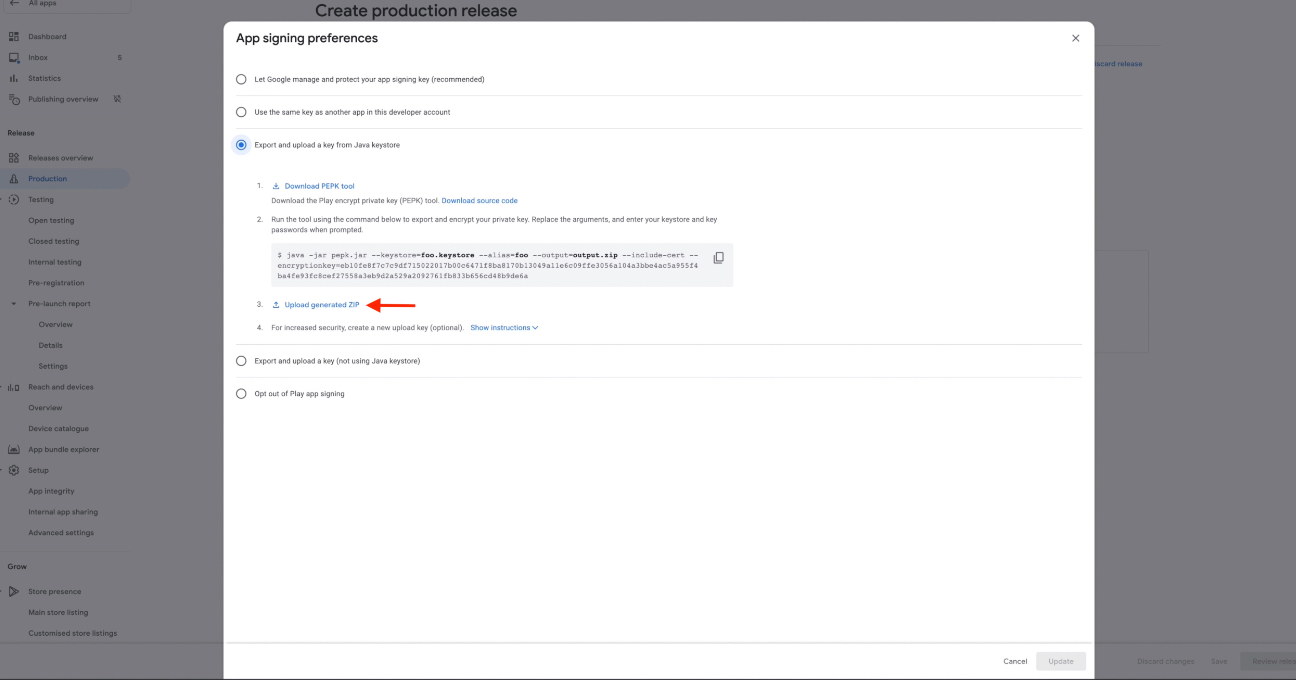 Step 53: Click on update
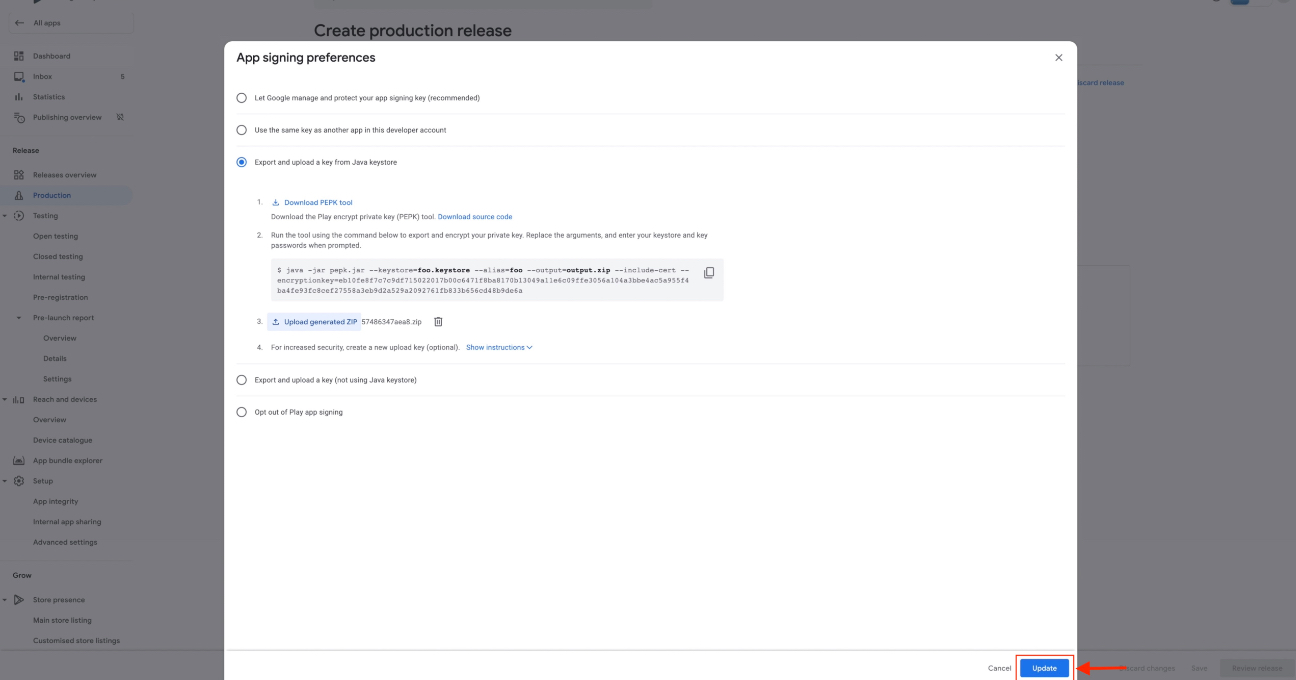
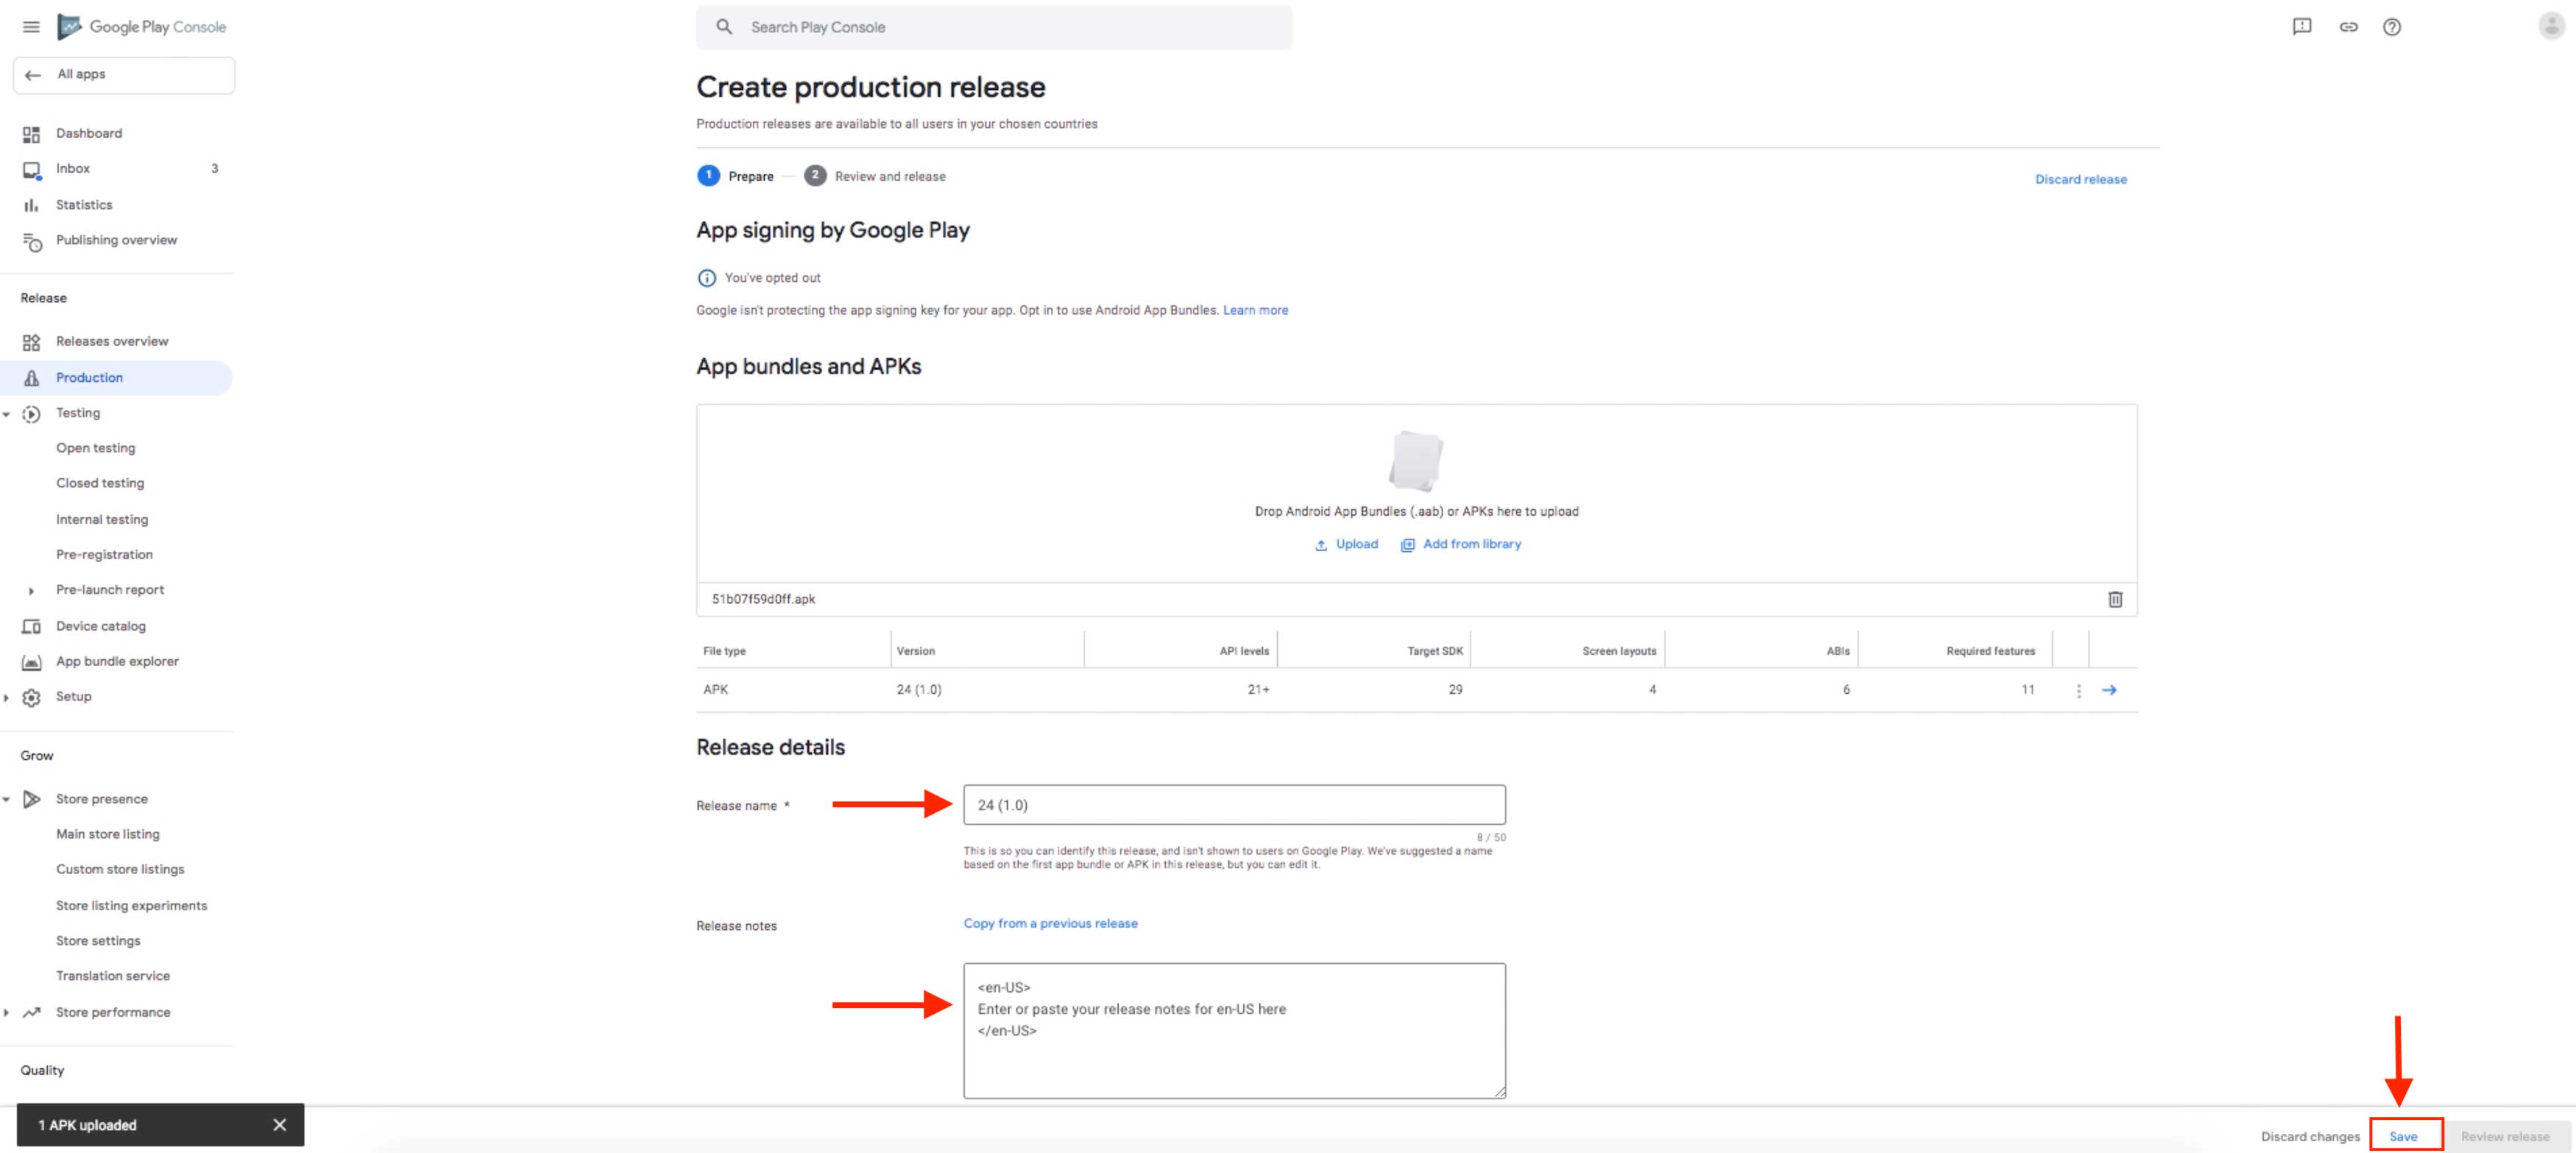
Step 54: Upload Android App Bundles or APK 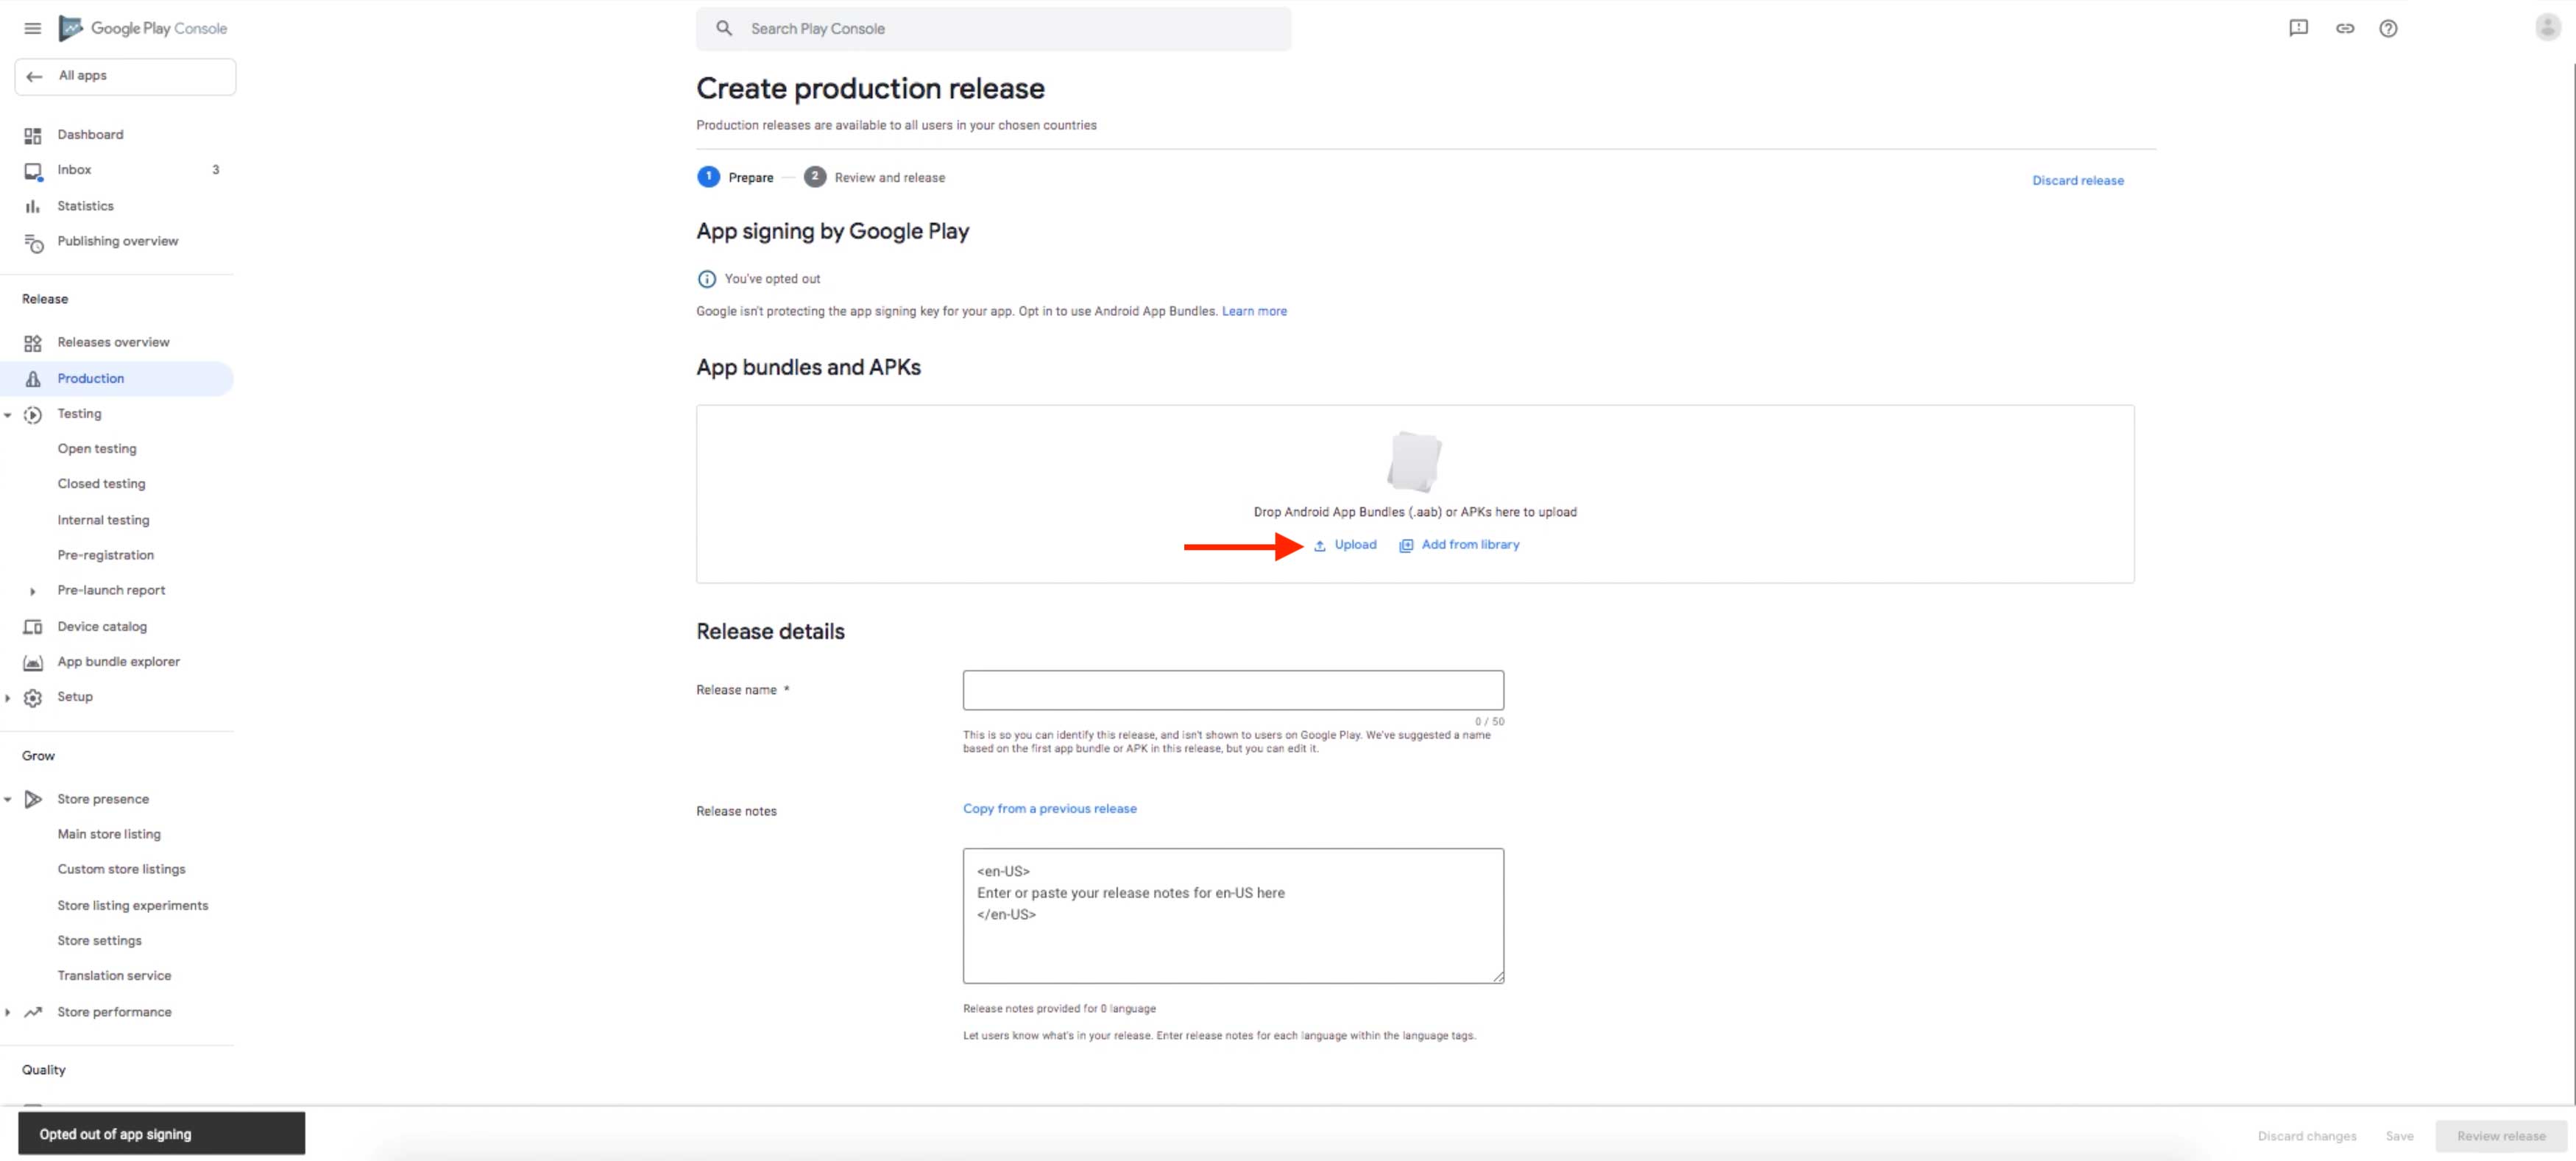
Step 55: Edit or add your release details if you want and click on Save